Social Share Button
1.Download Plugin
First, download the Social Share Button plugin from your Awplife account.
If you are not downloaded plugin then (click-here) to log-in and download plugin from your account.
2.Install & Activate Plugin
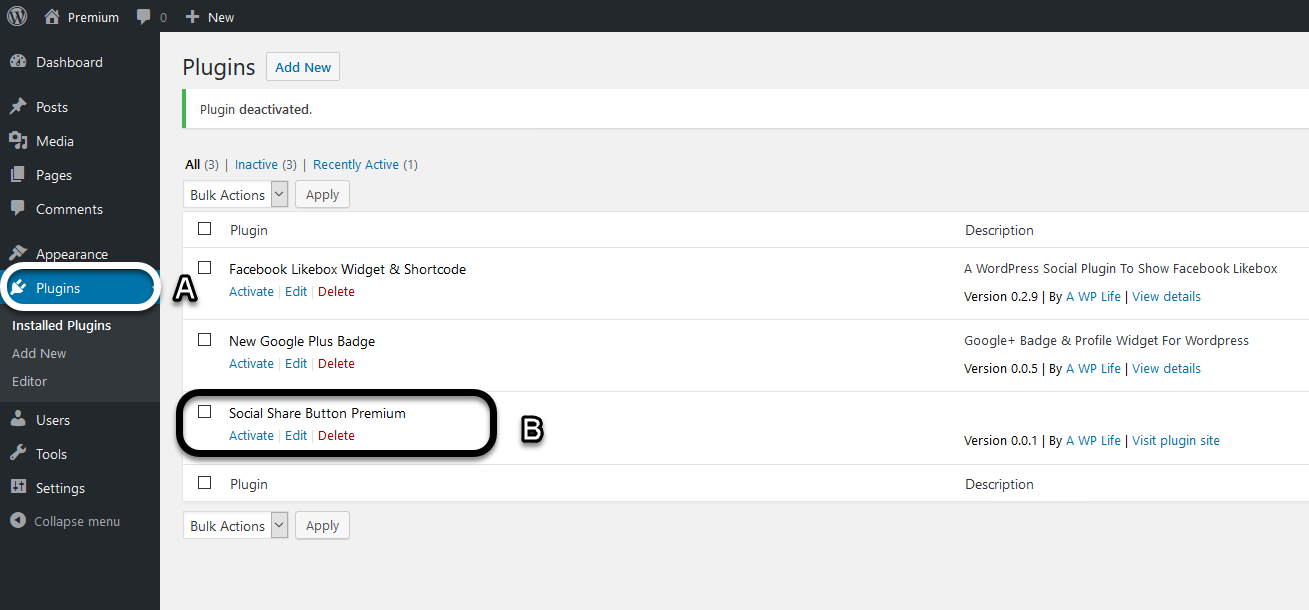
A. Access your plugin page.
B. Click on Activate link to Install & Activate plugin on WordPress site.
3.Add Social Share Button
A. Go to your plugin and scroll to the bottom.
B. Click on save button.
NOTE : Default settings will apply to the buttons.
4.Social Share Button Settings
A. Select the appearing position of Social Share Button in Post.
B. Select the appearing position of Social Share Button on Page.
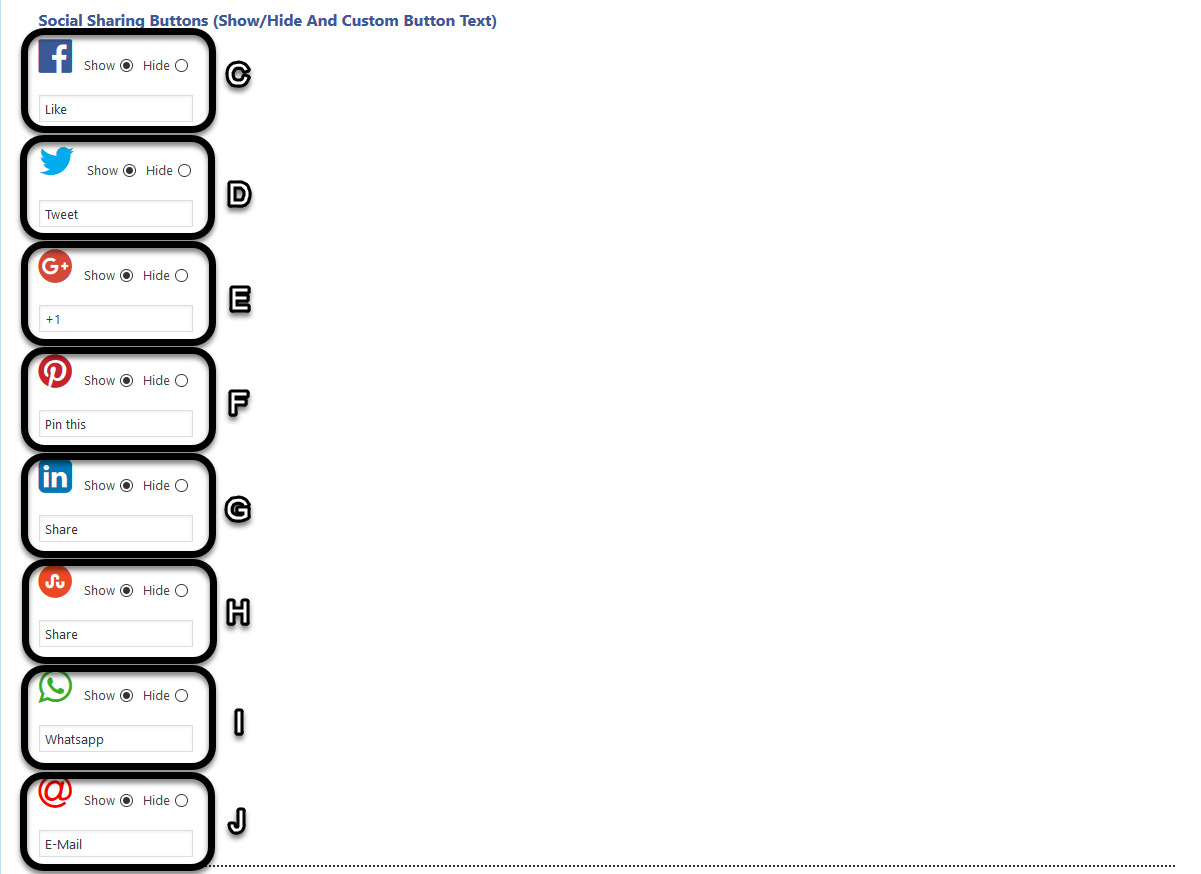
C. Select to show or hide the Facebook share button and set custom label text.
D. Select to show or hide the Twitter share button and set custom label text.
E. Select to show or hide the Google Plus share button and set custom label text.
F. Select to show or hide the Pinter-est share button and set custom label text.
G. Select to show or hide the LinkedIn share button and set custom label text.
H. Select to show or hide the the StumbleUpon share button and set custom label text.
I. Select to show or hide the the Whats-app share button and set custom label text.
J. Select to show or hide the the E-Mail share button and set custom label text.
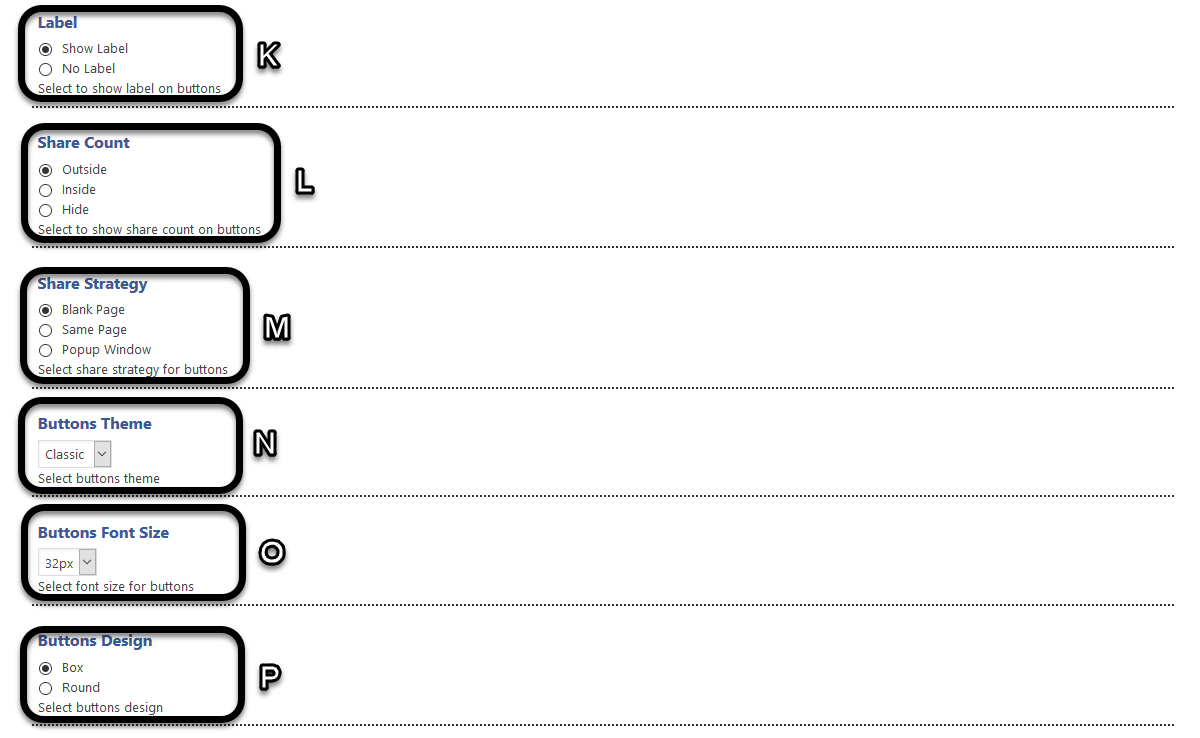
K. Select to show or hide the button label.
L. Select appearing position of share count.
M. Select the button share strategy.
N. Select the button theme.
O. Select the button font size.
P. Select the button design.


