Pricing Table Premium
1.Download Plugin
- First, you download Pricing Table Premium plugin.
- If you do not download yet (click here) to log in your account and download the plugin.
- If you are using the free version, then please deactivate it before install the premium version, and don’t worry you will not lose your plugin data.
2.Install & Active
- If you got the zip file of Pricing Table Premium plugin go to menu bar in admin panel and click on plugin > Add new
- Then click on Upload Plugin button.
- upload Pricing Table Premium zip file of the plugin by clicking the Browse button.
- after upload Pricing Table Premium plugin, click on Install now button.
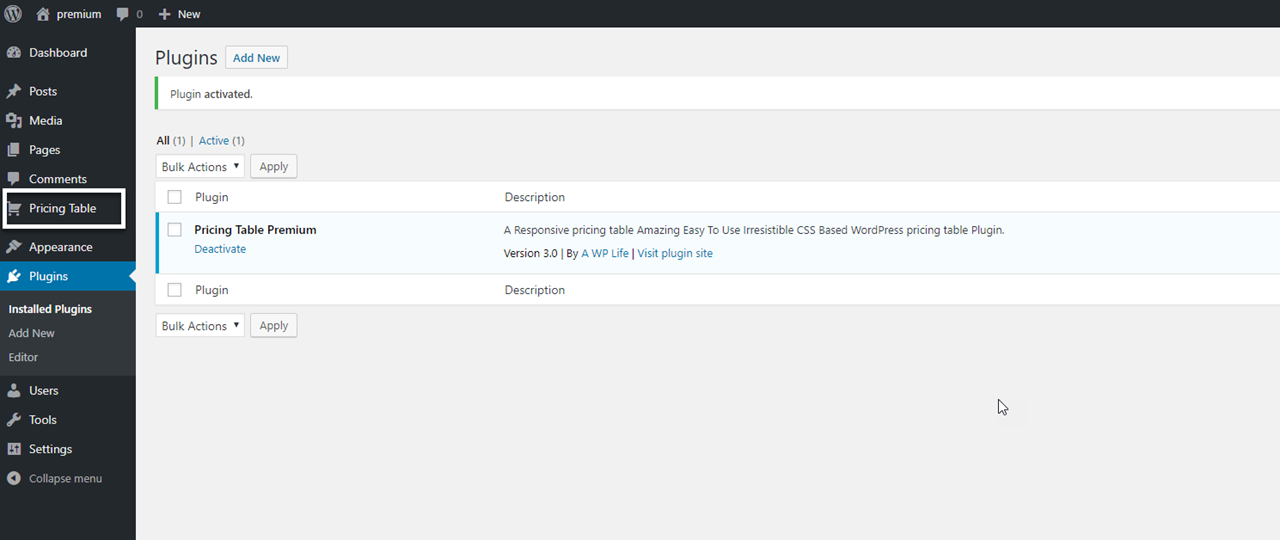
- Now activate your Pricing Table Premium plugin go to admin menu bar and click on plugin > Installed Plugins
And activate the Pricing Table Premium plugin.
3.Create Pricing Table
- For create gallery click on Pricing Table Premium in the admin menu bar.
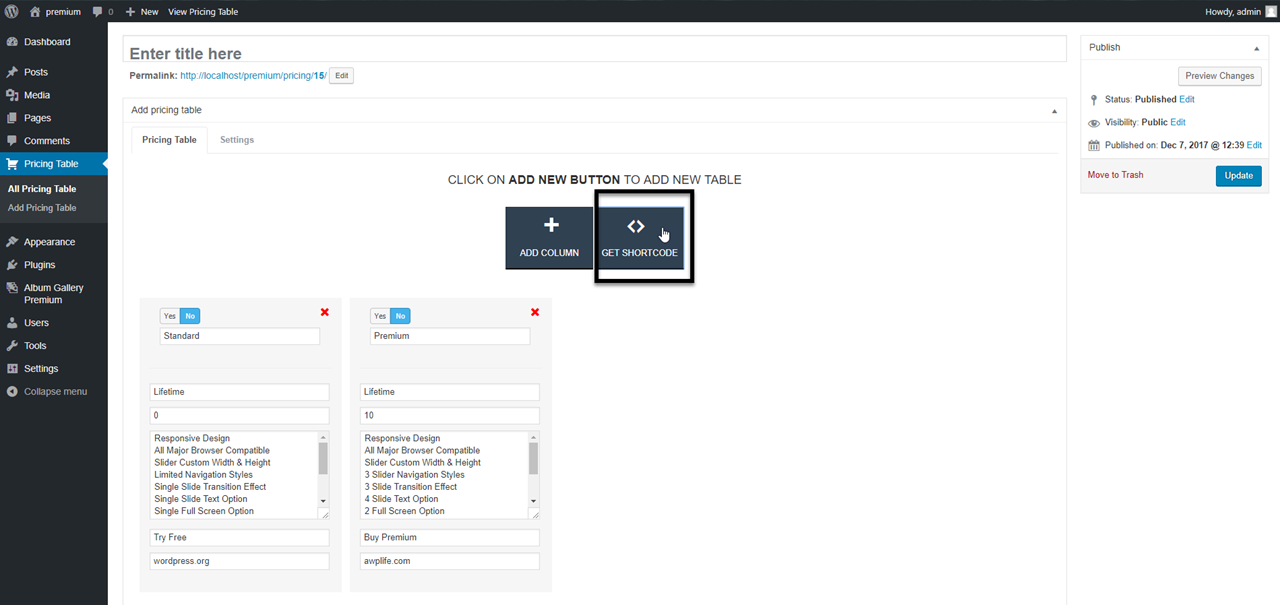
- Then click on Add Pricing Table.
- A. Type your Pricing Table title in the text box.
- B. Now you need to add columns in Pricing Table click on Add image box.
Now you have successfully added columns, Now you have to add details in tables.
- A. select yes if you want to mark this column featured.
- B. Type Price without currency symbol.
- C. Type column name / plan name.
- D. Type Plan duration like – one month, three months, one year and lifetime.
- E. Now type your plan details, just type your points after a point just take an enter the enter means a new line.
- F. Type text tor button.
- G. if you want to redirect user then fill a link if you don’t want, leave it blank.
Now publish the table with default settings
Now get the shortcode.
- Click on “Get Shortcode” button for the shortcode.
- now copy the shortcode from the popup.
- Paste the shortcode where you want to show Pricing table on any Page or post.
4.Configure Pricing Table Settings
You can set the pricing table configuration.
- for the configure settings please click on the settings tab.
Template and icon settings.
- A. We have more than 20 templates for pricing table, you can select anyone.
- B. You can select currency as you want to show.
- C. when you will select any one template you can see a template image for a look.
Column settings.
- you can select the columns like – if you have two table but you want to show only one then select one column.
Color settings
- you can set colors of pricing table template, you can use any color because we have given you color pickers.
A. Heading text color. B. Background color. C. Background color on hover. D. Button color. E. Button text color. F. Button text color on hover.
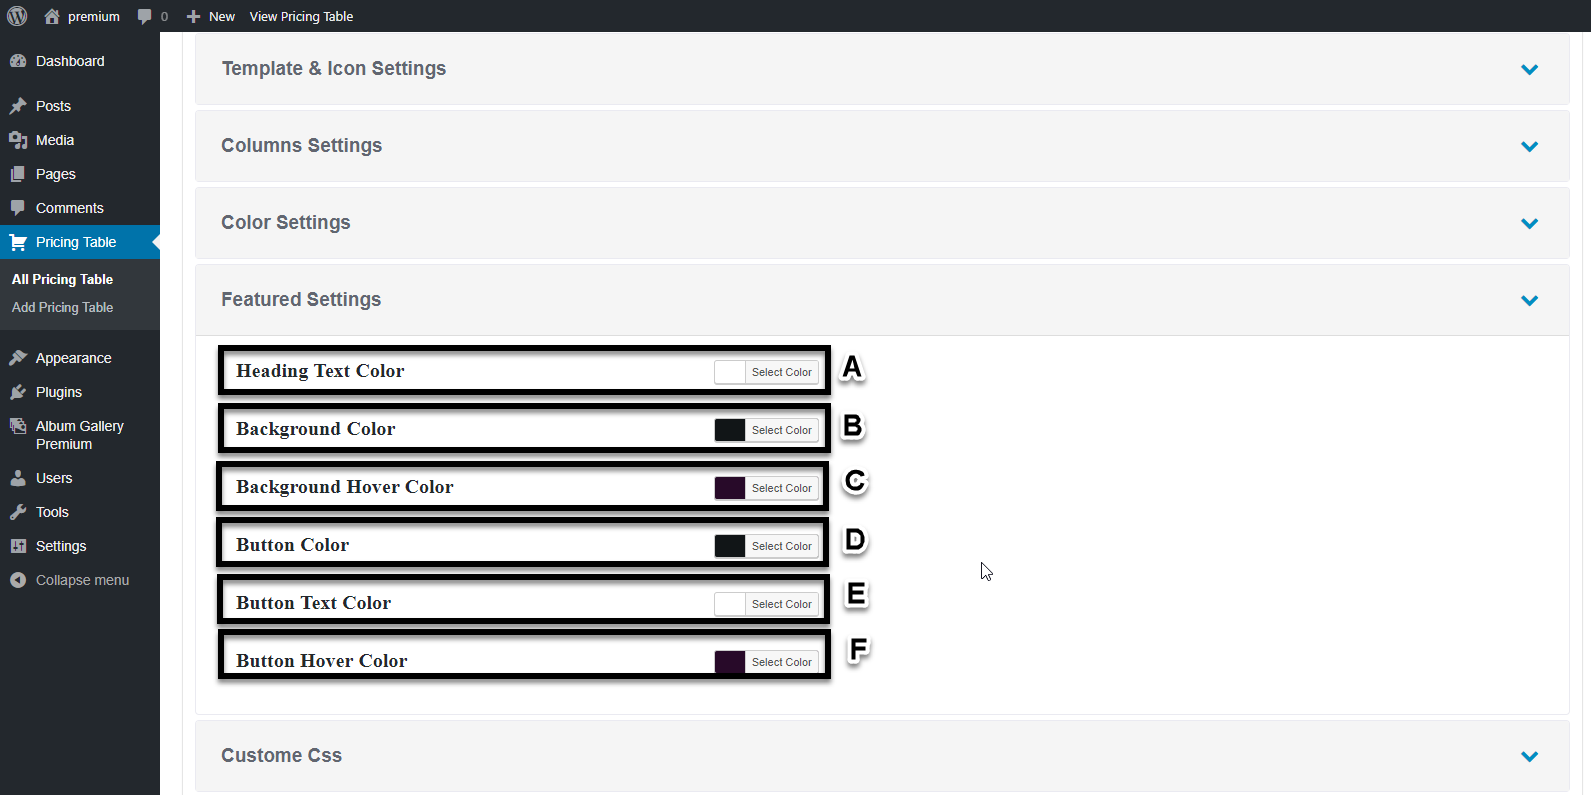
Featured color setting
- this color setting for a featured table.
A. Heading text color. B. Background color. C. Background color on hover. D. Button color. E. Button text color. F. Button text color on hover.
when you select a table featured these colors will show.
Custom CSS
- this is custom CSS field, you can apply your own CSS here
5.Add Pricing Table On Page, Post And Sidebar
Add Grid Gallery on page
- Copy Pricing Table Shortcode from the pricing table settings page.
- Go to the pages from the admin menu bar
- A. Click on add new page
- B. Add the page title
- C. Paste the shortcode into the body.
- D. Click the publish button. (that’s all).
Add Pricing Table to post
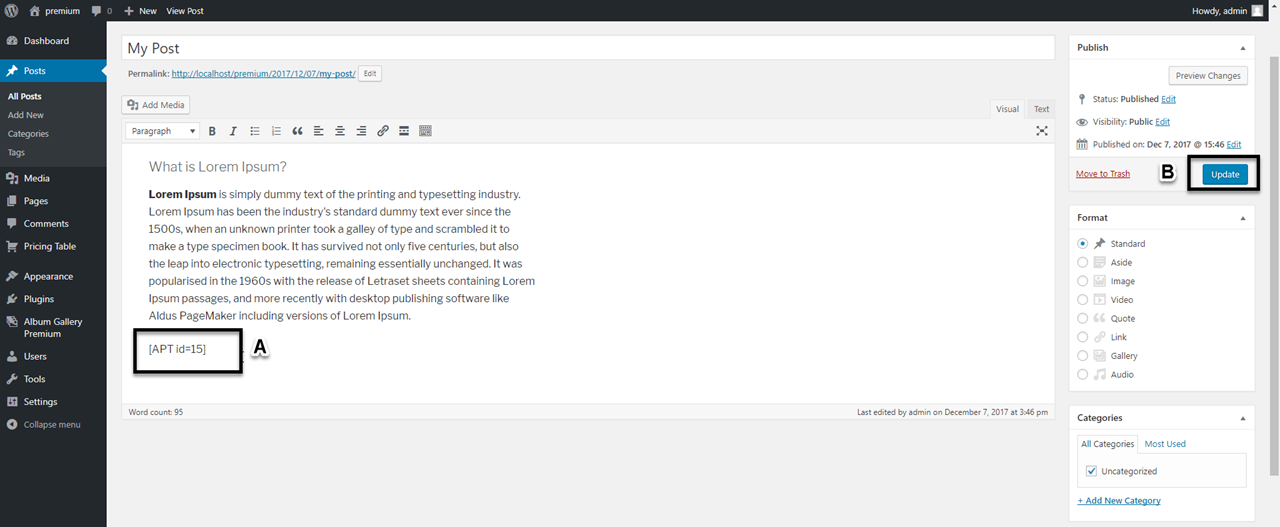
- Go to the Posts from the admin menu bar.
- Click on any post where you want add Pricing table.
- A. Paste the shortcode into the body.
- B. Click the publish button. (that’s all).
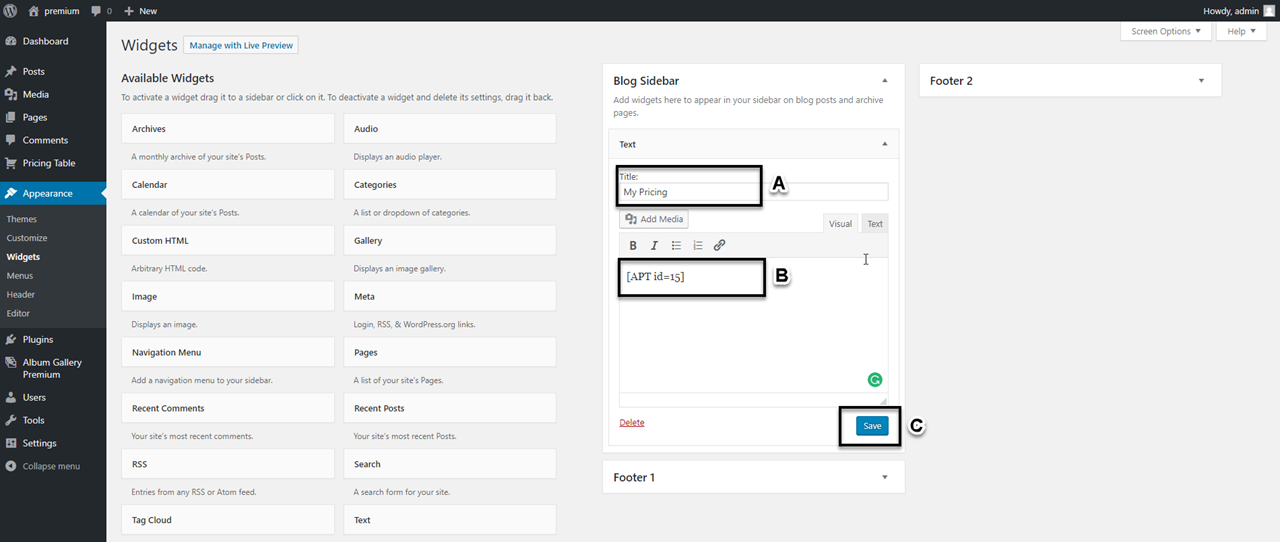
Add Pricing Table in a sidebar
- Go to the widgets in the appearance from the admin menu bar
- A. Pick the text widget.
- B. And drop in the sidebar.
- A. Now add a title
- B. Paste the shortcode into the content box.
- C. Click on the save button (that’s all).


