Aneeq Premium
Table of Contents
- 1.Download Theme
- 2.How to Install & Setup a WordPress Theme
- 3.Menu Setup
- 4.General Settings (Theme Options)
- 5.Slider Settings (Theme Options)
- 6.Font Settings (Theme Options)
- 7.Header Settings (Theme Options)
- 8.Service Settings (Theme Options)
- 9.Portfolio Settings (Theme Options)
- 10.Fun-Facts Settings (Theme options)
- 11.Testimonials Settings (Theme Options)
- 12.Blog Settings (Theme Options)
- 13.Team Member Settings (Theme Options)
- 14.Our Client Settings (Theme Options)
- 15.Footer Settings (Theme Options)
- 16.About Us Page Settings (Theme Options)
- 17.404 Error Settings (Theme Options)
- 18.Contact Settings (Theme options)
- 19.Call-Out Area Settings (Theme options)
- 20.Home Page Layout Settings (Theme Options)
- 21.how to add Footer & Sidebar widgets
- 22.How To create Portfolio Gallery For Home Page
- 23.Video Tutorials
1.Download Theme
- First of All, Download “Aneeq” Premium Theme.
- If you do not download yet (click here) to log in your account and download “Aneeq” Premium Theme.
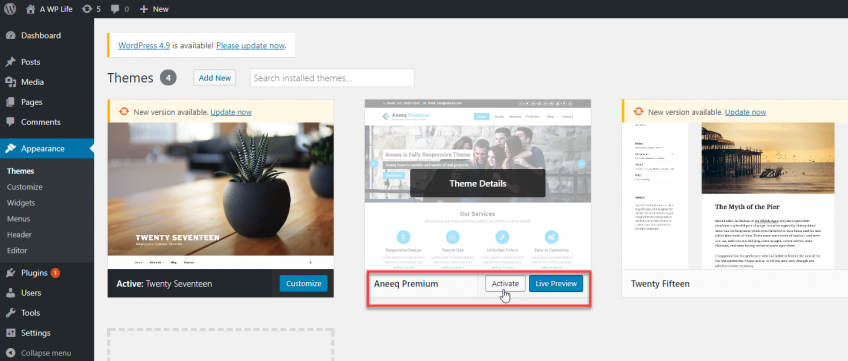
2.How to Install & Setup a WordPress Theme
Log into your WordPress website and browse to Appearance > Themes
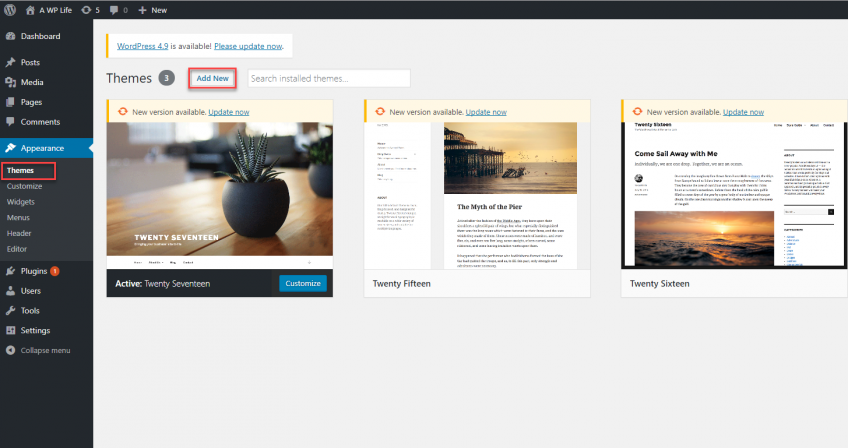
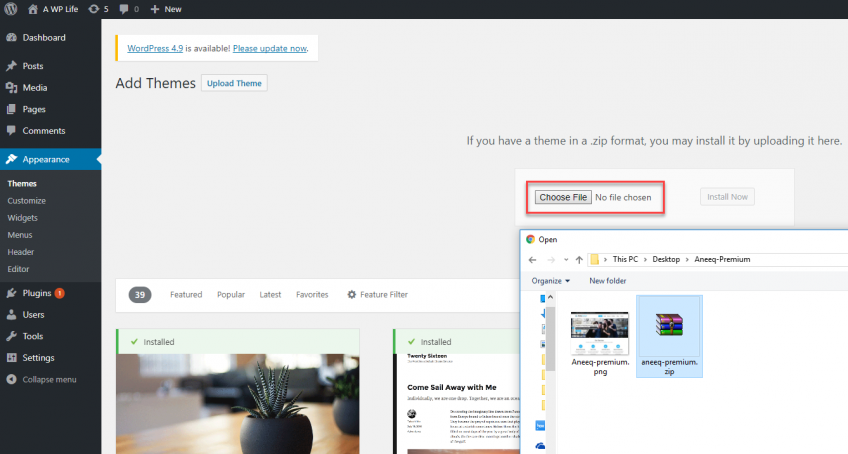
Then click on the option to upload theme.

Next Choose for the Aneeq Premium zipped theme file you downloaded from A WP Life and Install
Once WordPress has unpacked and installed the theme,
Go To WordPress site Appearance > Themes and activate Aneeq Premium Theme.
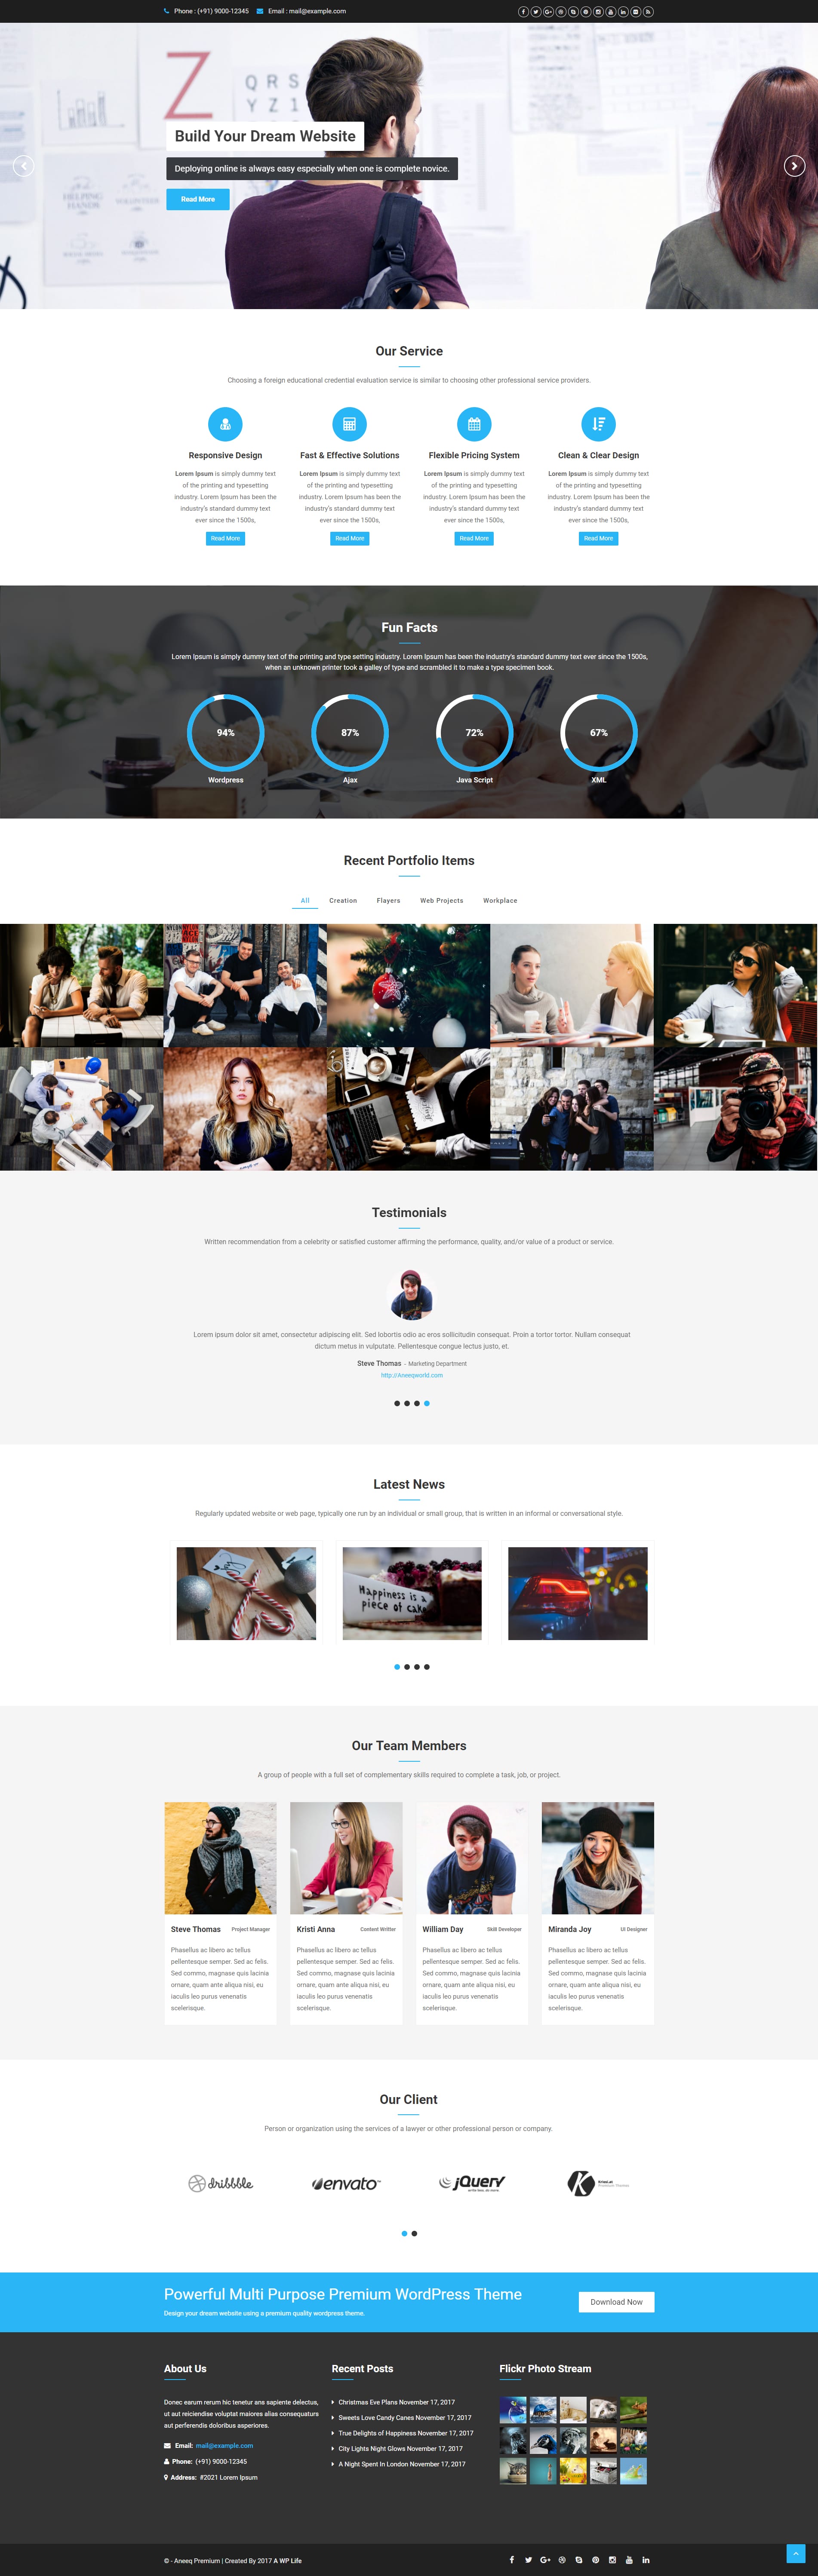
“Aneeq” Theme Preview
3.Menu Setup
Go to Appearance > Menus
- Select Pages you wanted to appear in Menu
- Click on Add to Menu
- Give a suitable menu name
- Drag menu item left-right to make it under another menu(submenu).
- Click Save Menu

4.General Settings (Theme Options)
Theme Options General Settings Configuration
You can define your own General Settings from within the Aneeq Theme Options page in your WordPress Dashboard. To locate the Aneeq Theme Options, click the Appearance> Theme Options link in your WordPress Dashboard, Then click on General Menu Tab

1. Enable Button to show home page or custom page.

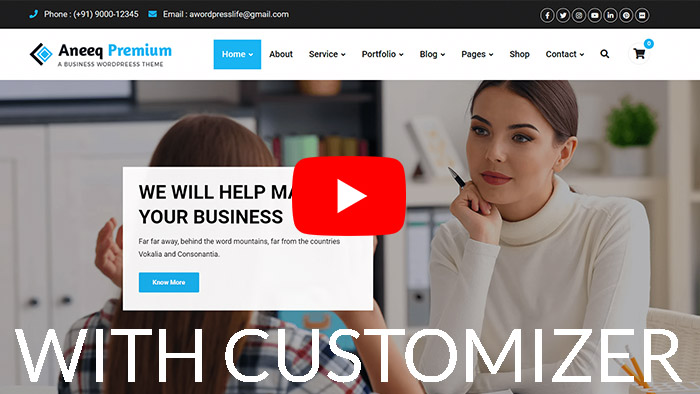
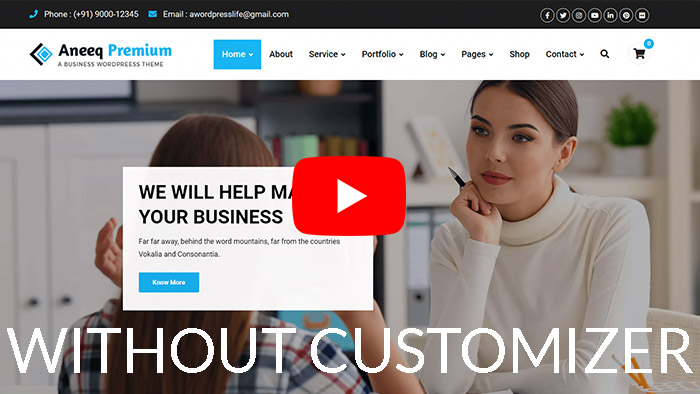
2. Theme Color Settings, You can set all the colors needed for customizing your theme here so that these colors will be available throughout the building process. This is a color to highlight different elements. Like text links, active tabs, progress bars, active accordion and others.

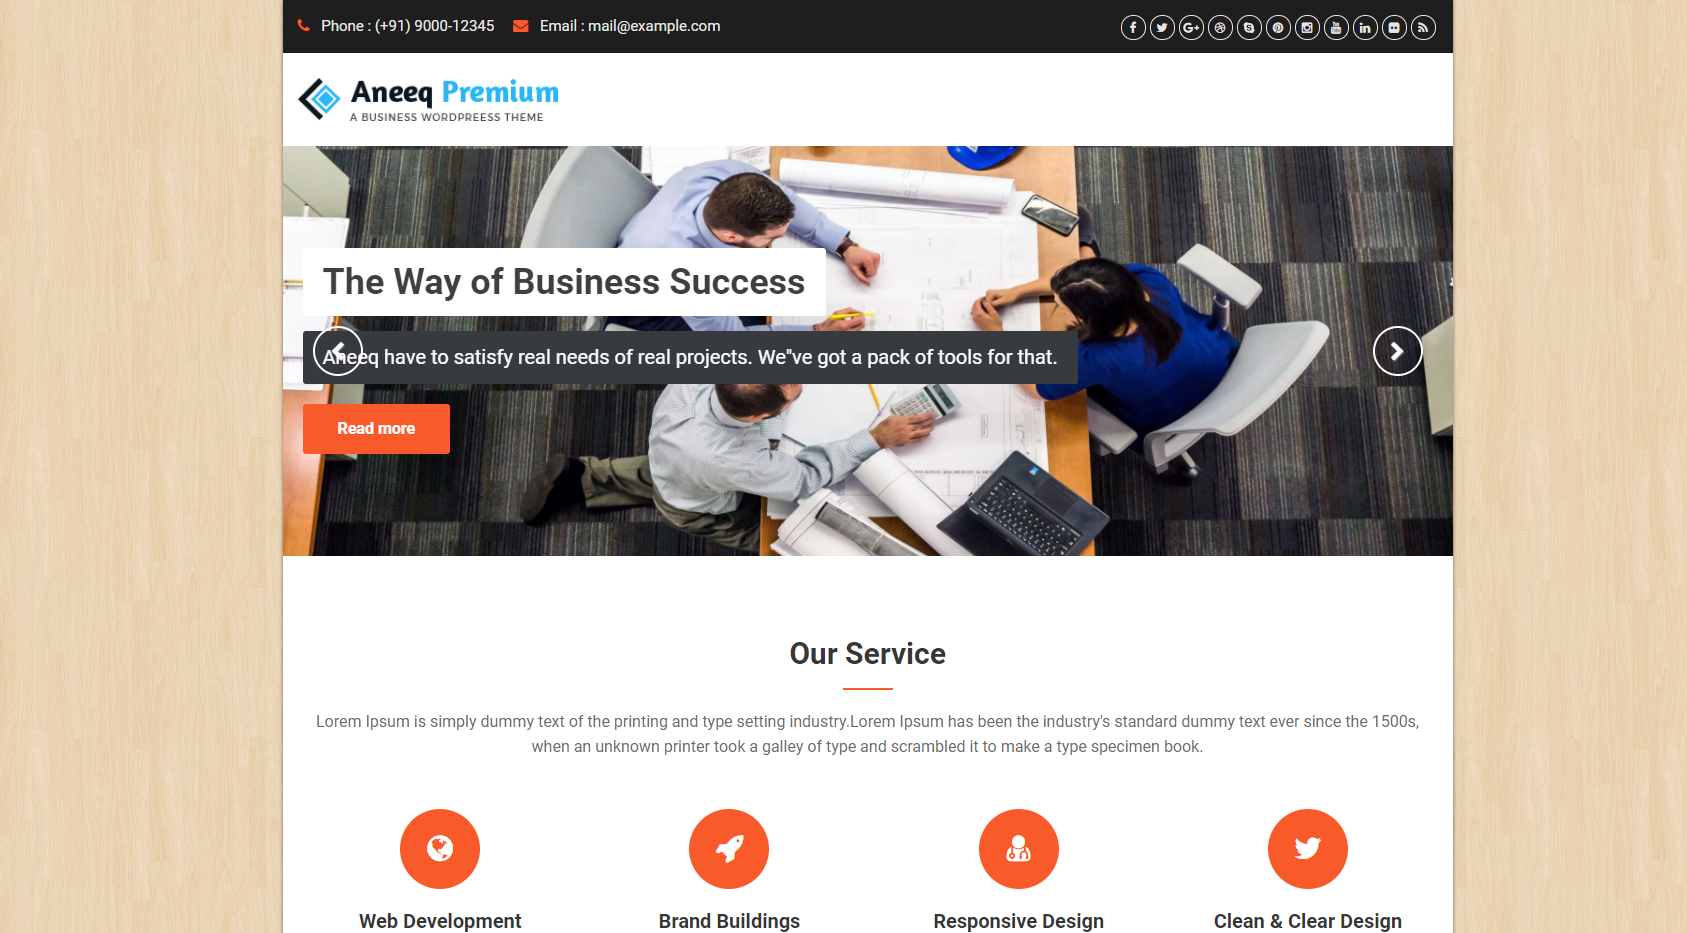
- See the changed color of front page section below.

3. Theme Layout to Specify the layout of the pages.Theme Layout background Image setting to Chang only for Your Boxed layout Background Image.

- See the changed setting “boxed” theme layout below the image.
4. Google Analytic Tracking Code Settings

5.Slider Settings (Theme Options)
Theme Options Slider Settings Configuration
You can define your own Slider Settings from within the Aneeq Theme Options page in your WordPress Dashboard. To locate the Aneeq Theme Options, click the Appearance> Theme Options link in your WordPress Dashboard, Then click on Slider Menu Tab

1. Autoplay Slider Setting, Use On or Off button to Autoplay Slide.


2. Slider Pause On Hover Setting, Use On or Off Button to Pause slides on hover.

3. Slideshow Interval, Use Range Bar for change slides speed (milliseconds).

Upload gif
4. Recent slides count Setting, Use Range Bar to set how many recent slides you want to show on slider slides.

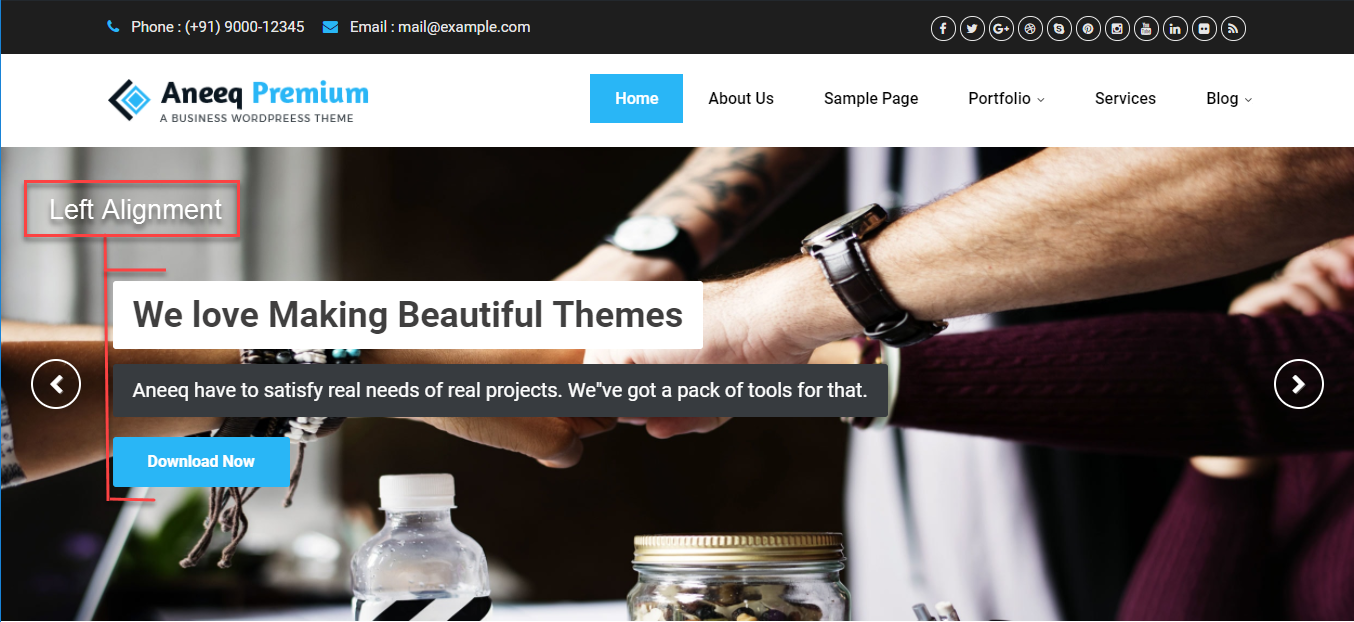
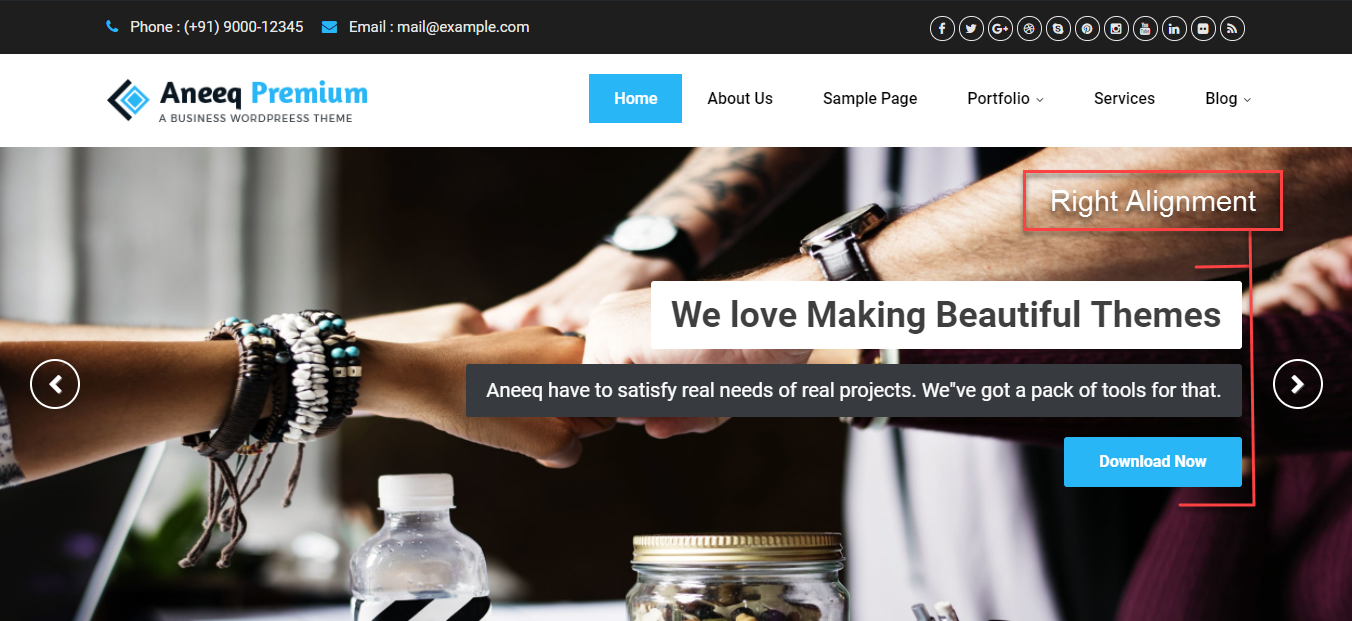
5. Slider Caption Alignment Setting, Specify the type of Slider Caption Alignment (Left / Right / Center).
- Slider caption Alignment Left

- Slider caption Alignment Center

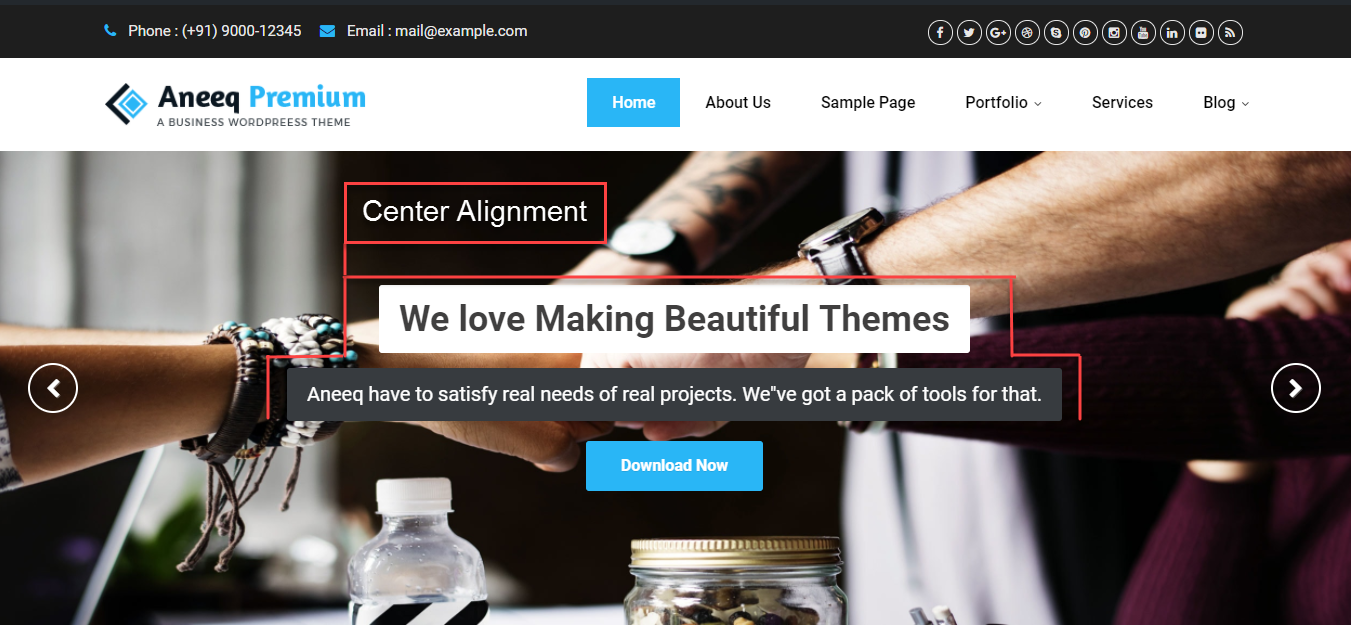
- Slider caption Alignment Right

- Slider Meta Settings Details

How to add new slide in slider section?
6.Font Settings (Theme Options)
Theme Options Font Settings Configuration
You can define your own Font Settings from within the Aneeq Theme Options page in your WordPress Dashboard. To locate the Aneeq Theme Options, click the Appearance> Theme Options link in your WordPress Dashboard, Then click on Font Menu Tab

1. Font Family Setting, Use Select Box to Choose font family and font weight for theme

2. Letter Spacing Setting, Use range bar to Set letterSpacing Between Fonts
- Letter-spacing refers to a uniform adjustment to the spacing of a word.

7.Header Settings (Theme Options)
Theme Options Header Settings Configuration
You can define your own Header Settings from within the Aneeq Theme Options page in your WordPress Dashboard. To locate the Aneeq Theme Options, click the Appearance> Theme Options link in your WordPress Dashboard, Then click on Header Menu Tab

1. Logo Type Setting, This is where you can upload your own logo file or logo Text to appear in the header of every page of your website.
There Is two Type of Settings into Logo Setting.
a. Text Type Logo: When You Click on Text Logo Button You will See an Input field, Write your Logo Title There then click on Save Options button to save settings.
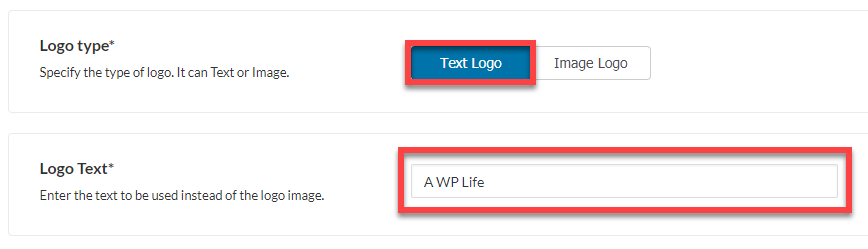
b. Image Type Logo: When You Click on Image Logo Button You See Upload Image” button. You can use the “Upload Image” button below the field to upload your logo image click on it to upload your logo image then click on Save Options button to save settings.

2. Header Height Setting, You can set height of header area

8.Service Settings (Theme Options)
Theme Options Service Settings Configuration
You can define your own Service Settings from within the Aneeq Theme Options page in your WordPress Dashboard. To locate the Aneeq Theme Options, click the Appearance> Theme Options link in your WordPress Dashboard, Then click on Service Menu Tab.

1. Service Page Template Setting, Select Different Design for service Templates to show your services
- Service Template Design 1


- Service Template Design 2

2. Service Section Heading
3. Service Section Description
4. Service Column Layout, Select how many columns of services you want to show on Homepage.
5. A Number Of services on Homepage, Select how many Number of services you want to show on Homepage.
6. Read More Text, Write Your service button text here

7. Read More Link, Use Radio Button To show or hide Read More Link Button

- Service Meta settings

- How to add service in service section
9.Portfolio Settings (Theme Options)
Theme Options Portfolio Settings Configuration
You can define your own Portfolio Settings from within the Aneeq Theme Options page in your WordPress Dashboard. To locate the Aneeq Theme Options, click the Appearance> Theme Options link in your WordPress Dashboard, Then click on Portfolio Menu Tab.

1. Portfolio Title Setting, Title of the front page “Title” area.(For front page only).
2. Portfolio Items Setting, Use Buttons to Select the number of portfolio items to show on front page. (For front page only)
- See 10 items are shown below Image.

3. Show Recent Work Limit Setting, Use range Slider to show the number of recent work in portfolio Single pages.
- Recent 5 Items Are shown In Single Portfolio 3 column page.

-
How to add portfolio in portfolio section
10.Fun-Facts Settings (Theme options)
Theme Options Fun Facts Settings Configuration
You can define your own Fun Facts Settings from within the Aneeq Theme Options page in your WordPress Dashboard. To locate the Aneeq Theme Options, click the Appearance> Theme Options link in your WordPress Dashboard, Then click on Fun Facts Menu Tab.
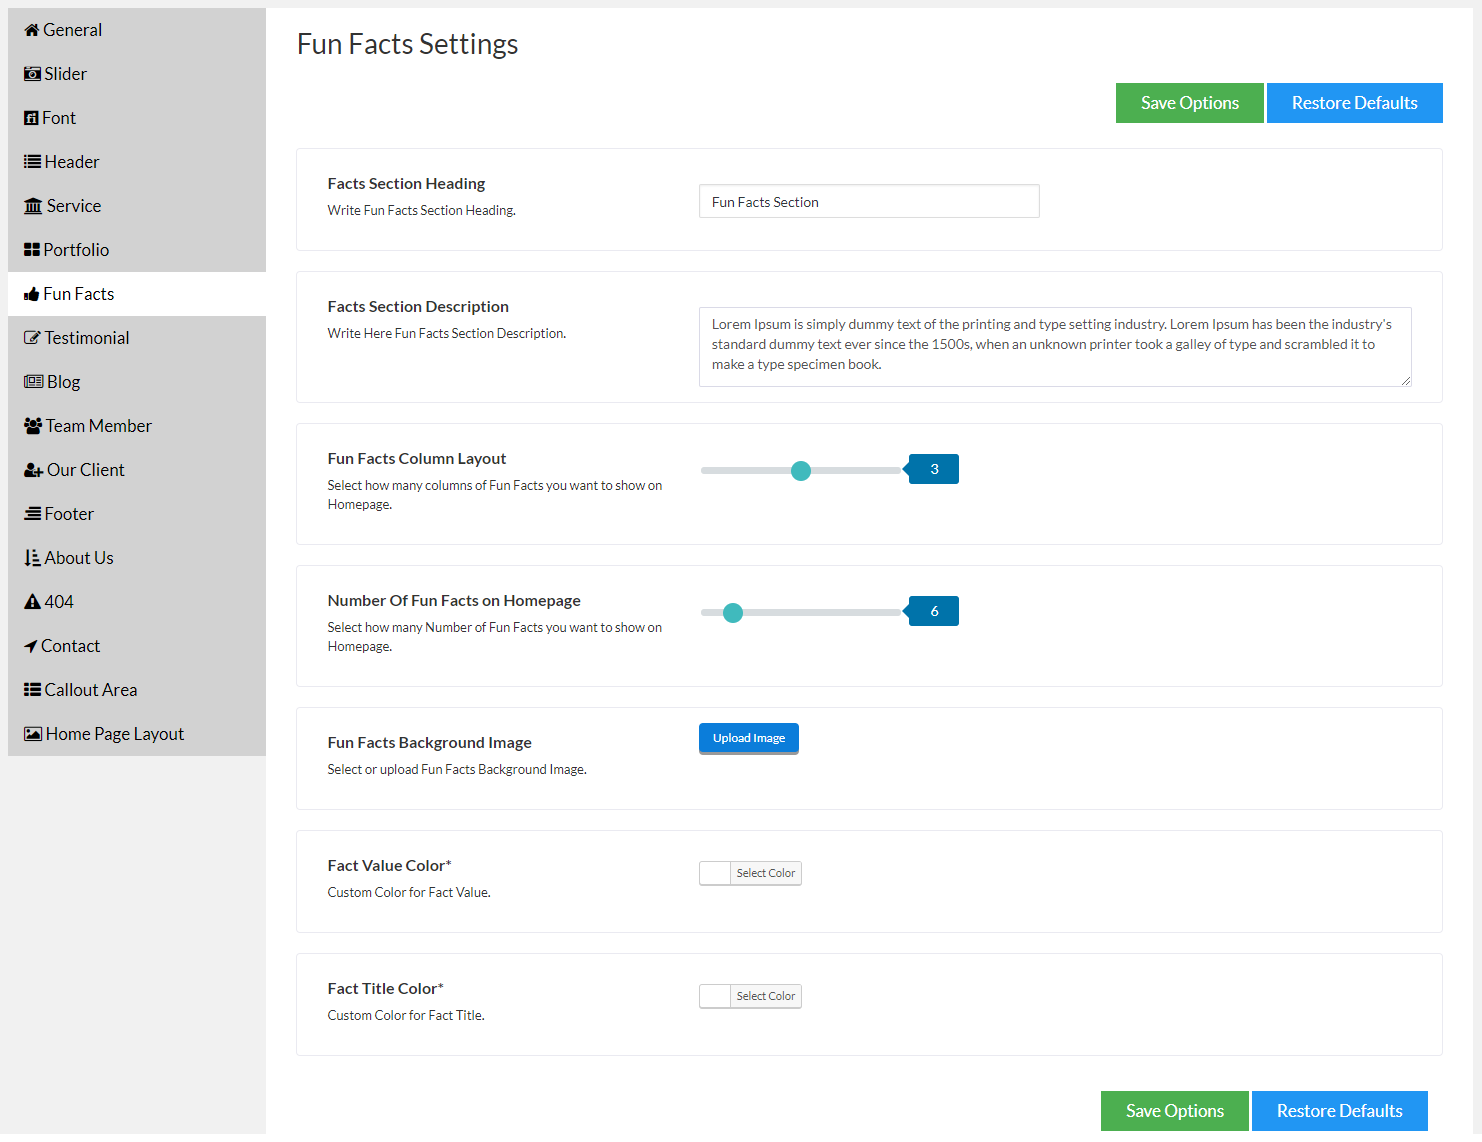
1. Facts Section Heading Setting, Write Fun Facts Section Heading.
2. Facts Section Description Setting, Write Here Fun Facts Section Description.
3. Fun Facts Column Layout Setting, Use Range Slider to set how many columns of Fun Facts you want to show on Homepage (2 columns, 3 columns & 4 columns).
4. Number Of Fun Facts on Homepage Setting, Select how many Number of Fun Facts you want to show on Homepage.
5. Fun Facts Background Image Setting, You can use the “Upload Image” button in the field to upload your logo image click on it to upload your logo image then click on Save Options button to save settings.
6. Fact-Value Color Setting, Use Color Picker To set Color for Fact-Value.(see Title Color is white into Below Image)
7. Fact Title Color Setting, Use Color Picker To set Color for Fact Title.(see Fact-Value Color is white into Below Image)

-
How To add Fun-Facts in Fun-Facts Section
11.Testimonials Settings (Theme Options)
Theme Options Testimonials Settings Configuration
You can define your own Testimonials Settings from within the Aneeq Theme Options page in your WordPress Dashboard. To locate the Aneeq Theme Options, click the Appearance> Theme Options link in your WordPress Dashboard, Then click on Testimonials Menu Tab.

1. Testimonial Section Heading Setting, Use Input field for testimonial section heading.
2. Testimonial Section Description Setting, Use Input field for testimonial section Description.
3. Bullets Settings, Use Show / Hide Button to enable Bullets for testimonial slide.

4. Autoplay Testimonial Setting, Use On/Off Button to enable Autoplay for Testimonial.
5. Transitions Slide SpeedSetting, Use range slider to Set slide changing duration into milliseconds ( Default is 1000).

- Service Meta Settings Details

- How to add testimonial in testimonial section
12.Blog Settings (Theme Options)
Theme Options Blog Settings Configuration
You can define your own Blog Settings from within the Aneeq Theme Options page in your WordPress Dashboard. To locate the Aneeq Theme Options, click the Appearance> Theme Options link in your WordPress Dashboard, Then click on Blog Menu Tab.

1. Blog Section Heading Setting, Write your Blog Section Heading.
2. Blog Section Description Setting, Write your Blog Section Description.

- Blog Meta Settings Detail

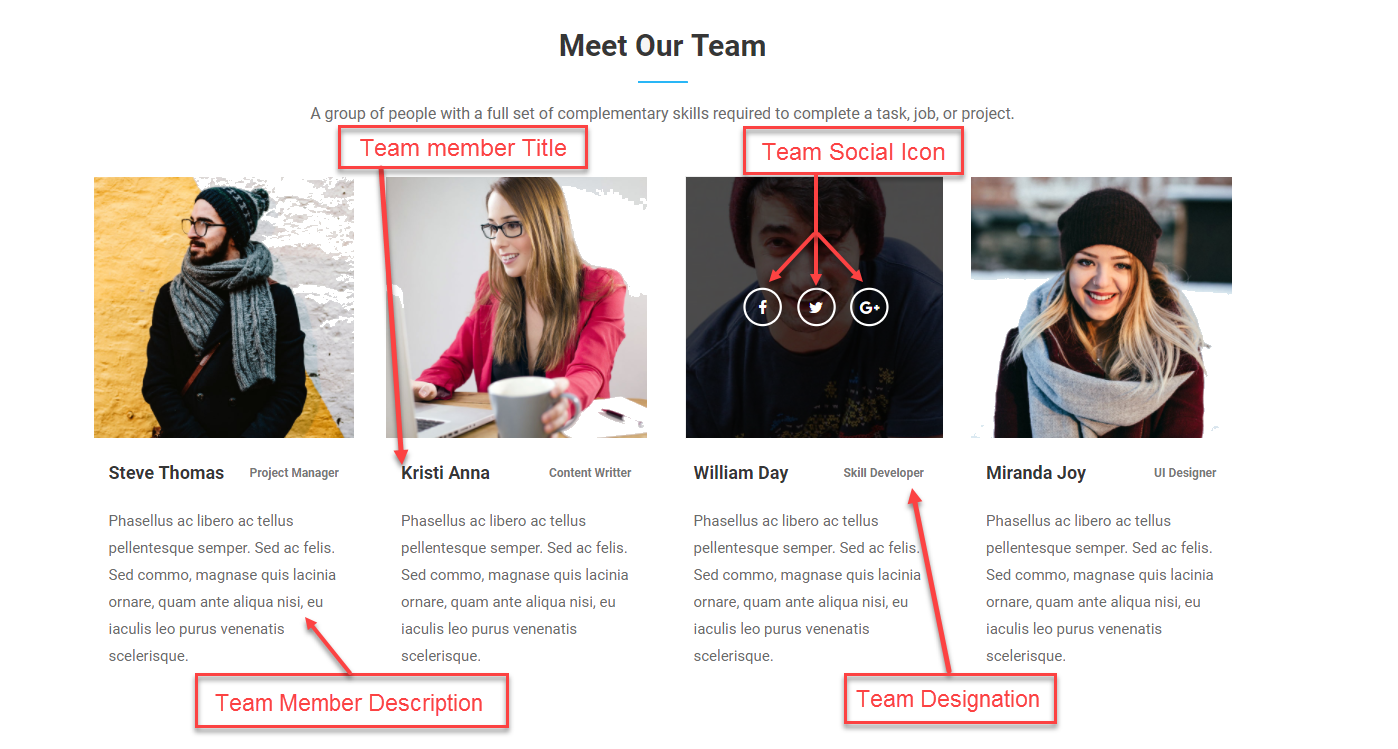
13.Team Member Settings (Theme Options)
Theme Options Team Member Settings Configuration
You can define your own Team Member Settings from within the Aneeq Theme Options page in your WordPress Dashboard. To locate the Aneeq Theme Options, click the Appearance> Theme Options link in your WordPress Dashboard, Then click on Team Member Menu Tab.

1. Team Member Section Description Setting, Write your Team Member section description into Input field.
2. Team Member Heading Setting, Write Your Team Member section heading.
3. Team Member Column Layout Setting, Select how many columns of Team Members you want to show on Homepage.(4 columns are shown in below image)
4. Number Of Teams Member on Homepage Setting, Select how many Number of Team Member you want to show on Homepage.(four numbers of team member shown in below image)

- Team Member Meta Settings Detail
- How to add team member in team member section
14.Our Client Settings (Theme Options)
Theme Options Our Client Settings Configuration
You can define your own Our Client Settings from within the Aneeq Theme Options page in your WordPress Dashboard. To locate the Aneeq Theme Options, click the Appearance> Theme Options link in your WordPress Dashboard, Then click on Our Client Menu Tab.

1. Our Client Heading Setting, Use Input field for Our Client section heading.
2. Our Client Section Description Setting, Write you’re Our Client section description into Input field.
3. Autoplay Setting, Use On or Off button to Autoplay Client Slider.
4. A number Of Client Setting, Use Range slider to set how many recent clients you want to show Into Page.

- How To add client in our client section
15.Footer Settings (Theme Options)
Theme Options Footer Settings Configuration
You can define your own Our Footer Settings from within the Aneeq Theme Options page in your WordPress Dashboard. To locate the Aneeq Theme Options, click the Appearance> Theme Options link in your WordPress Dashboard, Then click on Our Client Menu Tab.

1. Select Footer Column layout View Setting, Select or Choose Footer Column layout View for your footer settings.(1 column, 2 column, 3 column, 4column)
2. Show / Hide Footer Bottom Icon Setting, Use Radio Button to Show or Hide social icons into footer bottom.
3. Footer Bottom Text Setting, Use Input Feild to Enter footer bottom text.
4. Footer Bottom Link Text Setting, Use Input Feild to Enter footer bottom link text.
5. Footer Bottom Link Setting, Use Input Feild to Enter footer bottom link.

16.About Us Page Settings (Theme Options)
Theme Options About-Us Settings Configuration
You can define your own About Us Settings from within the Aneeq Theme Options page in your WordPress Dashboard. To locate the Aneeq Theme Options, click the Appearance> Theme Options link in your WordPress Dashboard, Then click on About Us Menu Tab.
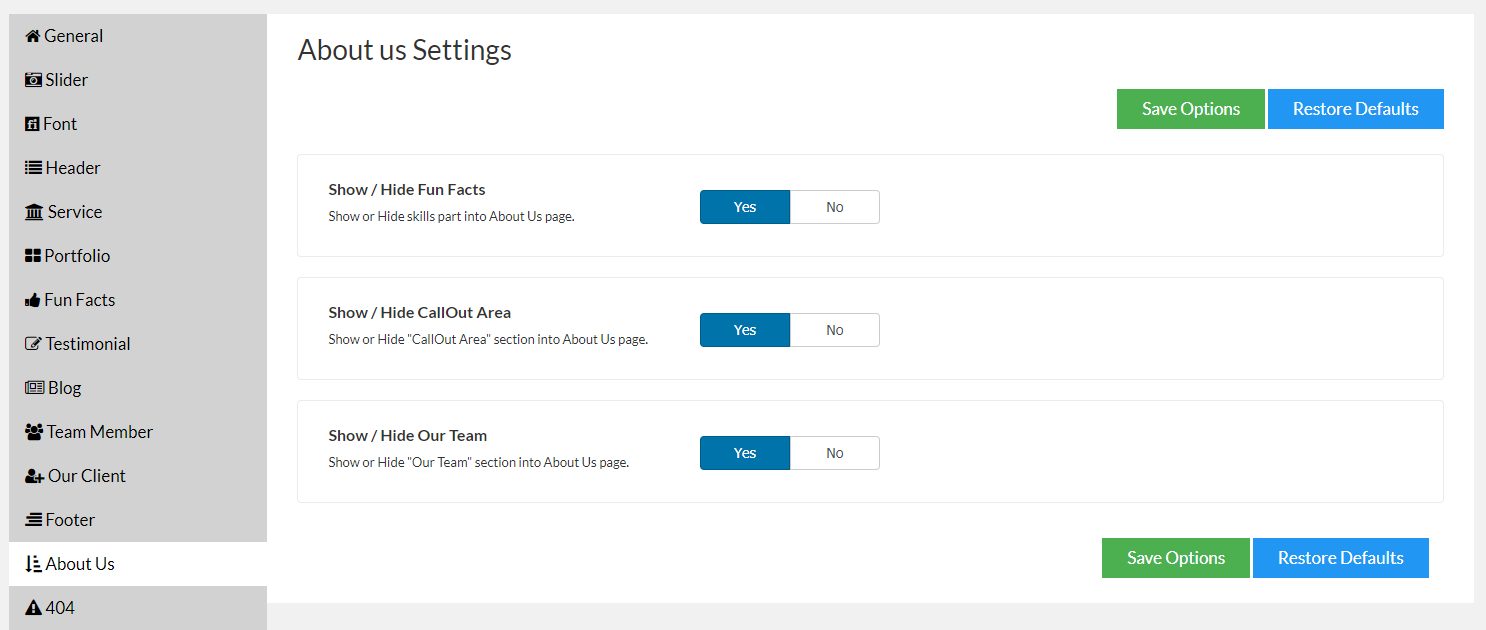
1. Show / Hide Fun Facts Setting, Use Radio Button To Show or Hide skills part into About Us page.
2. Show / Hide CallOut Area Setting, Use Radio Button To Show or Hide “CallOut Area” section into About Us page.
3. Show / Hide Our Team Setting, Use Radio Buttons to Show or Hide “Our Team” section into About Us page.
- See The About Us Page Preview Below The image

17.404 Error Settings (Theme Options)
Theme Options 404 Error Settings Configuration
You can define your own 404 Error Settings from within the Aneeq Theme Options page in your WordPress Dashboard. To locate the Aneeq Theme Options, click the Appearance> Theme Options link in your WordPress Dashboard, Then click on 404 Error Menu Tab.

1. 404 Error Text Setting, Use input field for 404 Error Page Heading Text
2. 404 Error Description Setting, Use input field for 404 Error Page Text Description
3. 404 Button Text Setting, Use Input field for button text
4. 404 Button Icon Setting, Use Icon picker for a button icon

18.Contact Settings (Theme options)
Theme Options Contact Settings Configuration
You can define your own Contact Settings from within the Aneeq Theme Options page in your WordPress Dashboard. To locate the Aneeq Theme Options, click the Appearance> Theme Options link in your WordPress Dashboard, Then click on Contact Menu Tab.
A. Map Setting
1. Map Setting, Use Input field to Enter Google Map Embed URL

B. Form Settings

1. Form Label Text Setting
2. Form Description Text Setting
3. Name Placeholder Text Setting
4. Last Name Placeholder Text Setting
5. Subject Placeholder Text Setting
6. Email Placeholder Text Setting
7. Message Placeholder Text Setting

C. Contact Info Setting

1. Contact Label Text
2. Contact Description Text
3. Address Label Text Setting, Address Label Icon Setting, Address Details Setting
4. Phone Label Text Setting, Phone Label Icon Setting, Phone Details Setting
5. Email Label Text Setting, Email Label Icon Setting, Email Details Setting
6. Website Label Text Setting, Website Label Icon Setting, Website Details Setting

4. Social Media

1. Icon URL Setting, Use Input Feild to enter URL.(click on social icon to redirect given URL)
2. Icon Title Setting, Use Input Feild To set icon Title.(see icon title on hover)
3. Social Icon PIcker Setting, Use Icon Picker to set Social Icon.

19.Call-Out Area Settings (Theme options)
Theme Options Call-Out Area Settings Configuration
You can define your own Call-out Area Settings from within the Aneeq Theme Options page in your WordPress Dashboard. To locate the Aneeq Theme Options, click the Appearance> Theme Options link in your WordPress Dashboard, Then click on Call-out Area Menu Tab.
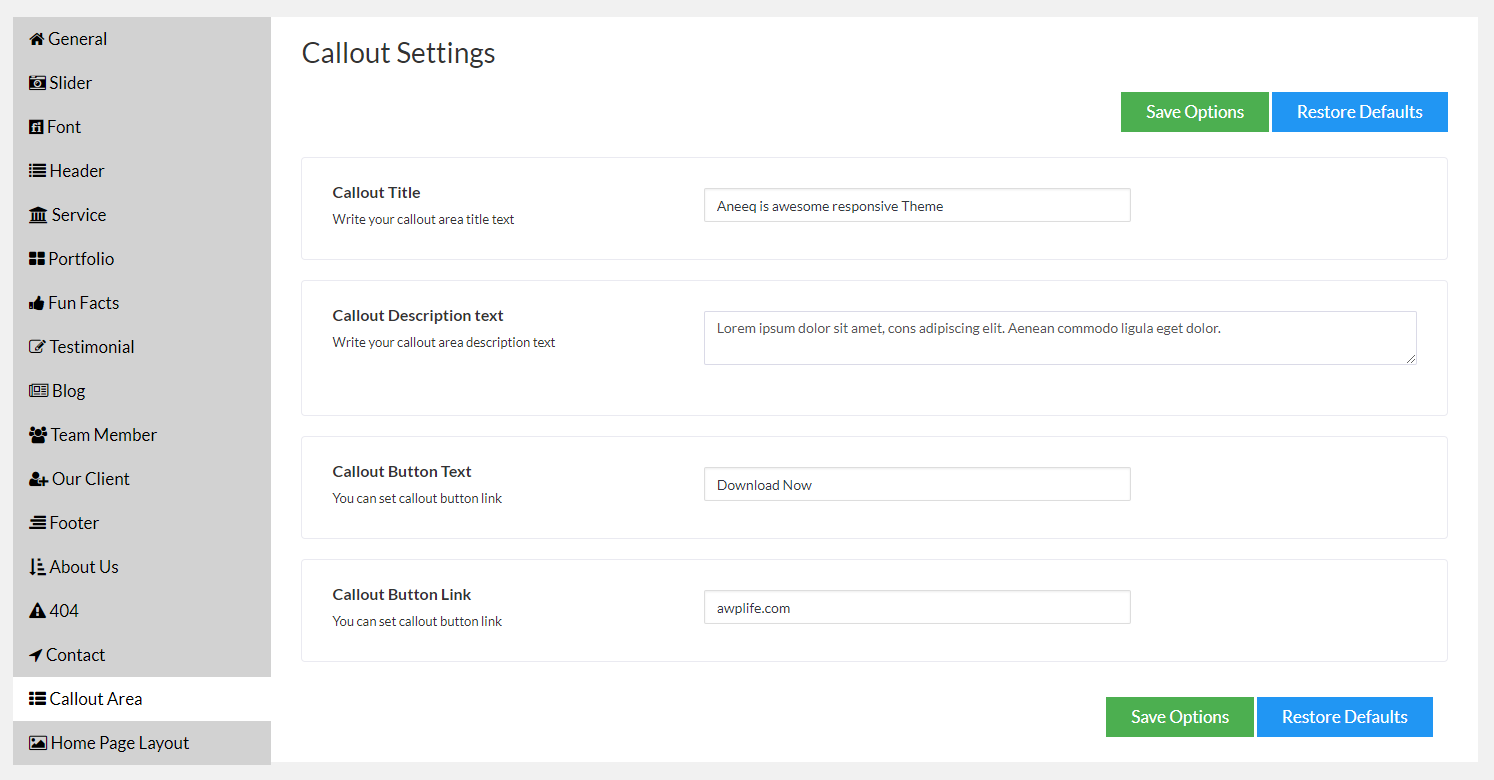
1. Callout Title Setting, Use Input Feild to Write your callout area title text
2. Callout Description text Setting, Use Input Feild to Write your callout area description text
3. Callout Button Text Setting, Use Input Feild to Write Callout Button Text
4. Callout Button Link Setting, Use Input Feild to set callout button link

20.Home Page Layout Settings (Theme Options)
Theme Options Homepage Layout Settings Configuration
You can define your own Homepage Layout Settings from within the Aneeq Theme Options page in your WordPress Dashboard. To locate the Aneeq Theme Options, click the Appearance> Theme Options link in your WordPress Dashboard, Then click on Homepage Layout Menu Tab.
Using Home Page Customizer settings, sections on Home Page can be Adjust and remove.
Here section can be active/inactive and move using DRAG N DROP.

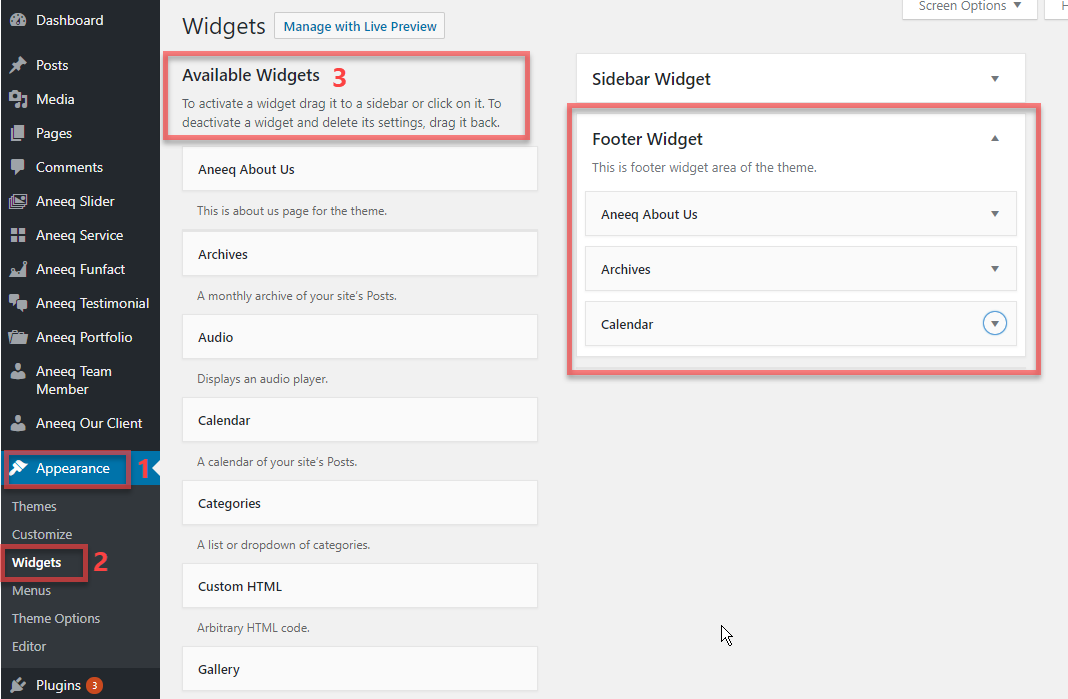
21.how to add Footer & Sidebar widgets
How to add Widgets
go to Admin Dashboard → Appearance → Widgets.
To activate a sidebar or footer widget just drag it to a sidebar widget or Footer widget and drop on it there.
Also, To deactivate a widget click on it and delete or drag and drop it back.

Footer Widgets
22.How To create Portfolio Gallery For Home Page
How to Create Portfolio gallery
go to Admin Dashboard → Aneeq Portfolio
See the Steps below the image
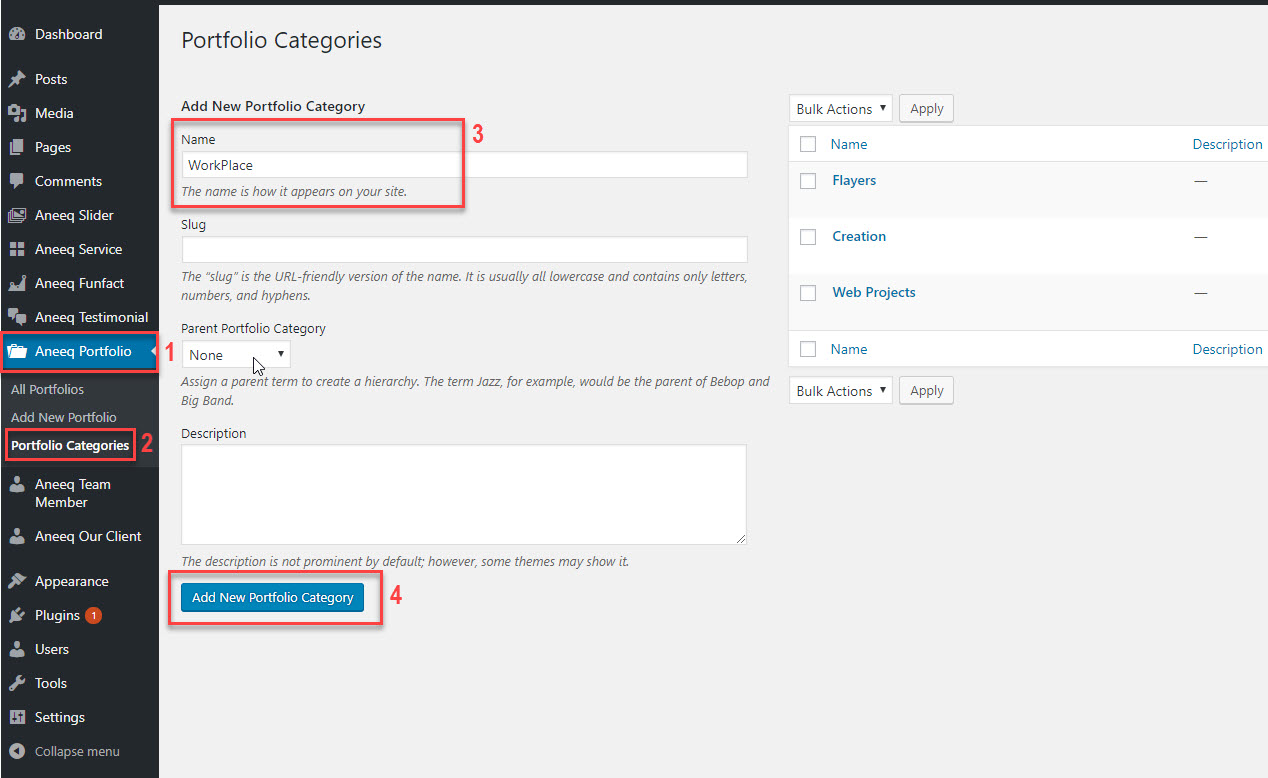
Step 1 → Click On “Aneeq Portfolio” Custom Post Type, there is you found Some options.
Step 2 → First of All Click on “Portfolio Categories” To create categories which you want to show on portfolio Section.
Step 3 → into this you can add new portfolio category (Fill input field).
Step 4 → After all click on “Add New Portfolio Category” Button.
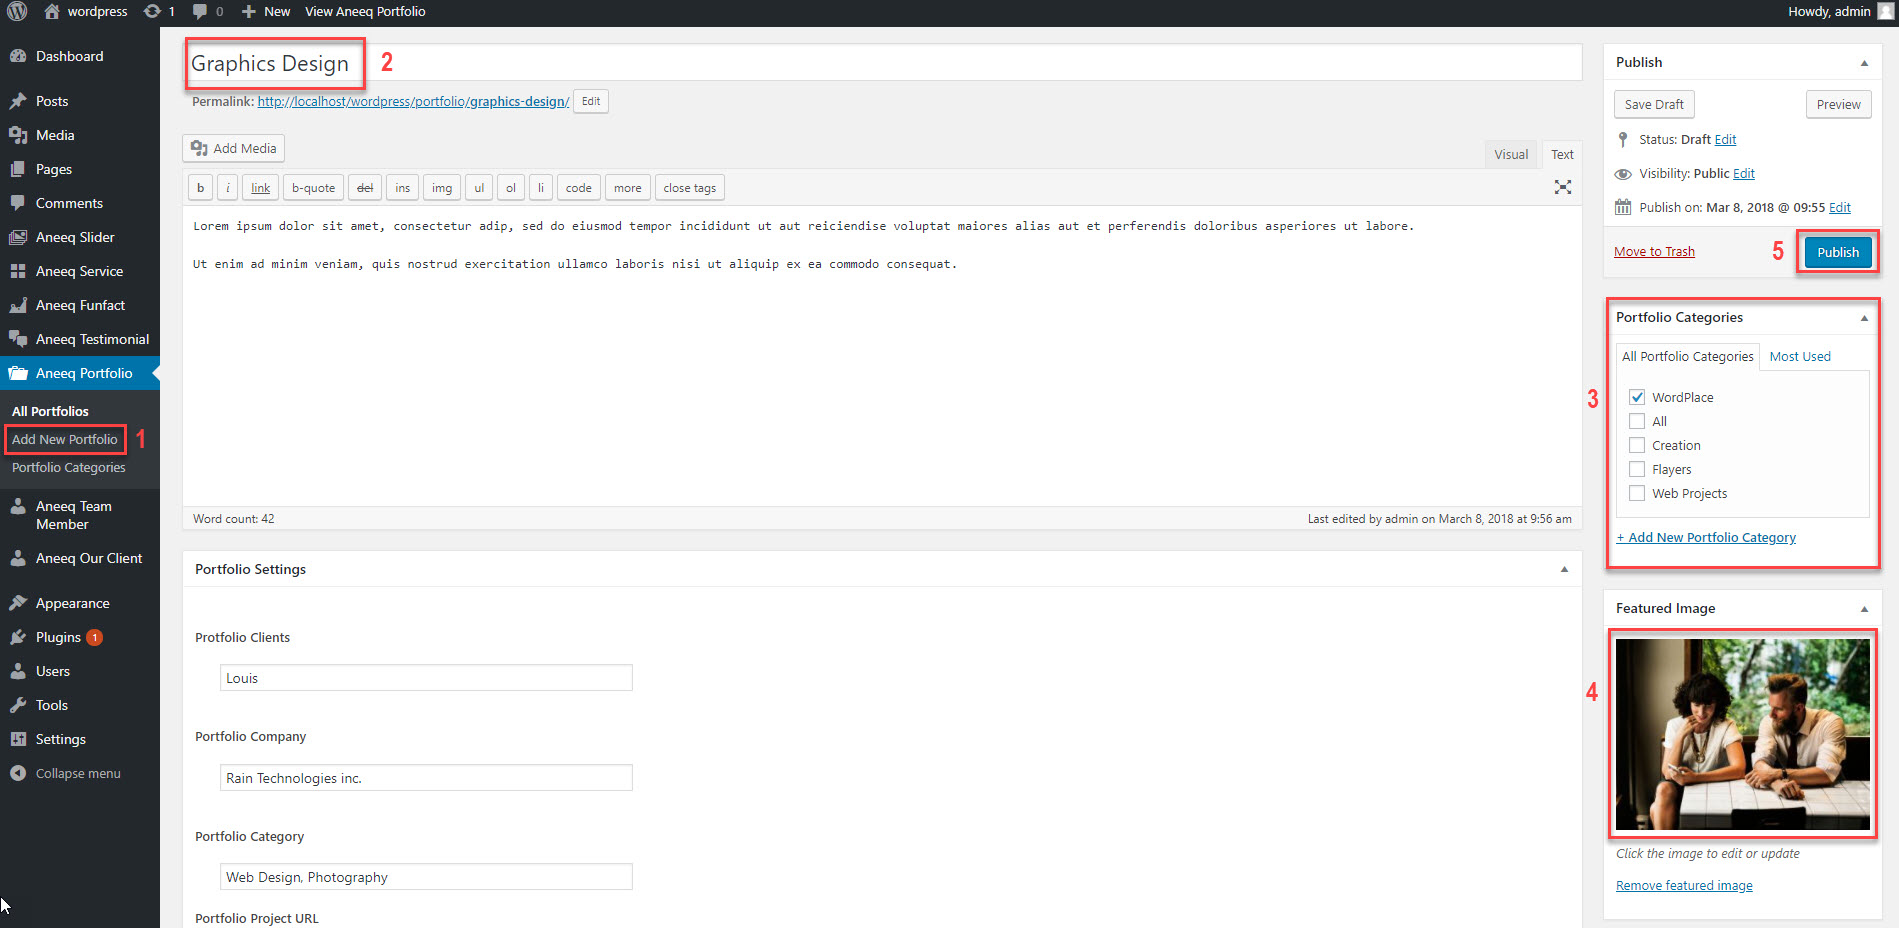
Then, go to Aneeq Portfolio → Add New Portfolio
Step 1 → Click On “Add New Portfolio” Page To create Portfolio.
Step 2 → Enter Portfolio image Title Into input Field.
Step 3 → Now select the Portfolio Category.
Step 4 → Then, Upload an Image as a Featured Image.
Step 5 → After all Click on Publish Button to Save.
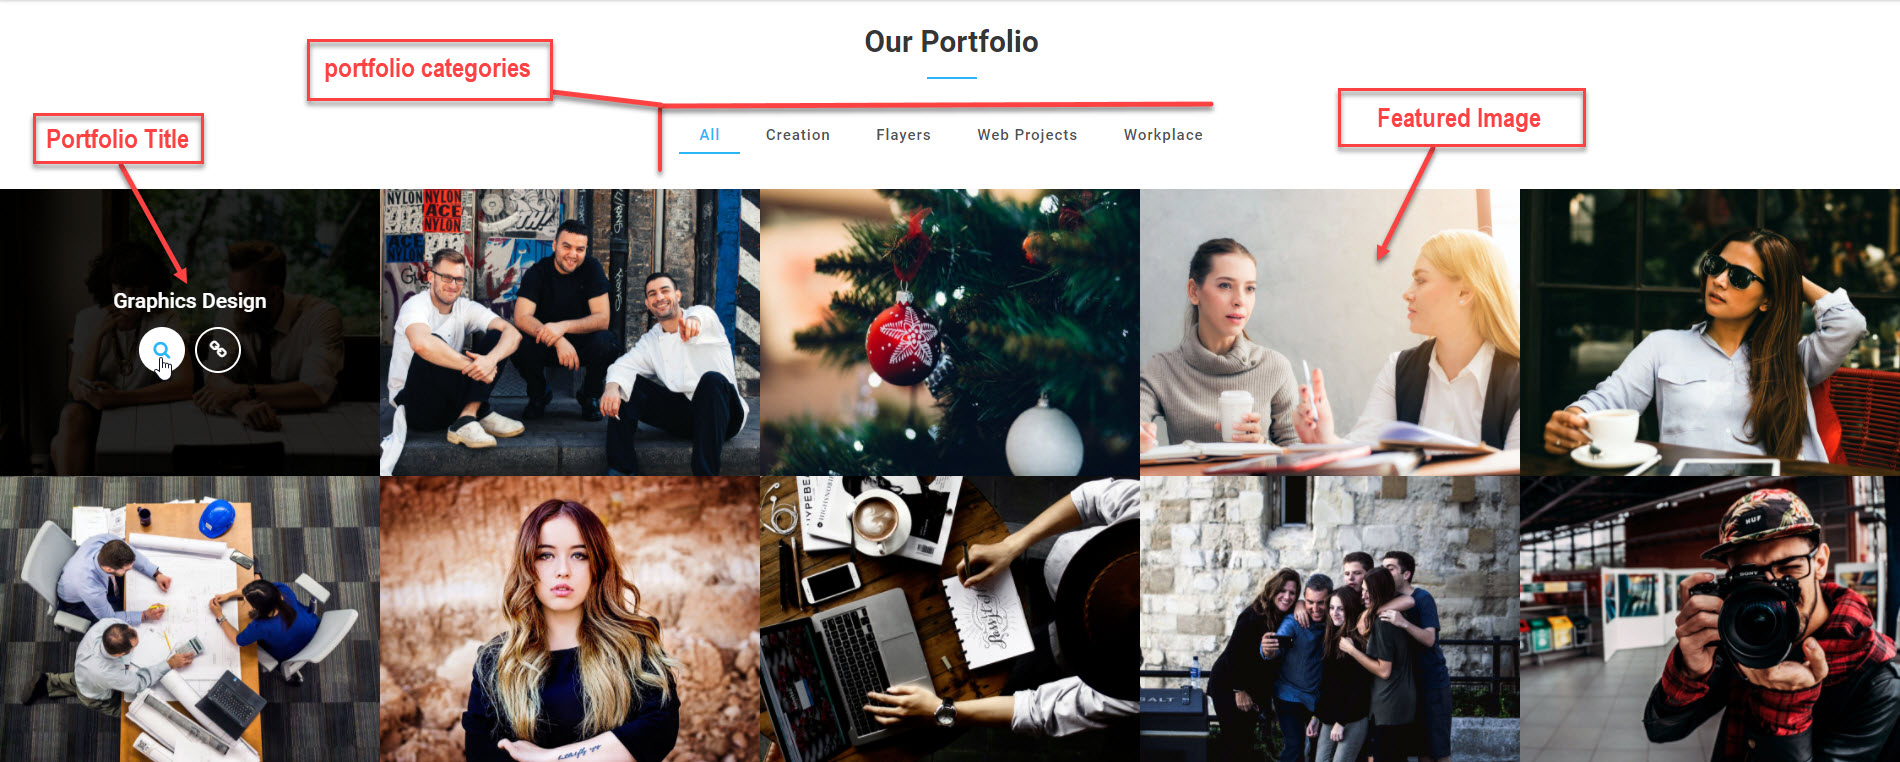
See Homepage Preview
23.Video Tutorials