How To Create Video Gallery In WordPress?

1. Download & Installation

  • First, download the Video Gallery plugin from the WordPress Admin Panel
  • Click on plugins button from the admin menu bar.
  • Now click on add new.
  • Search for video gallery.
  • Now click on the install button and then install and activate.

2. How To Add Video Poster Into Video Gallery

  • To create, Video Gallery click on Video Gallery plugin in the menu bar.
  • Then type your Video Gallery title in the text box.
  • To add your video thumbnail in the video gallery plugin, click on “Add Image” button.

  • Click on video poster to upload. If you want to upload multiple video poster use (Ctrl) key from the keyboard.
  • After selecting the video poster, click on the “Select” button.

3. Publish & Copy Shortcode

  • Now click on publish button for save video gallery with default settings.
  • Copy the shortcode of Video Gallery.

4. Show Video Gallery on Page

  • Click on pages button from the admin menu bar.
  • Click on add new.
  • Type a page title in the text box.
  • Paste video gallery shortcode in the page content.
  • Now click on the “Publish” button.

5. Video Gallery Preview

Thanks for reading “How To Create Video Gallery In WordPress” article.

How To Create Photo Gallery In WordPress?

WordPress makes it incredibly simple to create Photo gallery anywhere on your site, but many site owners fail to take advantage of this powerful feature.

In this article, we’ll take you through create “Photo Gallery

1. Download & Installation

  • First,  download Photo Gallery Plugin On WordPress
  • Click on plugins button from the admin menu bar.
  • Click on “Add New” And Search for Photo Gallery.
  • Now click on install button and then activate.


Live Demo


2. Add Photo Into Gallery

  • For create Photo gallery click on Photo Gallery > Add Photo Gallery in the menu bar.
  • Then type your photo gallery title in the text box.
  • For add your images in Photo Gallery premium plugin click on “Add Image” button.

  • Now Click on Photo to upload if you want Upload multiple Photos use (Ctrl) key from keyboard
  • After Selecting Photos Click on Select Button.


3. How To Add Shortcode Into Page?

By this feature, you can show your Photo Gallery on Pages /Posts /Widgets. In the gallery setting page you can set your own settings for Photo Gallery and this page give you a unique id to create your gallery by shortcode id that seems to be “[LG id= 192]”

  • Now Copy & Embed shortcode into any Page/ Post / Text Widget to display your Photo gallery on site.


4. For Showing Photo Gallery on Page

When You Get Your Shortcode Id From Galley Page Like “[LG id= 192]”, Copy This Shortcode And Paste This shortcode Into Pages / Posts And Widgets To Show Your Photo Gallery.Shortcode features allow you to add multiple galleries into same page & posts.

  • First type a Page title on your Page
  • Copy Shortcode from Gallery And paste the copied Shortcode on Page & Post
  • Now Click On Publish Button


5. Photo Gallery Preview

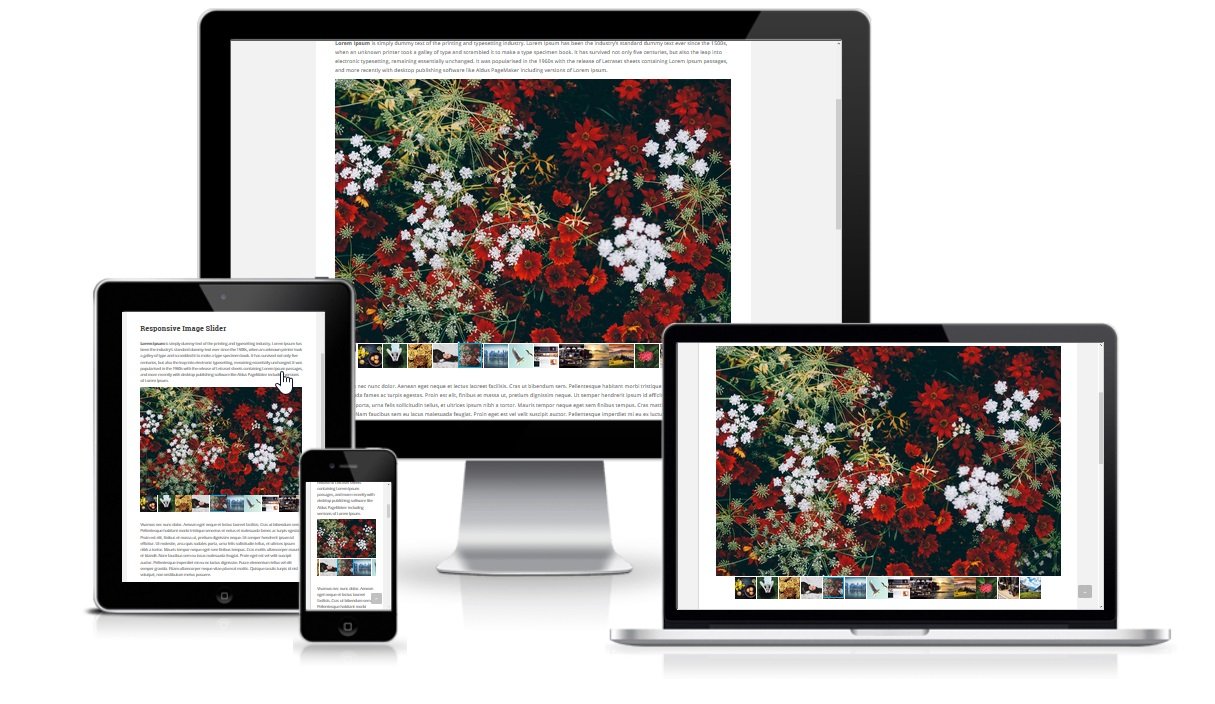
After click on Publish Button Visit To Your Site then you found your Photo Gallery on your post/page & widgets. You can also add multiple galleries on the same page by following these five steps which are shown on our page. This photo gallery plugin helps you to make and create a creative & responsive gallery to display on the pages and posts of your website.

Thanks for reading “How To Create Photo Gallery In WordPress” article.

How To Create Responsive Slider Gallery In WordPress?

Create Responsive Slider Gallery

WordPress is very simple, you can do anything on your site with some plugins, you can create responsive slider gallery to show your images.

Please follow these below steps for creating a slider gallery.


  • First,  download Slider Gallery Plugin On WordPress.
  • If you do not download yet (click here) to log in your account and download “Slider Gallery” plugin.

How To Add Slider Gallery Into Page/Post

  • To create Slider Gallery click on Responsive Slider Gallery plugin in the menu bar.
  • Then type your slider gallery title in the text box.
  • To add your images in Responsive Slider Gallery Premium plugin click on New Slide button.


  • Click on Photo to upload if you want Upload multiple Photos use (Ctrl) key from keyboard
  • After Selecting Photos Click on Select Button.


  • Now Copy & Embed Short-code into any Page/ Post / Text Widget to display your image gallery on site.


  • For adding your Photo gallery into Page first type a Page title and your Page matter and paste the copied code, Then Click On Publish Button

Preview

P A G E

P O S T

S I D E B A R

Multiple Bootstrap Carousel Slideshow

How do I add Multiple Bootstrap Carousel Slideshow slider on a single page or one page?

In this tutorial, we are providing a sample of working source code. First, download the sample code using the Download Code button at the bottom of the page.

Adding and creating multiple bootstrap carousel slider on the page is so easy and simple.

So, let’s start with the sample code.

After source code downloading complete you will get a zip file “multiple-bootstrap-carousels.zip”. Extract the zip file anywhere into the local computer system.

After extraction you find a directory named “multiple-bootstrap-carousels”, in that directory you will get the following assets:

  1. CSS Directory
  2. Fonts Directory
  3. Images Directory
  4. JS Directory
  5. CSS Directory
  6. HTML File – multiple-bootstrap-carousels.html

What are these attests?

These assets are required to create a bootstrap multiple carousel sliders.

  • CSS directory contains a file “bootstrap.min.css” which is used to design responsive HTML pages.
  • Fonts directory are used by bootstrap CSS to generates the various built graphic icon. Carousel slider arrow navigation control also generated by this. You can check here.
  • Images directory contains all images which we will use into carousel slider’s slides.
  • JS directory are contains 2 js files “jquery.min.js” and “bootstrap.min.js”. a jquery.min.js file is a JavaScript library the purpose of jquery use JavaScript on websites. a bootstrap.min.js file is bootstrap framework js library file which is used to create bootstrap carousels, models forms, tool-tips, tabs etc. bootstrap.min.js file is dependent on jquery.min.js file, you need load first before using bootstrap js. You can more explore about bootstrap js library file here.
  • HTML file (multiple-bootstrap-carousels.html) is containing all design and code part of multiple carousel sliders.

let’s learn more about multiple-bootstrap-carousels.html file.

You should open the HTML file into any code editor. If you have no code editor tool install on the computer then here some fee code editor tools, download and install any code editor tool:

In Head section we have loaded all required CSS & js file and four carousel JS codes as below:

Code

 <head>
 <title>Multiple Bootstrap Carousel Slidesshow Example</title>
 <meta charset="utf-8">
 <meta name="viewport" content="width=device-width, initial-scale=1">
 
 <!-- bootstrap css library -->
 <link rel="stylesheet" href="css/bootstrap.min.css">
 
 <!-- jQuery latest library (load this library first) -->
 <script src="js/jquery.min.js"></script>
 
 <!-- bootstrap js library -->
 <script src="js/bootstrap.min.js"></script>
 
 <!-- carousel customizing css code -->
 <style>
 .carousel {
 /* you can add customizing css here like slider height width */
 }
 </style>
 
 <!-- carousel js code -->
 <script>

 /* first carousel slidesshow */
 $('#carousel-1').carousel({
      // Amount of time to delay between cycling slide, If false, no cycle
      interval: 500,

      // Pauses slide on mouse enter and resumes on mouseleave.
      pause: "hover",

      // Whether carousel should cycle continuously or have hard stops.
      wrap: true,

      // Whether the carousel should react to keyboard events.
      keyboard: true
 });
 
 
 /* second carousel slidesshow */
 $('#carousel-2').carousel({
      interval: 1000,
      wrap: true,
      keyboard: true
 });
 
 
 /* third carousel slidesshow */
 $('#carousel-3').carousel({
     interval: 2000,
     wrap: true,
     keyboard: true
 });
 
 
 /* forth carousel slidesshow */
 $('#carousel-4').carousel({
     interval: 3000,
     wrap: true,
     keyboard: true
 });
 </script>
 </head>


In the Body section, we are defining the two carousel HTML code. Now, explaining the working of the first slider code. We have divided a row class div into two columns using col-md-6 class. And into the first column, we added HTML code of first carousel slider same as below.


<div class="row">
 <!-------------- first column start -------------->
 <div class="col-md-6">
  <div class="jumbotron">
   <center><h3>Carousel One</h3></center>
   <!-------------- first carousel slidesshow start -------------->
   <div id="carousel-1" class="carousel slide" data-ride="carousel">
   <!-- slides bulletes -->
   <ol class="carousel-indicators">
    <li data-target="#carousel-1" data-slide-to="0" class="active"></li>
    <li data-target="#carousel-1" data-slide-to="1"></li>
    <li data-target="#carousel-1" data-slide-to="2"></li>
   </ol>

   <!-- wrapper for slides -->
   <div class="carousel-inner" role="listbox">
    
    <!-- slides 1 -->
    <div class="item active">
     <img src="images/girl-1.jpg" alt="Chania">
    </div>
 
    <!-- slides 2 -->
    <div class="item">
     <img src="images/girl-2.jpg" alt="Chania">
    </div>
 
    <!-- slides 3 -->
    <div class="item">
     <img src="images/girl-3.jpg" alt="Flower">
    </div>

   </div>

   <!-- left and right slides control arrrows -->
   <a class="left carousel-control" href="#carousel-1" role="button" data-slide="prev">
    <span class="glyphicon glyphicon-chevron-left" aria-hidden="true"></span>
    <span class="sr-only">Previous</span>
   </a>
   <a class="right carousel-control" href="#carousel-1" role="button" data-slide="next">
    <span class="glyphicon glyphicon-chevron-right" aria-hidden="true"></span>
    <span class="sr-only">Next</span>
   </a>
  </div>
  <!-------------- first carousel slide show end -------------->
  </div>
 </div>
 <!-------------- first column end -------------->
</row>

There three parts of carousel slider into above HTML code

  • Slider Bullets
  • Image Slides
  • Slider Navigation

Slider Bullets section it’s build using order list tag of HTML. <ol> uses a class named carousel-indicators, which defined into the bootstrap CSS file. And each <li> tag has a attribute data-target=”#carousel-1″ where #carousel-1 is the same ID we are using in first carousel js code into example code.

Slider Image Slides section has a div with a class item. In each, of this div, we have added an image tag to load slide image.

Slider Navigation is used to navigate image slides left or right direction. Navigation arrows are created by bootstrap graphic icons called Glyphicon. Navigation buttons are wrapped into anchor <a> tag with bootstrap carousel data attribute function and with carousel-control class. Into <a> tag into href attribute, we have added the same ID ( #carousel-1 ) as we added before into slider bullets part. This ID is used into first carousel slideshow js code to activate the first slider functionality into first slider HTML code.

Into our second slider code, we have assigned another ID #carousel-2 for all three parts of slider code like into second slider js code, second slider bullets, and navigation HTML code.

Hope! you guys find the tutorial & example code is descriptive and working for you. We have commented on each and every section of code into the example, so you could understand easily each and every code.

Guys if you have a suggestion regarding tutorial language & downloadable example code then please write to us at our mail. Our email address is awordpresslife{at}gmail{dot}com

Thanks to reading, using and supporting this tutorial.

Find the Useful References links below which we looked to write this tutorial for you:


Top 10 Beautiful WordPress Themes October 2015

1. Merlin

Merlin is a beautiful designed Magazine WordPress theme with a responsive layout. The theme comes with a gorhttps://awplife.com/top-10-beautiful-wordpress-themes-october-2015/geous Post Slider, Magazine Homepage template and a Header Widget area.


2. News Maxx Lite


The New Maxx – a free WordPress blog theme designed for the online publisher with support for images, galleries, audio and video. This theme can be used to setup a fashion website, a studio, Photography, Artistic Showcase, or similar website that needs to show yours product on beautiful landing pages.


3. Himalayas


Himalayas is modern style free one page, parallax and responsive WordPress theme. Inform your visitors all they need to know right from your home page without requiring to go to the other pages. Himalayas can be used for business, portfolio, corporate, agency, photography, freelancers and almost any kind of sites.


4. SKT Hotel Lite


SKT Hotel is a hotel WordPress theme which is responsive. It caters to hotel, hospitality business, restaurant, eatery, cuisine, recipe, cafe, lodge, food joint and others. It is mobile friendly and has a very nice animated homepage. SKT Hotel Theme can be easily set up using Customizer API.


5. Aron


Aron is the best free responsive wordpress theme for Multi-Purpose. Anyone can install this theme into their website. Its very sleek and comes with fully customization options. It has a very simple admin section.


6. Allegiant

Allegiant is a multipurpose WordPress theme suited for creating just about any kind of website. It comes with a vast array of features that will let you create many different kinds of content– from portfolios to services and team members.

This theme is especially great for designing event-oriented websites and agency pages. You can take advantage of the team member functionality to showcase people of your organization. You can also add a testimonials section for social proof.

Allegiant is completely responsive, and can adapt screen size of any device. Your content will be handled gracefully and will shine on every way possible.


7. Magzimum


Magzimum is a  simple, clean and responsive WordPress theme designed to suit the need of Magazine, Blog and News sites. It has built-in WordPress customizer. It’s now easier than ever to make your website according to your needs. You can easily add a custom logo, favicon, web clip icon, social icons, background, custom menu, slider, featured content, breaking news, pagination, bradcrumb and more.


8. Mystore


With MYStore, which is fully responsive and packed in a big bunch of settings. It will let you customize almost everything from the header colors, layouts to the body content & design. You can select between 5 different footer layouts in premium. MYStore is also integrated with WooCommerce so you can easily build an online store and select between 2 different WooCommerce layouts. It is integrated with SiteOrigin’s Page Builder plugin which allows you to easily build beautiful page layouts that you want. It has styling option for Contact Form 7 to make beautiful contact pages. MYStore Theme also comes with a simple beautiful default slider as well as the options to add other sliders. You can select your own fonts and colors, social links etc. You can also make blog and Shop page with full width with a variety of page templates… MYStore has it all… Enjoy.


9. Morning Time Lite


Morning Time Lite is a modern and clean Premium WordPress theme designed for personal Blogging. The theme will help you to get a unique look for your blog as it has a lot of great features. Morning Time Lite is perfect to display daily articles in a beautiful way. The design is responsive, so the  theme could look just perfect for devices such as iPad, iPhone, and desktop. It has a great post format gallery which creates the possibility for you to display images from your galleries inside posts. Morning Time Lite also comes with awesome standard post format, audio post format, quote, aside and video post format.


10. Simtiful


Simtiful is a simeple and full responsive WordPress theme designed for Simplicity, Usability & Legibility.

Hope you find some beautiful theme for your blog, client or business.

Greeting From A WP Life Team