Cryptocurrency Exchange Free WordPress Theme Setup

Cryptocurrency-exchange is a free WordPress theme with very fine-tuned design, typography, and color used for all types of cryptocurrency-related business. Cryptocurrency theme is useful for all type of websites like cryptocurrency blog, news, market, exchanges, coins, hardware, mining, algorithm, business, or even cryptocurrency live update website. You can easily set up and configure the theme the same as the demo.

How to setup Cryptocurrency-Exchange free WordPress theme?

We are explaining everything with detailed guidelines below, follow and set up the Cryptocurrency-exchange theme on your website.

Main Steps

1. Download and Activate
2. Adding Navigation Menu
3. Setup Homepage
4. Enable Slider Section on Homepage
5. Enable Service Section on Homepage
6. Enable Portfolio Section on Homepage
7. Enable Blog Section on Homepage
8. Enable Testimonial Section on Homepage
9. Enable Email & Icon Settings Section on Homepage
10. Import demo data using XML file

1) Download and Activate

Login into your WordPress website admin dashboard. Simply, Go to the Appearance > Themes > Add New

Check the highlighted area into the screenshot

On Add Themes page type the “cryptocurrency-exchange” into the Search box, WordPress will display the cryptocurrency-exchange theme into a search result and click on the Install button

After the theme installation finished click on the Activate button to activate the theme on the website.

The cryptocurrency-exchange theme has been activated on the website. You can visit the site with the newly activated theme.

Your website will look like this:


2. Adding Navigation Menu

The first step is to create a navigation menu for your website. But, before creating a navigation menu, you need to create some pages which will be used in your navigation menu. You can make some sample pages like Home, About, Service, Blog, etc.

Simply, Go to dashboard Appearance > Menu and follow the screenshot.

A) Write a Menu Name as “Primary Menu”, you can name it according to you.

B) Select the pages to add to the menu

C) Set the menu pages position by drag and drop option

D) Click on Create Menu button

After creating the menu it will show Menu Setting, this setting allows you to choose the menu display position on the homepage like Primary, Header, and Footer. The location feature depending on themes character, some themes provide multiple menus location for it.

The site navigation has been added successfully, check the navigation preview on the homepage.

3. Setup Homepage

Currently, the homepage will show the post with right sidebar page. Now open the theme customizer to set up the homepage and click on the Customize button at the top bar.

Set the Homepage Settings tab into the customizer.

A) simply, Set Your Homepage Display – A static page

B) Choose Homepage – Home (Home is a page, which is created during navigation menu creation)

C) Set Posts page – Blog (Blog is a page, which is created during navigation menu creation)

D) Click- on the Publish button.

4. Enable Slider Section on Homepage

After activating cryptocurrency-exchange homepage, you will see first setting tab  HomePage Slider Settings.

Here at Home Page Slider Setting or Slider Section, Make it Active to enable the slider on the homepage. Now, you can change the Title for the slide, Slider Description, Button-Link, and Button Text. You can add three slides to the slider section. and the premium version can add multiple slides without any limit.

5. Enable Service Section On Homepage

Move back to your customizer settings and select the HomePage Service Settings setting tab.

In HomePage Service Setting Select Service Section – Active to enable the service on the homepage. Now, you can change the section title, description service icon, service title, service description. You can add up to Three services in that section. In premium version can add multiple services without any limit.

6. Enable Portfolio Section On Homepage

Step back in customizer settings and select the HomePage Portfolio Settings setting tab.

In HomePage Portfolio Setting Select Portfolio Section – Active to enable the portfolio on the homepage. Now, you can change the section title, Section Description Upload Portfolio Image, Project Title, Description. You can add up to Three portfolios in that section. In premium version can add multiple portfolios without any limit.

7. Enable Blog Section On Homepage

Step back into customizer settings and select the HomePage Blog Settings setting tab.

In HomePage Blog Setting, select Blog Section, and make it Active to enable the blog on the homepage. Now, you can simply change the blog title, blog description. In premium version can add configure blog section features settings like column layout and blog page layout.

8. Enable Testimonial Section On Homepage

Step back in customizer settings and select the HomePage Testimonial Settings setting tab.

In Home Page Testimonial Setting select Testimonial Section  – Active to enable the Testimonial on the homepage. Now, you can change the  Section Title, Section Description, client Image, Client Description, Client Name, Designation. In premium version can add multiple testimonials without any limit.

9. Email & Icon Settings Section On Homepage

Step back in customizer settings and select the Email & Icon Settings tab.

In Email & Icon Setting enables the homepage. Now, you can type your email, and enable social media icons on the top menu.

The Final Preview Of Cryptocurrency-Exchange Theme

10. Import Demo Data Using XML File

Go admin menu Tools > Import and brose the XML file downloaded using the below link.

Finally, we have completed the tutorial about cryptocurrency-exchange free WordPress theme setup on a website. Hopefully, you will find this theme setup tutorial easy-going and useful. Your feedback and support questions about the cryptocurrency exchange theme are really appreciated in the comment section.

Top 10 Online Education And Learning Websites

Nowadays the development in the education sector is increasing rapidly with the platforms that provide free of cost and paid online education to learners and workers who want to increase their knowledge as well as their skills. After the launch of these online education websites, you don’t have to visit any universities or colleges now education comes to you, the only source you need in order to access these resources is the internet.

There are many websites that provide online courses like certificate programs and degree programs to choose from, learn from the professionals and talk to them if you have any queries. To save your time we have done some research and come up with the top 10 websites that provide world-class education and also have tie-ups with the world’s top universities and institutes.

1. Udemy

Udemy is one of the top utilized online education websites worldwide with millions of users. It provides learning courses for almost everything which is available for you which can be learned.

There are above 100 thousand online video tutorials and articles of the courses available for you to upgrade your skills. Got any queries to consult ask our experts.

Get lifetime access to the hub of online education where you can get courses in almost all fields and can you can also get experts to advise on your future plans.

Read more…

2. Coursera

Coursera is one of the most popular online learning websites which collaborated with the world’s highest-ranking universities and top companies.

The interaction system of the learning very unique each module is like real-time book with exclusive video learning and also there also activities like quiz and project for better learning.

It is the revolutionary way of learning your favorite topics and enhance your development skills.

3. Lynda

Lynda is a top online educational hub for students and professionals who want to learn new skills related to business, creativity, and technology.

Everything you want to learn is available here like animation, designing, creative media, and much more. Get the unlimited access to the topics you want to learn and reeducate yourself anytime.

Signup for your 30 day trial period in which you get limited access to the Lynda but if you want full access you can choose from basic and premium membership. You can revoke your membership even after deleting your account and login it again.

Read more…

4. Open Culture

Open Culture is also the one of top educational platform which provide learning courses free of cost. All the courses are list in the alphabetical order for you to easily find the your suitable course.

Website provide free access to all the audio & videos tutorials of the courses and you can even download these from the YouTube. Courses are provided by the universities all around the globe so that you can easily choose courses from the top universities.

Read more…

5. edX

edX is an online learning platform which provides excellent quality educational courses provided by the world’s No.1 universities and educational institutes.

People who are not able to afford study in the top colleges and universities can get their desired education online by simply paying a little amount of money.

It is specifically run by the group of universities and institutes that’s it is the best website to get your dream education started.

Read more…

6. Tuts+

Envato’s Tuts+ is for the people who always give their time in learning something new and exploring many different fields.

It is the best learning platform from where you can gain knowledge about the single topic in-depth, there are a lot of articles and videos available on the website for the users.

A monthly subscription can cost you USD $16.50 and it gives you access to Envato’s Tuts+ as well as it includes Envato Elements.

7. Udacity

Udacity offers both online courses and credentials that teach learners the skills that are currently trending and in demand by industry employers.

They claim to offer their education at very low cost very much less comparing with traditional schooling.

If you’re planning on working in technology, this could be the excellent platform to look into.

8. ALISON

ALISON resources are designed for absolutely anyone looking for any kind of new job, promotion, college placement or any business venture.

You can choose from a wide range of subjects to pick from over 800 free courses which are specially designed to provide you with certificate and diploma level education.

You’ll also be required to take assessments and you need score at least 80% to pass, so you know you’ll have the skills to move forward.

Read more…

9. OpenLearn

It is one of the best option for online learning. OpenLearn offers both the interactive & topical content in a wide range of content formats, including courses.

You can easily filter free courses by activity, content format (audio or video), topic and other options.

All courses are listed according to skill level (introductory, intermediate, etc.) and the time length to give you an idea of what you can expect from that course.

Read more…

10. CakeHR Blog

There are a lot of tips in this blog for HRs struggling to provide the most HR managers for employees by boosting their engagement, talent development, and use of technology for a personal advance at the workplace.

The results and success of any company depend to a great extent on its employees’ job satisfaction and ability to withstand any challenges and hardships. That is why it is very important for an HR specialist to understand what happens to people within an office and how to improve their working environment. 

HR blog CakeHR provides many interesting and consistent tips for using technology, HR main principles, resolving issues.

Read more…

Make an Amazon Affiliate Store With WordPress

Do you want to make an Amazon affiliate store with WordPress?

You can sell products through Amazon affiliate store from Amazon.com as an affiliate and earn a good commission on every sale. Due to less overhead, the Amazon affiliate store is the easiest to start at the time.

Here are some main points or steps we are going to follow to make an Amazon affiliate store with WordPress.

  1. What is an Amazon affiliate store?
  2. Get started with Amazon affiliate store and WordPress
  3. Sign up for the Amazon affiliate program
  4. Add affiliate products in WooCommerce
  5. Resources to increase your affiliates
  6. FAQs about running an Amazon affiliate store

Lets Start…

What is an Amazon affiliate store?

An Amazon affiliate store promotes products that are listed for sale on Amazon.com.

If you are a store owner then you can send traffic to Amazon by adding your affiliate links to the products. Users will redirect to Amazon if they will complete the purchase then you will get your affiliate commission on every sale.

when you are an owner of an affiliate store, you don’t have to worry about manage orders, ship products, and keep track like a traditional online store.

Amazon store is too popular because you can start an affiliate store with very little money and choose from millions of products listed on Amazon

Get started with Amazon affiliate store and WordPress

You can start an Amazon affiliate store with WooCommerce plugin because it’s the most popular solution for any online store based on E-commerce. WooCommerce is using by millions of eCommerce based websites all over the world.

You will also need a Hosting account on good Hosting company, a domain name, and an SSL certificate if you want to sell products on your website.

Basically, a domain name costs around $14.99 / year, web hosting costs around $7.99 / month, and SSL certificate costs around $69.99 / year.

If you are a beginner, then this is quite a lot.

Thankfully, Hostinger, a fastest and value for money recommended hosting providing company, has agreed to offer our users a free domain name, free SSL certificate, and a discount on web hosting.

Basically, you can get started for $3.95 / month.

Once you have installed WordPress, you’ll reach the WordPress dashboard which looks like below image.

Now, you need to install a good theme and plugins as you want, also you need to install the WooCommerce plugin. For this blog I am installing the Daron theme, it is very nice and it is fully supported WooCommerce For more details, see our step by step Post for how to install a WordPress plugin and how to setup Daron WordPress theme.

After activation, WooCommerce will start the setup wizard to choose the currency, payment methods, and location etc.

Since you are setting up an affiliate store, you can skip the setup with a click on ‘Not Now’, it is on the bottom of the page.

If you need in the future then you can configure each option in the setup.

Sign up for the Amazon affiliate program

Now you have installed WordPress, theme and WooCommerce plugin, you have to sign up for an Amazon affiliate program to start adding products with your affiliate ID.

Go to the Amazon Affiliate program and click on the ‘Join now for free’ button.

Next, you need to log in with your existing Amazon account using the email address and password associated with that account.

If you don’t have an Amazon account, then you need to create one.

Once you are signed in, now provide payee information and answer questions about your website. Follow the on-screen instructions to complete your profile.

After completion of the associate account, your application will be reviewed and approved by Amazon.

Add affiliate products in WooCommerce

WooCommerce is the best plugin any affiliate store WordPress site. It is very easy to add external affiliate products to your website on the WordPress site.

To start importing products, you need to go Products » Add New page.

First, provide a title and detailed description in the post editor.

After that, scroll down to the product data meta box and select ‘External/Affiliate Product’ under ‘Product type’ from the dropdown menu.

Now enter the product Affiliate Link. You can get the affiliate Link from your Amazon Associates account. Simply search for the product and click on the get link button.

Copy the URL from the popup and paste it on your product edit page in WordPress.

Note: You have to leave the ‘Price’ field blank because this will allow users to check the price on Amazon.com. Policies of Amazon’s affiliate program do not allow you to manually enter price information.

You need to provide a short description of the product because this description will appear on the product page, product category pages, and search results.

You can add a product image and more images for product gallery.

Now, you can click on the publish button to make the product page live on your website.

Repeat this process for adding more affiliate products to your website. Once you have added a few products on your site from Amazon, you can check the shop page on your website to see the products in action.

Resources to increase your affiliates

You have done set up your Amazon affiliate store, now you can focus on growing your business.

Fortunately, there are many plugins and resources that will help you grow your site.

You can start with SEO and optimize your WooCommerce store for search engines. You can see this blog for best SEO plugins to optimize your website for better results in google rankings.

Blogs about good products will increase your site traffic you can read this useful blog about Top Most Tips To Increase Your Blog Traffic

You always need to look to add useful products, helpful reviews to your website.

FAQs about running an Amazon affiliate store

Here are some question and answers that everyone wants to know.

1. Can I use the original content from Amazon for product pages?

Ans. No, you cannot use the original content from Amazon because Amazon has a strict content policy where you are not allowed to copy product content directly from Amazon.

Most affiliate stores add their own product descriptions, get images from the product manufacturer’s website.

2. Can I add affiliate products from other websites?

Ans. Yes, you can add affiliate products from another website. This will be useful to grow your earnings.

3. I live outside of the United States, can I join the Amazon Affiliate program?

Ans. Yes, Amazon allows affiliate program for other country users.

4. Is it necessary to disclose about my affiliate partnership?

Ans. Yes, you need to disclose your affiliate partnership because Amazon’s program policies and the US laws require you to disclose that you’ll earn a commission when users buy a product.

All websites are required to disclose affiliate partnership that use advertising or affiliate marketing to make money so.

5. Can I promote Amazon products on other websites without creating an affiliate store?

Ans. Yes, you can add affiliate links to your blog posts or through other social media platforms like Facebook and Twitter

We hope this article will be helpful for you to start an Amazon affiliate store using WordPress. You may also want to see our blog for OWASP WordPress Security Implementation Guide.

If you liked our article, then please subscribe to our YouTube Channel for WordPress video tutorials. You can also find us on Facebook.

How To Disable Gutenberg & Switch Back To Classic WordPress Editor

Do you want to disable and remove Gutenberg and use a classic WordPress editor on your website?

Gutenberg is a new WordPress editor which replaced the classic WordPress editor. While it looks unique and modern. A lot of WordPress users are finding it hard to use and would prefer to keep the old classic editor. In this Blog, we will teach you how to disable Gutenberg editor in WordPress and use a classic editor in WordPress.
before, “How to Disable Gutenberg Editor in WordPress and Use a Classic editor” you should know about what is Gutenberg?

Gutenberg is a newly WordPress editor with a goal to modernize the WordPress writing experience.

It attempts to work as a page builder plugin and allows you to drag and drop items into your post or page. The goal is to offer WordPress users to create a unique layout for their content.

Since WordPress 4.9.8, the WordPress team has added a call to try Gutenberg in the WordPress dashboard. The purpose of this to get feedback from millions of WordPress users. Now, Gutenberg will become a default WordPress editor with the release of WordPress 5.0.

Many users feel that Gutenberg in its current state and not ready for live sites. Despite the negative reviews, the WordPress core team is moving forward with making Gutenberg a default editor in WordPress 5.0. This is making many users very concerned. They want to have an option to disable/unable Gutenberg and keep the classic editor.

Thankfully, there is a plugin by the WordPress core team which allows you to do that. Let’s take a quick look at how to disable Gutenberg editor in WordPress and use a classic editor in WordPress.

Keep Gutenberg and Classic Editor into WordPress by Plugin

For this method, we will use the Classic Editor plugin which is developed and maintained by the core WordPress team.
The first thing you need to do, install and activate the Classic Editor plugin.
The plugin works out of the box. it will disable the Gutenberg editor on activation.
This plugin also gives you an option to use both Gutenberg and the Classic editor at the same time. You can configure it into the plugin settings.

Simply, go to the Settings > Writing page in your WordPress admin dashboard area. You will see this option to do this under “Classic editor settings”.

Remember Do not forget to click on the save changes button to store your settings.

Now, You will be able to see a new link under the Posts menu to create new posts using the Add New (classic) by a classic editor.

Also, You will be able to edit older articles using the classic editor. Simply go to Posts > All Posts page and you will see an ‘Edit (Classic)’ link below posts.

Use the Classic Editor with Disable Gutenberg Plugin

If you want to disable Gutenberg then this method will help you do that.

First of all, you need to install and activate the Disable Gutenberg plugin into. after activation, you need to go to the Settings > Disable Gutenberg page to configure plugins setting.

By default, this plugin will disable Gutenberg from everywhere for all users on your site. However, if you want to limit it for certain user roles and post types, then you need to uncheck ‘Complete Disable’ options. Unchecking it will be displaying more options to disable Gutenberg for certain user roles, theme templates, post types or individual posts.

These settings will help if you are using a WordPress plugin that is not compatible with Gutenberg, but you want to use Gutenberg editor for other areas on your website.

If you want to eliminates the pain of dealing with code then you can use WYSIWYG WordPress plugin. This plugin allows you to build on WordPress website based on “what you see is what you get” approach.

We hope this article helped you, how to disable Gutenberg editor in WordPress and use a classic editor in WordPress.

Instagram Access Token Generator

To generate an Instagram Access Token online for any Instagram account is very easy and can be done in a minute. There are some websites available online to generate the token. So, we are showing the method using one of the websites to generate your access token online.

Follow the below steps:

1) Log in Your Instagram Account First

You need to login into your Instagram account first to start this process.


2) Generate Access Token

There is an online website named Pixel Union, open this website into the browser by clicking the link on the website name. You will see a green button there. Hit that button once.


A popup will appear and ask you to allow your Instagram account media & profile basic information access. So, allow it by clicking the Authorize button.


After authorizing the permission in popup it will generate the access token for your account. You can copy and use the access token directly into your Instagram app.


We also made a small video tutorial, how this process takes place. Have look below in YouTube video about Instagram Access Token Generator.


The below Youtube video is about how to use Instagram Access Token into Instagram Feed Gallery Premium WordPress plugin configuration settings.

Download Free Instagram Feed WordPress Plugin

  Download Instagram Feed

How to Create a Classified Website with WordPress: Just 8 Steps

Gone are the days, when people used to go through a classified ads section in a newspaper to find the services they need. Classified websites are better alternatives today.

On the other hand, they have become a better online business commercial center where people pitch their products and services to anyone interesting for the same. From mobiles to real estate to beauty products to jobs, different services and products can list on classified websites. If you too want to create a classified website, here is a step-by-step guide for you.

Step: 1 Choose a Domain Name

First of all, you should think of a domain for your website. Choose a domain name that best describes your brand. It should be short, memorable and easy to remember. Next, choose popular extensions such as “.com”.

If your classified website will be limited to a certain country, you can go for a country-specific extension such as .au(Australia) .br (Brazil), .in (India), .uk (United Kingdom), etc.

Once you’re done with choosing your domain name, it is time to register it. You can choose any of the popular domain name registrars such as Namecheap, GoDaddy, etc. Additionally, you can register your domain name with your web host.

Step: 2 Select Web Host & Hosting Plan

For any website, choosing a reliable web host is a crucial step. It is recommended that you choose the one that comes with multiple hosting plans, excellent uptime, and 24/7 support.

Finding such a provider can be a time-taking process. To save your time, you should read reviews about different hosting providers.  It is a better you search for a blog post comparing the top hosting providers of the industry. One such post is available here. It will help you know more about your potential hosting provider.

Talking about the hosting plan, it is advisable that you choose a WordPress optimized plan. With an optimized plan, you get pre-installed WordPress, which is better optimized for security and speed. With most WP optimized plans, you get automatic backups as well.

Step: 3 Use WordPress As Your Website Building Platform

When it comes to the content management system, WordPress is the most preferred platform. Millions of websites across the globe are built with WordPress. According to WordPress, they are powering more than 33% of all sites across the web. This platform is well-known for its ease of installation. Installing WordPress is a very simple process and takes less than five minutes. Let’s take a look at some advantages of WordPress.

-It can be downloaded and installed for free on your hosting account.

-It is a user-friendly platform. You can easily figure out how to work with it.

-It is highly customizable – thanks to its thousands of plugins and themes. You can add different functionalities and design to your website.

-It is an SEO friendly. There are numerous plugins available that help you optimize your site according to search engines.

If for any reason, you don’t want to use WordPress, you can go for self-hosted website builders as well. A website builder helps you launch a website in a few minutes.

Step: 4 Choose Theme and Customize Design

Now when you have chosen your domain name, hosting plan and website building platform, it is time to get into the details of how you want your website to look like in terms of design. In order to personalize your WordPress classified site, look for a theme that you can customize according to your needs.

There are a number of premium themes available on ThemeForest that you can use to create a classified website. MyListing is a good theme which lets you create any type of directory without using any web code. The theme allows you to design your pages on the front end.

Moreover, it is mobile-friendly, supports drag-and-drop front-end page builder. This theme has more than 50 ready-to-build elements for your site. WooCommerce integration is also supported by this theme.

Other WordPress classified themes you can consider are Classiera theme, AdForest, ClassiPress, etc.

You should choose a theme, which is flexible and gives you a lot of options to monetize your website. Also, don’t ignore designing part. Look for theme having a sleek design that can capture your visitors’ mind.

Step: 5 Give Your Website Some Structure

To create a fully functional classified website, add some pages and menus to your website. It will give your site some structure. Your theme will already have numerous templates for important pages, so you just need to edit them according to your requirement. Simply add your data on these templates.

Once all your pages are ready, link them with menus and submenus reflecting the different listings categories. According to your choice, you can create categories such as entertainment, personals, jobs, etc.

Always keep your website well-organized so that users can search for different listing easily. Make sure your home page is linked to the page which allows users to submit their classified ads or create an account.

Step: 6 Adding of Classified Services and Products

Add high-quality images with your product listing. It will give your users a better idea of the products you want to sell. Along with pictures, add relevant product description and other important details such as price, the location of the product, contact details of sellers, etc. On the basis of your listing, you can add more information. Design all your “call to action” buttons carefully. They should be clearly visible and easily accessible.

Step 7: Monetize Your Website

There is no benefit of creating a classified website if it is not monetized. Two of the best easiest ways to monetize a classified website is, through paid classifieds ad listings and advertisement banners.

You can place advertisement banners anywhere on your site. It can be your home page or category page. With premium themes like AdForest or MyListing, you get a simple way to display banner ads on your site.

In the beginning, you might have to reach out to advertisers yourself. However, once your site will start getting traffic, advertisers will be interested in advertising their products and services on your site.

Second monetization method is, charge for classified submission. You can offer two different tiers for those who want to post their ads on your site. For example, you can have a free tier that comes with some standard features and a paid tier that has advanced features.

Step: 8 Promote Your Classified Ads Site

It is not enough to create a classified website, you will also have to promote it and get a decent amount of traffic. One good way to promote your site is to use paid advertising via Google AdWords. It is a simple yet costly way to get more visitors to your website.

If you don’t want to invest a huge amount in the promotion, invest some time and effort in promoting your website via social media platforms such as Facebook, Instagram, Twitter, Pinterest, etc or via search engine optimization.

You can also create a YouTube channel and create some classified related videos to promote your website. Along with promotion also focus on maintenance of your website.         

That’s all you have to do to create a classified website and promote it successfully.

How to Get Instagram Access Token

With the A WP LIFE Instagram Feed extension, you need to generate an access token to display your photos. These steps to get the Instagram Access Token.

 1 – Register Application

To get your Access Token, first, you have to register as a developer on the Instagram website. After registration, Instagram will provide your Client ID. Please visit site https://www.instagram.com/developer to get your ID.

2. Log in Instagram

To get a Client ID you need to be registered on Instagram. Create an account or log in using the existing account to get on to the next step.

3 – Register New App Client

Go to Manage Clients, and hit “Register a New Client” to register and gain API access.

Register your App

Fill out the form with your website data.

  • Application name: Do not use InstagramIGinsta or gram in your app name.
  • Description: Write any description you want.
  • Company name: Fill company name
  • Website URL: Fill Your Website URL.
  • Valid redirect URI: Fill Your Valid URL

Click Button To Register

4 – Copy or Save Client ID

Copy the Client ID, you will need the Client ID to generate the Access Token.

5.  Get Instagram Access Token using the Client ID & Client Secret

Click The link  and  generate your Instagram Access token

Download Free Instagram Feed WordPress Plugin

  Download Instagram Feed

Edit WordPress Files Without CPanel Or FTP Client

It is very hard to edit server files, people are getting frustrated because they need to log in every time when they need to edit the server files.

We are showing you are a new way to edit files without CPanel or FTP.

Follow the below instructions to edit the server files.

  • First, you need a free plugin From WordPress Called “File manager”
  • Just go to the Plugins page From the admin menu of the WordPress then click on the Add New.

  • Now click on the search field and type there File Manager then you will see many file manager plugins, install anyone from them.
  • Click on the Install button then activate it.

  • After installing the file manager plugin, launch it with the click on the WP File Manager from the admin menu.

  • Now go to the file which you want to edit and Right Click on then click on Edit.

  • when will you click on Edit a Popup Editor will open, now you can edit the file and Save it, we are editing thumbnail.php of Photo Gallery Premium plugin. I have added a Comment in the file “Editing with file manager”, it will appear on the output of the gallery.

  • Edited file preview.

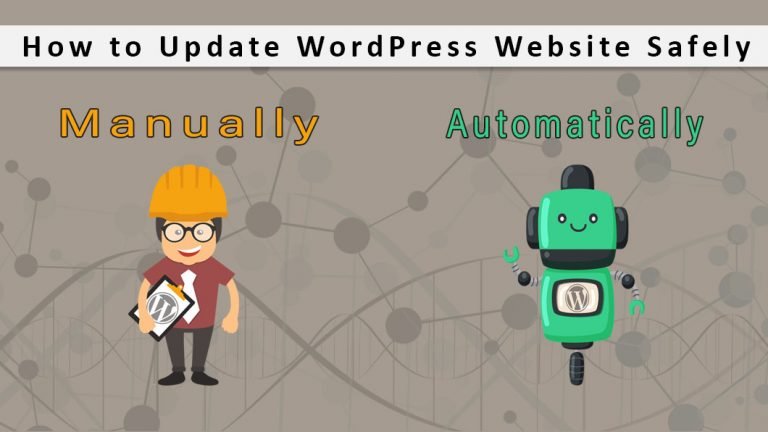
How to Update WordPress Website Safely (Manually And Automatically)

Updating your WordPress via the automatic method is highly recommended by experts. But this isn’t always possible. But not to worry, there’s an alternative. In a situation where one-click or the automatic WordPress update isn’t probable, the manual method can also be used. But care has to be taken so as not to run into errors.

Many users prefer automatic updates of WordPress plugins as they are tired of the process of updating a plugin regularly. Users ask want to know if it’s advisable to employ trusted developers to carry out auto-update plugins. However, whenever a security or even minor release is available by default.

However, it should be noted that WordPress has the ability to update itself automatically, most especially in the case where security or minor releases are available. But in the case of major releases, the user has to initiate the update by themselves. Secondly, theme updates and plugins also have to be installed by the users. Installing these new updates has the added benefit of having new fixes and features.

It won’t be okay to continue discussing this topic without first answering the question. Why should we update WordPress? Below are the reasons:

Why should we update WordPress?

1. SECURITY

Updating WordPress installations on a regular basis is very important for security. With the growing security concern from firms that conduct business via WordPress websites, and also consumers who use these websites, of this content management system. This doesn’t discredit the WordPress in any way as WordPress has a facility in place to monitor the platform and carry out necessary software update as soon as vulnerability is discovered.

WordPress is one of the well-known CMS making it a victim of a great percentage of attempts by hackers. WordPress also faces bugs and vulnerabilities which have dangerous effects. In securing a WordPress website a lot of factors need to be considered from, securing PHP, making use of a SSL certificate and conducting security audits regularly. But the most important of all is to make updating WordPress a priority. Plugins and themes also have been updated. The absence of this update affects the security of the site. WordPress updates helps in fixing and patching security holes, making it difficult for a hacker to break in.

2. SPEED

Nobody wants to waste time in a slow and unresponsive site. With each WordPress update comes optimization with the sole purpose of increasing the speed of the website.

  • New and better features

Any new version comes with these upgraded features and functionalities. All these are geared to make WordPress work efficiently. This update improves the work efficiency of a WordPress owner and also plays the role of improving the experience of visitors on your website.

How to update WordPress automatically?

The task of updating a website can be mind-numbing; the situation becomes annoying when tasked with updating more 2 websites. But the situation is better with the introduction of automatic updates by WordPress 3.7. This automatic update helps make the site administration process of the easier and also develop the installation security.

Below are steps to be followed in automatically updating your WordPress.

1. SCHEDULE BACKUPS

It’s of dire importance to have backups of a WordPress website saved on a daily basis, even when the updates aren’t processed manually. This is done by using a backup and restore plugin. This is safe option, just in a situation where there’s a mishap during the automated updates. With this procedure taken, the old version of the WordPress site can be restored from the backup. With the aid of WordPress back up plugins this all can be handled.

2. AUTOMATE WITH A PLUGIN

This comes in handy for those of us who are not developers, as WordPress automatic updates can be controlled using a plugin. Easy Updates Manager aids user to take control of WordPress updates on single or even as much as multiple site installations. With this free service won’t have to be disturbed with notification of waiting updates, this easing his or her work.

As soon as the plugin installed, there is also need to configure the settings. The plugin gives room for managing all the typologies that are required of WordPress updates. User blocking, logging plugin updates and notification emails are the additional features available. Where you need professional assistance with the right plugins to choose from, a good marketing agency can be employed. This is necessary to ensure that the site is fully optimized for search engines.

3. AUTOMATE YOUR WORK FLOW

Instead of using just one plugin for handling backups and updates, Why not preferably make use of one tool that consolidates all the both functions into one? ManageWP perfectly manages the work flow. ManageWP has the ability to ability to manage a good number of website updates from just a single dashboard. One other specific function that users applaud is its ability of scheduling backups on a daily basis and saving to the site destination of your choice.

Apart from work flow ManageWP also adds value to the level operation, health and security of the WordPress website.

4. DO A CHECK IF EVERYTHING IS OKAY

Take a general look at your website to see if everything is functioning well. Check to see if your page and post display haven’t been tampered with by the update.

5. BACK UP YOUR SITE AGAIN

If everything is intact, it is advisable to back up the website again. This is simply done to have an updated version of the website saved.

The level of changes to the site’s structure should be well contained. The recent image of the website should also be backed up.

How to update WordPress manually?

Below, are the steps taken to update your website manually:

1. BACK UP YOUR SITE

Once you are notified that an update is needed, backup your databases, uploads, themes and plugins. In order, for this to be done manually make use of a backup and restore plugin. A zipped copy of the backed up file can be save in a secure location in case a situation arises where there’s need to restore it.

2. DEACTIVATE ALL PLUGINS

When manually updating your WordPress, all the active plugins has to be immediately deactivated before the update kicks off. It has also been recommended by WordPress that your plugins should be deactivated before updating the core manually. This is done to avoid problems that normally occur if otherwise. This is simply done by selecting the plugins that are to be deactivated and selecting the deactivate option from the menu at the top.

3. DELETE OLD FILES

It is essential to replace the old version of WordPress with a newer version. The step to be taken here is making use of SFTP from your control panel to locate the old files. The old files would be found under wp-content. There’s also need to delete the wp-includes and wp-admin. Also delete the plugins and theme files that are already old.

4. ADD NEW FILES

New files should then be added to the wp-content directory. The new versions are uploaded into the previous ones. This overwriting function plays the role of updating all the previous plugins and themes. A lot of people are concerned of the fate of their media files and other plugins and themes. All will remain intact and in good condition.

5. UPDATE THE ROOT

Use SFTP or SSH in the control panel to log into your root directory. When in the directory replace all the old folders available with newer ones. All the files with the exception of wp-config.php will be overwritten. The reason for this is the new version previously downloaded doesn’t contain wp-config-php. This file can be located in the archive folder downloaded but with a different name, wp-config.php. The next step to be taken is to check the files to ascertain if wp-config-sample.php has any new lines. If in any case a new line is found, copy and paste the line into the old wp-config.php.

About Author

Jason Mayo composes on Digital Marketing, Real Estate, Shipping, Medical and also Logistics associated topics. His write-ups are enjoyable to check out and also extremely intriguing. He is versatile in creating interesting drafts and also his interests depends on numerous different areas of writing.

How To Install Free Plugin On WordPress

Are you looking to install or activate a WordPress Plugin? As a beginner, you may try out a few plugins on your site until you find the right one that completes your needs. In this guide, we will provide you with details step by step instructions on How To Install Free Plugin On WordPress for beginners.

Installing a WordPress plugin is very easy.

(How To Install Free Plugin On WordPress)


This tutorial explains how to install plugins and activate on your WordPress site.

Now, Go to the Dashboard > Plugins > Installed Plugins menu in WordPress. See below screenshots for More details.


our current plugin is the Blog Filter. At the top of this page, you’ll see Add New Button. Firstly click on it.

After clicking Add New Button Here we see a button to Upload Plugin, click on it then you see another button to Choose File.


Now click on the install button to upload your plugin which you want to install into WordPress. currently, I am going to upload my Image Gallery Plugin into it.

See the below screenshots for more details


After, All these steps simply Click on the activate button and enjoy.  Now, you can go to the home page of your site to see its new perfect Plugin look.