A disclaimer is a statement that limits or excludes liability for any damages or losses that may arise from the use of a product or service. It is a legal protection that companies use to avoid lawsuits and other legal actions. A disclaimer can also provide users with additional information about a product or service, such as its limitations, risks, or potential side effects.
However, manually inserting disclaimers into your content can be a time-consuming and tedious task. Fortunately, if you are using WordPress, there are several plugins available that can help you easily add a disclaimer to your posts. These plugins allow you to create a disclaimer once and then automatically insert it into all your posts or pages.
By adding a disclaimer to your WordPress posts, you can protect your company from legal action and provide users with important information. This article will provide you with step-by-step instructions on how to add a disclaimer to your WordPress posts using a plugin.
Why Is a Disclaimer Displayed in WordPress?
Including a disclaimer on your WordPress website is an excellent approach to informing your readers of crucial alerts and announcements. It also prevents your company from being held legally accountable for any claims made by a user.
Similarly, if you work in a sector controlled by distinct legislation, you can display legal disclaimers. This is extremely useful if you provide medical or health advice, legal counsel, or financial investment advice.
Assume you’re working on a blog article about the General Data Protection Regulation (GDPR). You can display a disclaimer informing visitors that they should get legal guidance from an internet law attorney.
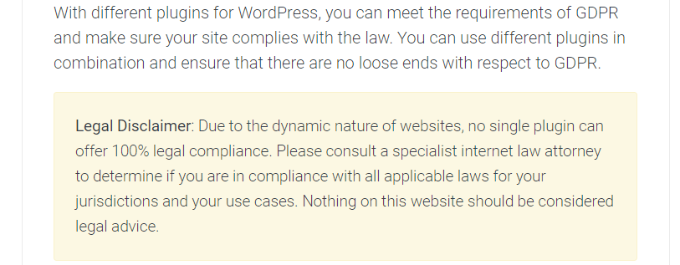
However, if you run a WordPress site where you discuss personal thoughts, such disclosure can protect you from legal action.
That being stated, let’s take a look at how to automatically add a disclaimer in WordPress.
Adding Disclaimers to WordPress
You may manually add disclosures to WordPress using the content editor. Simply include the disclaimer language in your blog articles or on your website. However, this is time-consuming because WordPress does not have an option to automatically display these warnings, and you would have to change each page.
WPCode provides a simple method to accomplish this. It is the finest WordPress code snippet plugin for managing and adding custom code snippets.
What exactly is a Code Blocks Snippet?
WPCode has a Custom Blocks Snippets functionality for creating disclaimers. It produces a custom WordPress block that you can install anywhere on your site instantly.
Normally, this would include changing code or creating a reusable block. WPCode simplifies the process by eliminating the need to fiddle with website code or manually change articles and pages.
You may use this WPCode feature to construct custom WordPress blocks for call-to-action boxes, show crucial notices, create interactive blocks with forms or image sliders, and much more.
We’ll be utilizing the WPCode Pro edition for this lesson because it contains the Custom Blocks Snippets option. However, there is a free version of WPCode that you may use to get started.
You must first install and activate the WPCode Pro plugin. If you need assistance, please visit our instructions on how to install the free WordPress plugin.
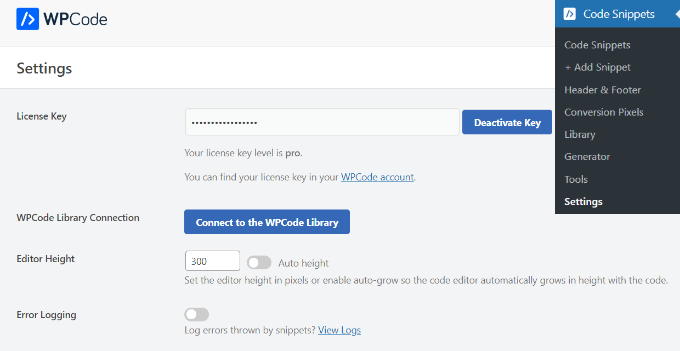
After activation, navigate to the WordPress admin panel » Code Snippets » Settings and enter the license key. The license key may be found in your WPCode account section.
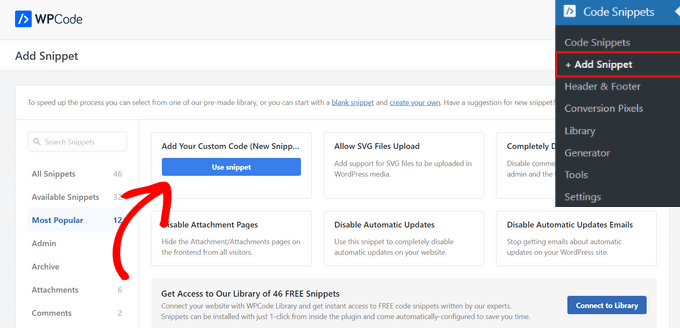
Then, from the WordPress dashboard, navigate to Code Snippets » + Add Snippet.
Select the ‘Add Your Custom Code (New Snippet)’ option from here.
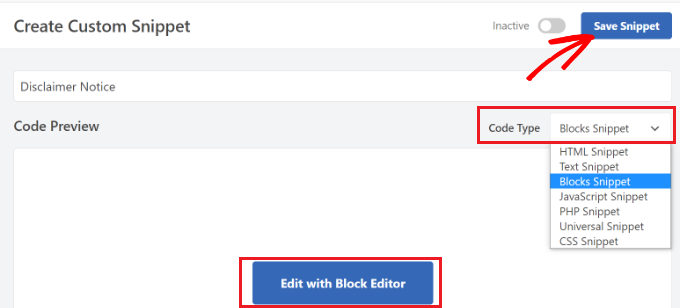
After that, you may give your snippet a name, such as ‘Disclaimer Notice.’
Then, pick the ‘Blocks Snippet’ option from the Code Type dropdown box. When you’re finished, just click the ‘Save Snippet’ button.
The WordPress content editor now allows you to change your disclaimer notice.
To do so, simply click the ‘Edit using Block Editor’ option.
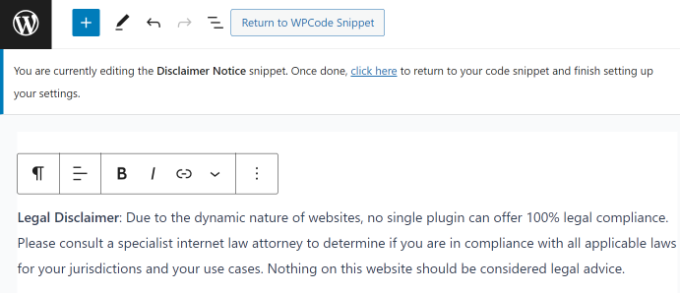
Following that, you’ll be directed to WordPress’s block editor. Enter the content for your disclaimer now.
You may further customize your disclaimer notice by utilizing the block editor’s stylistic tools.
Simply navigate to the ‘Style’ tab in the right-hand Settings panel. You may change the color of the text, background, and link from here. There are various options to change the font size.
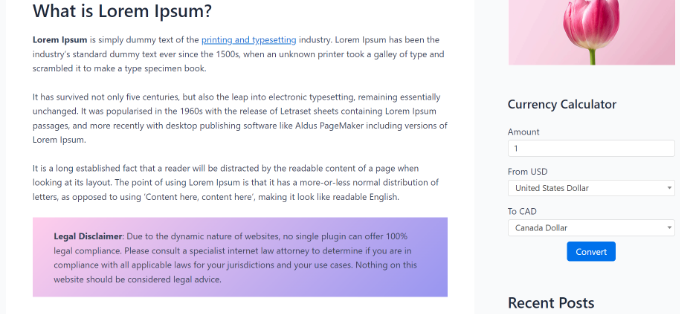
In this lesson, we will make the disclaimer notice stand out from the rest of the text by adding a background color to it. Remember to click the ‘Update’ button.

After you’ve customized your disclaimer notice, click the ‘Return to WPCode Snippet’ button at the top.
Adding Disclaimers Automatically in WordPress
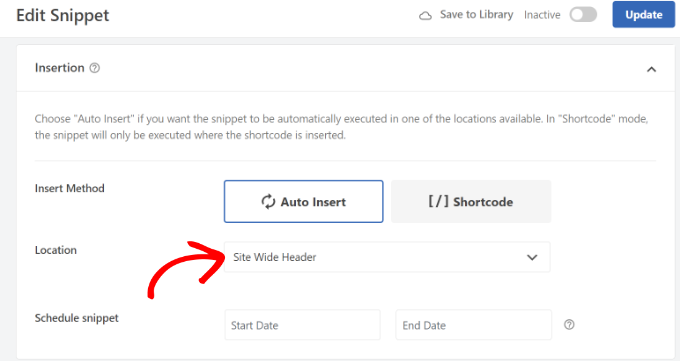
Simply scroll down to the ‘Insertion’ area once you’re on the WPCode Snippet screen. You may specify when and where your disclaimer notice will display here.
Keep the ‘Insert Method’ set to Auto Insert. After it, From the dropdown menu select a location.
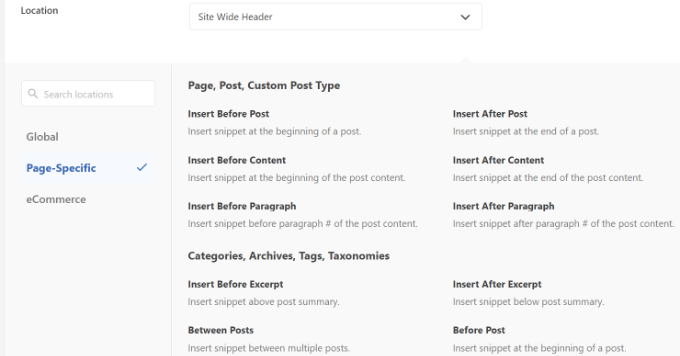
WPCode now displays numerous alternatives. Navigate to the Page-Specific tab now.
Following that, you can specify where the disclaimer will appear on your website. It can, for example, occur at the start of a post, after a few paragraphs, at the end of the post, and elsewhere.
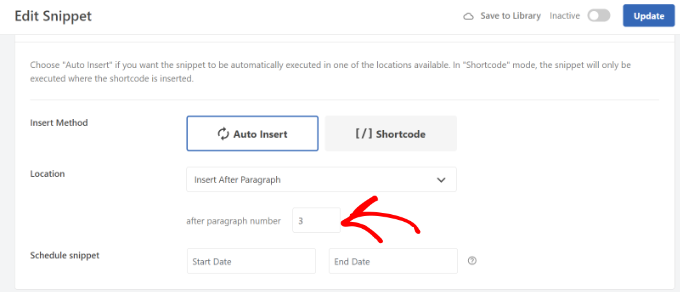
For the sake of this example, we shall pick ‘Insert After Paragraph’. After a specific amount of paragraphs, the snippet will show on all pages.
WPCode also allows you to choose the number of paragraphs after which the custom block snippet appears.
For example, on all pages of our sample site, we want the disclaimer notice to show automatically after the first three paragraphs.
Don’t forget to activate the blocks snippet and click the ‘Update’ button at the top after you’re finished.
Aside from that, you may use shortcodes to place the disclaimer notice on certain pages.
Simply change the Insert Method setting from Auto Insert to Shortcode.
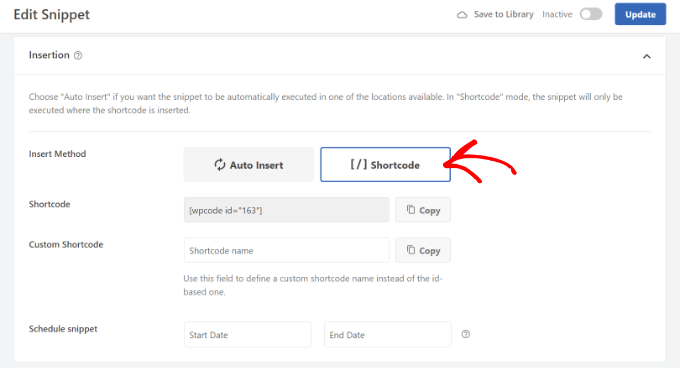
And then, copy and paste the shortcode anywhere on your website. You may, for example, display the disclaimer on select pages and posts.
WPCode also allows you to schedule disclaimer scripts. This is really beneficial if you need to publish a time-sensitive message on your website. To schedule the clip, simply enter the start and finish dates.
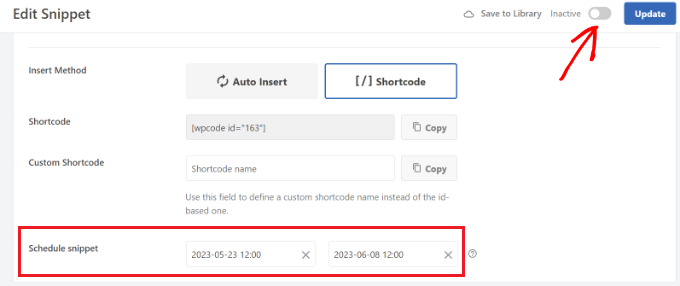
When you’re finished, activate the snippet and click the ‘Update’ button.
You may now see the disclaimer in action by visiting your website.
Wrapping Up
Adding a disclaimer to your WordPress posts can provide important information to users while protecting your company from legal action. Manually inserting disclaimers can be time-consuming, but with the help of plugins like WPCode, the process becomes much simpler. WPCode’s Custom Blocks Snippets feature allows you to create a custom WordPress block for your disclaimer, eliminating the need to modify code or manually change articles and pages. By following the step-by-step instructions provided, you can easily add a disclaimer to your WordPress posts and customize its appearance using the block editor’s stylistic tools. WPCode also offers options for automatically inserting disclaimers based on page-specific settings or using shortcodes for select pages. With WPCode, you can ensure that your disclaimers are displayed where and when you need them, providing both legal protection and valuable information to your website visitors.
