Not every blog needs cinematic hero shots, perfectly staged flat lays, or a studio’s worth of lighting gear. In fact, some of the most compelling blog visuals come from everyday photos: quick phone snapshots, behind-the-scenes moments, a messy desk, a rainy window, a coffee cup next to a notebook, a package arriving at your door, or a “real life” scene you didn’t plan to photograph at all.
Table of Contents
The challenge is that everyday photos often look… everyday. They can feel dim, cluttered, inconsistent, or too casual to support a professional blog. The good news is that you don’t need to replace your ordinary photos with expensive shoots. You need to upgrade how you select, edit, crop, and place them so they work like intentional storytelling assets.
This post is a practical guide to turning everyday photos into strong blog visuals that feel cohesive, credible, and engaging, even if they were captured quickly with minimal gear.
Start With the Role: What Should This Photo Do?
The fastest way to transform an everyday photo into a strong blog visual is to assign it a job.
Great blog images usually do one of these things:
- Set the scene: establish mood and context
- Show proof: demonstrate you actually did what you’re writing about
- Explain a step: make a process easier to understand
- Break up text: create pacing so the page feels lighter
- Add personality: make the blog feel human and lived-in
- Create a “scroll stop”: give the reader a rewarding moment to pause
When you know the role, you know what to fix. A proof photo needs clarity. A mood photo needs tone. A tutorial photo needs legibility. Everyday photos become powerful when they stop being random and start being purposeful.
Choose Everyday Photos That Feel Specific, Not Generic
Not all casual photos are equally useful. Some images feel like filler because they could have been taken by anyone. Strong blog visuals feel specific to your experience.
When reviewing your camera roll, look for photos with:
- A clear subject (one main thing the viewer can understand quickly)
- A distinct moment (something happening, not just a static scene)
- A sense of place (details that anchor it in reality)
- Human presence (hands, faces, tools, movement, or traces of use)
- Story clues (objects that imply action, change, or intention)
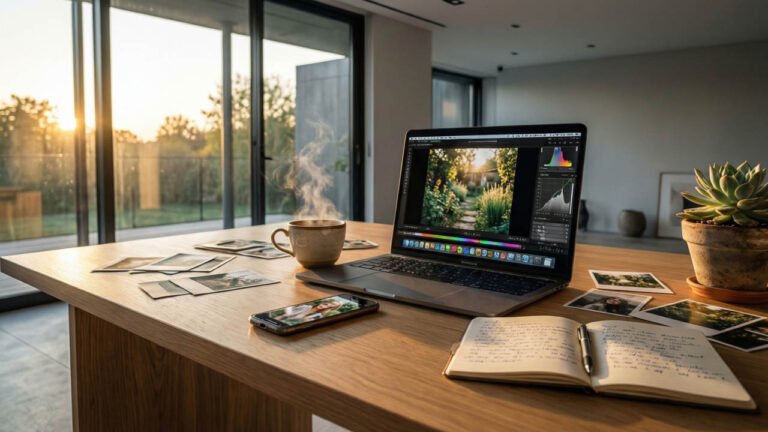
A photo of a plain laptop can be boring. A photo of a laptop with handwritten notes, coffee rings, and a to-do list can feel like a real day. Details turn “ordinary” into “authentic.”
Improve the Photo by Subtracting, Not Adding
Most everyday photos look unprofessional because there’s too much going on. You don’t need more props. You need fewer distractions.
Start with subtraction:
- Clear clutter from the frame if you can reshoot
- Crop tighter to remove dead space
- Angle the camera to avoid messy backgrounds
- Simplify the scene to one visual idea
If you can’t reshoot, cropping is your best friend. A strong crop can turn a chaotic snapshot into a focused blog image.
A useful test: if you squint at the image, can you still tell what it’s about? If not, crop or simplify.
Use Cropping to Create “Blog-Friendly” Compositions
Blogs often display images in consistent widths, and many readers view them on phones. That means your images need to read clearly at smaller sizes.
Cropping tips that work especially well for blog visuals:
- Crop to emphasize the main subject, not the environment
- Use rule-of-thirds placement to create breathing room
- Leave some negative space so the image feels clean and modern
- Avoid tiny subjects lost in wide scenes unless the point is atmosphere
- Use vertical crops (4:5 or 3:4) for mobile-heavy audiences when appropriate
Cropping is not cheating. It’s editing the story. The camera captured everything. You’re deciding what matters.
Fix Lighting the Simple Way
Everyday photos often suffer from bad light: overhead bulbs, mixed color temperatures, or dim interiors. You can’t always fix the capture, but you can often improve the result dramatically with simple adjustments.
If you can reshoot, do this:
- Move near a window
- Turn off overhead lights
- Angle your subject 45 degrees to the window
- Use a white wall or a piece of white paper to bounce light
If you can’t reshoot, edit for realism:
- Correct white balance first (remove yellow or green casts)
- Lift exposure gently
- Lower highlights if whites are blown
- Lift shadows slightly without flattening everything
The goal isn’t to make the photo look like a studio shot. The goal is to make it feel clear and believable.
Edit for Consistency Across Posts
Your blog will look more professional when your images share a consistent mood, even if they were taken on different days.
Pick an editing direction:
- Warm and cozy
- Bright and airy
- Muted and natural
- Bold and contrasty
Then apply a simple, repeatable recipe:
- Correct exposure
- Set white balance
- Control highlights
- Add gentle contrast
- Tame oversaturated colors
- Sharpen lightly (avoid “crunchy” edges)
Consistency beats intensity. A calm edit that matches your blog aesthetic will make an everyday photo feel intentional.
Turn Imperfections Into Style, Not Problems
Some everyday photos are imperfect in ways that can become part of the charm. A little grain, slight motion blur, or imperfect framing can feel authentic, especially in personal storytelling content.
The difference between “amateur” and “intentional” is usually consistency and context.
If your blog style is clean and minimal, keep imperfections subtle. If your blog style is personal and documentary-like, small imperfections can support honesty.
The key is to avoid accidental-looking mistakes that distract:
- Severe color casts
- Distracting clutter
- Unclear subject
- Overprocessing
- Random heavy filters that don’t match the rest of your site
Let photos feel real, but not careless.
Use Captions to Add Meaning
Captions can transform everyday photos because they tell the reader why the photo matters.
Instead of captions like “Working on this today,” use captions that add value:
- “This was the rough draft stage, when everything looked messy but the structure was forming.”
- “I took this photo to remind myself that progress often looks unorganized up close.”
- “This is the setup I use when I want soft window light without extra gear.”
Captions connect the photo to the narrative. They prevent the image from feeling like random decoration.
Build “Everyday Visual Systems” You Can Repeat
If you want strong blog visuals regularly, create a few repeatable everyday photo systems. These are easy setups you can return to whenever you need images for a post.
Examples:
- The desk shot: your workspace with consistent lighting and a simple background
- The process shot: hands doing the thing, always near a window
- The tool shot: the 3–5 tools you always use, photographed in the same spot
- The result shot: the finished output, staged simply on a neutral surface
- The behind-the-scenes shot: a wider view that shows context and personality
When you repeat the same systems, your blog naturally becomes visually consistent.
Pair Everyday Photos With Supporting Visuals When Needed
Sometimes you won’t have enough everyday photos to fully support a post, especially if you’re writing about a concept or an idea rather than a physical process. In those cases, free stock photography can be a positive, practical addition when used thoughtfully. It can help you add visual pacing, set atmosphere, or create clean header images without needing a full shoot for every topic.
The key is selection and cohesion. Choose free stock photography that matches your blog’s lighting style, color palette, and overall mood. Avoid overly staged images that feel like placeholders. Treat stock images as supporting actors, not the lead. Your everyday photos provide authenticity and proof. Stock visuals can provide structure and polish when your own library is thin.
Use Everyday Photos as Proof, Not Perfection
One of the biggest strengths of everyday photos is credibility. They prove you actually did what you’re writing about. A behind-the-scenes shot of your setup or a rough draft stage can build trust faster than a perfect, generic image.
Readers don’t always want perfection. They want reality they can learn from. They want to feel like your advice comes from experience.
Everyday photos are powerful because they are yours.
Placement Matters: Use Images to Keep Readers Moving
Strong blog visuals aren’t just about the photos themselves. They’re about where you place them.
Use everyday photos:
- After the intro to confirm tone and build connection
- In the middle to reset attention and prevent text fatigue
- Before key tips to create anticipation
- Near the end to provide payoff or a “proof” moment
If an image feels weak, sometimes it’s just in the wrong spot. Pair it with a section where it adds clarity or emotion, and it suddenly works.
Common Mistakes to Avoid
Even with the best intentions, these errors can undermine your blog visuals. Here’s what to watch for:
1. Over-Filtering
- Problem: Heavy Instagram-style filters that obscure detail and look dated
- Fix: Use subtle adjustments; if the filter is noticeable, dial it back 30-50%
2. Inconsistent Aspect Ratios
- Problem: Images jump between square, landscape, and portrait throughout the post
- Fix: Choose 1-2 aspect ratios for each post; 16:9 for headers, 4:3 for inline images works well
3. Ignoring Mobile Preview
- Problem: Images that look great on desktop but tiny or illegible on phones
- Fix: Always preview your post on mobile before publishing; crop tighter if needed
4. Generic Stock Photo Overuse
- Problem: Too many perfect, staged stock images that feel impersonal
- Fix: Use stock sparingly for atmosphere; lead with your own photos for authenticity
5. Low Resolution Uploads
- Problem: Blurry, pixelated images from over-compression or small source files
- Fix: Export at 2x your display size; compress using tools like TinyPNG after resizing
6. Missing Alt Text
- Problem: Images without descriptions hurt accessibility and SEO
- Fix: Write descriptive alt text for every image; describe what’s shown, not just “photo”
7. Watermark Overload
- Problem: Large, distracting watermarks that pull focus from the content
- Fix: If you must watermark, use small, subtle placement in corners; or skip entirely for blog content
The Everyday Photo Advantage
Turning everyday photos into strong blog visuals is less about becoming a better photographer and more about becoming a better editor, curator, and storyteller.
Your camera roll already contains:
- Moments
- Proof
- Textures
- Atmosphere
- Personality
- Process
With a bit of cropping, consistent editing, intentional placement, and helpful captions, those ordinary images become a visual language that supports your writing and strengthens your brand.
And if you ever feel like your everyday photos aren’t “good enough,” remember this: the most professional blog visuals are rarely the fanciest. They’re the ones that feel intentional, clear, and aligned with the story.
Everyday photos can do that beautifully. They just need direction.
