1. Download & Installation
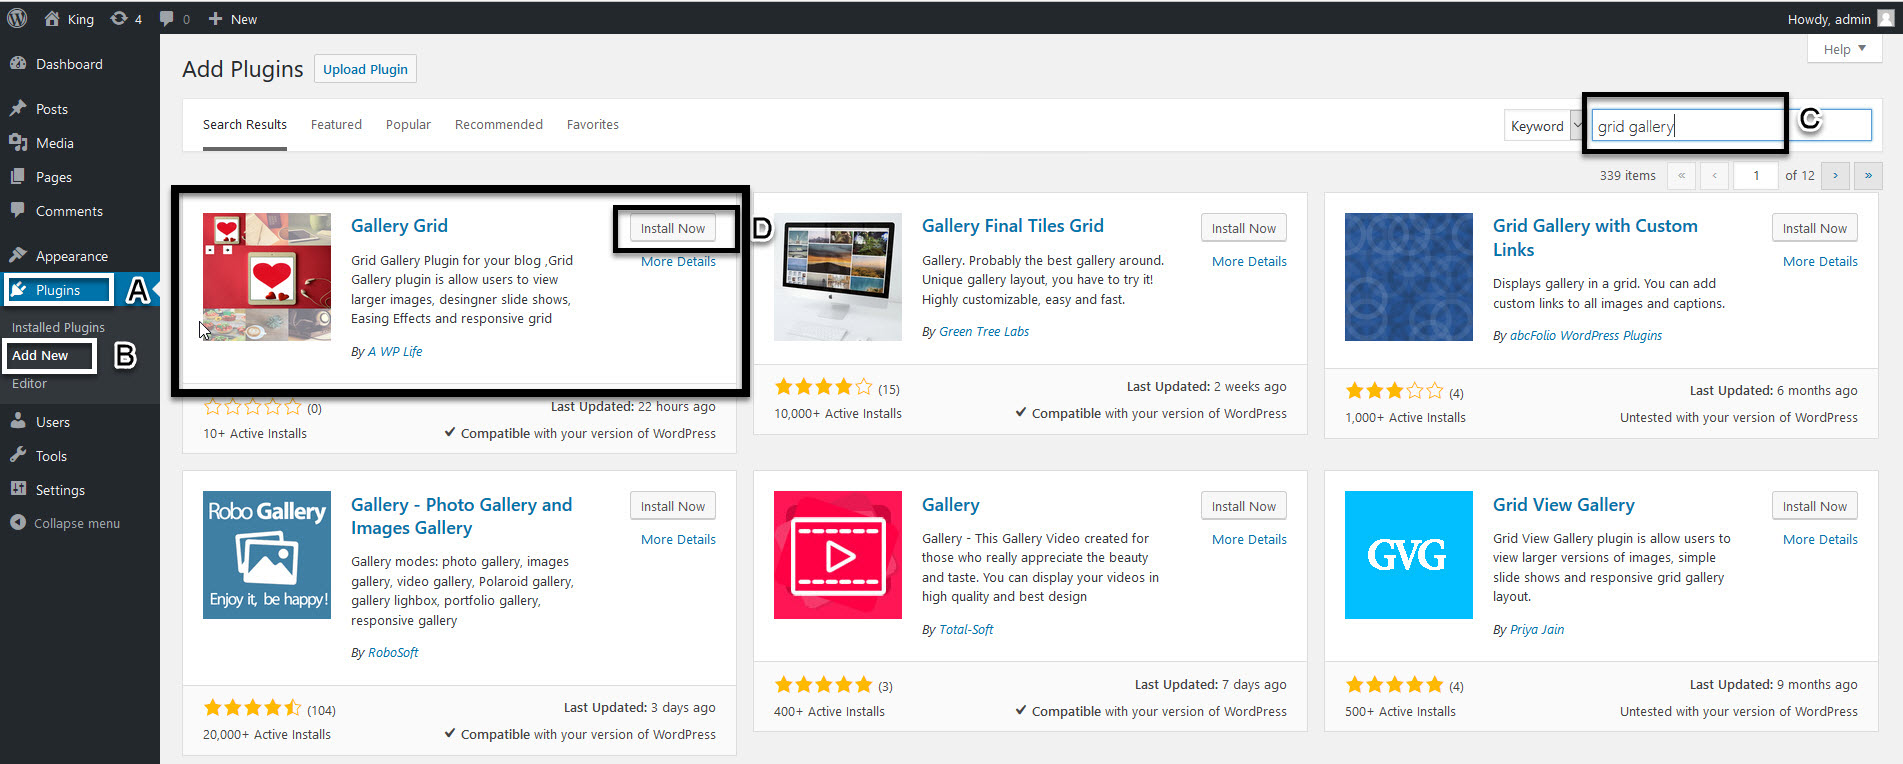
- First, download Grid Gallery Plugin from WordPress admin panel of your website.
- Click on plugins button from the admin menu bar.
- Click on add new.
- Search for “Grid Gallery”.
- Now click on install button and then activate.
2. Add Images Into Grid Gallery
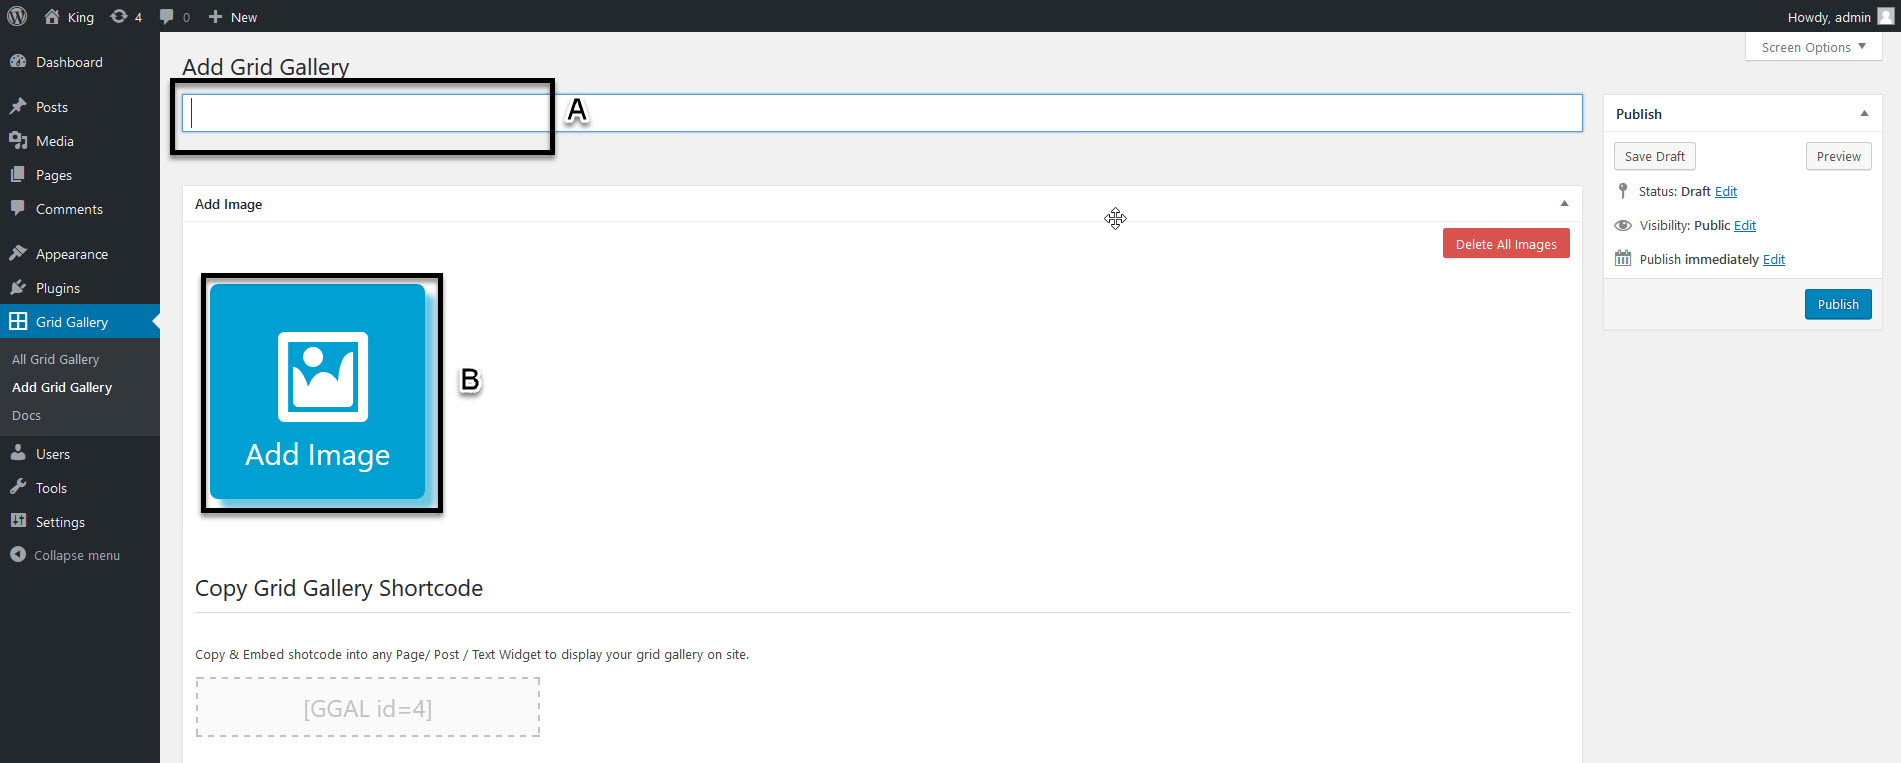
- To create gallery, click on grid gallery plugin in the menu bar.
- Then type “Grid Gallery” title in the text box.
- To add your images in Grid Gallery plugin click on Add Image button.
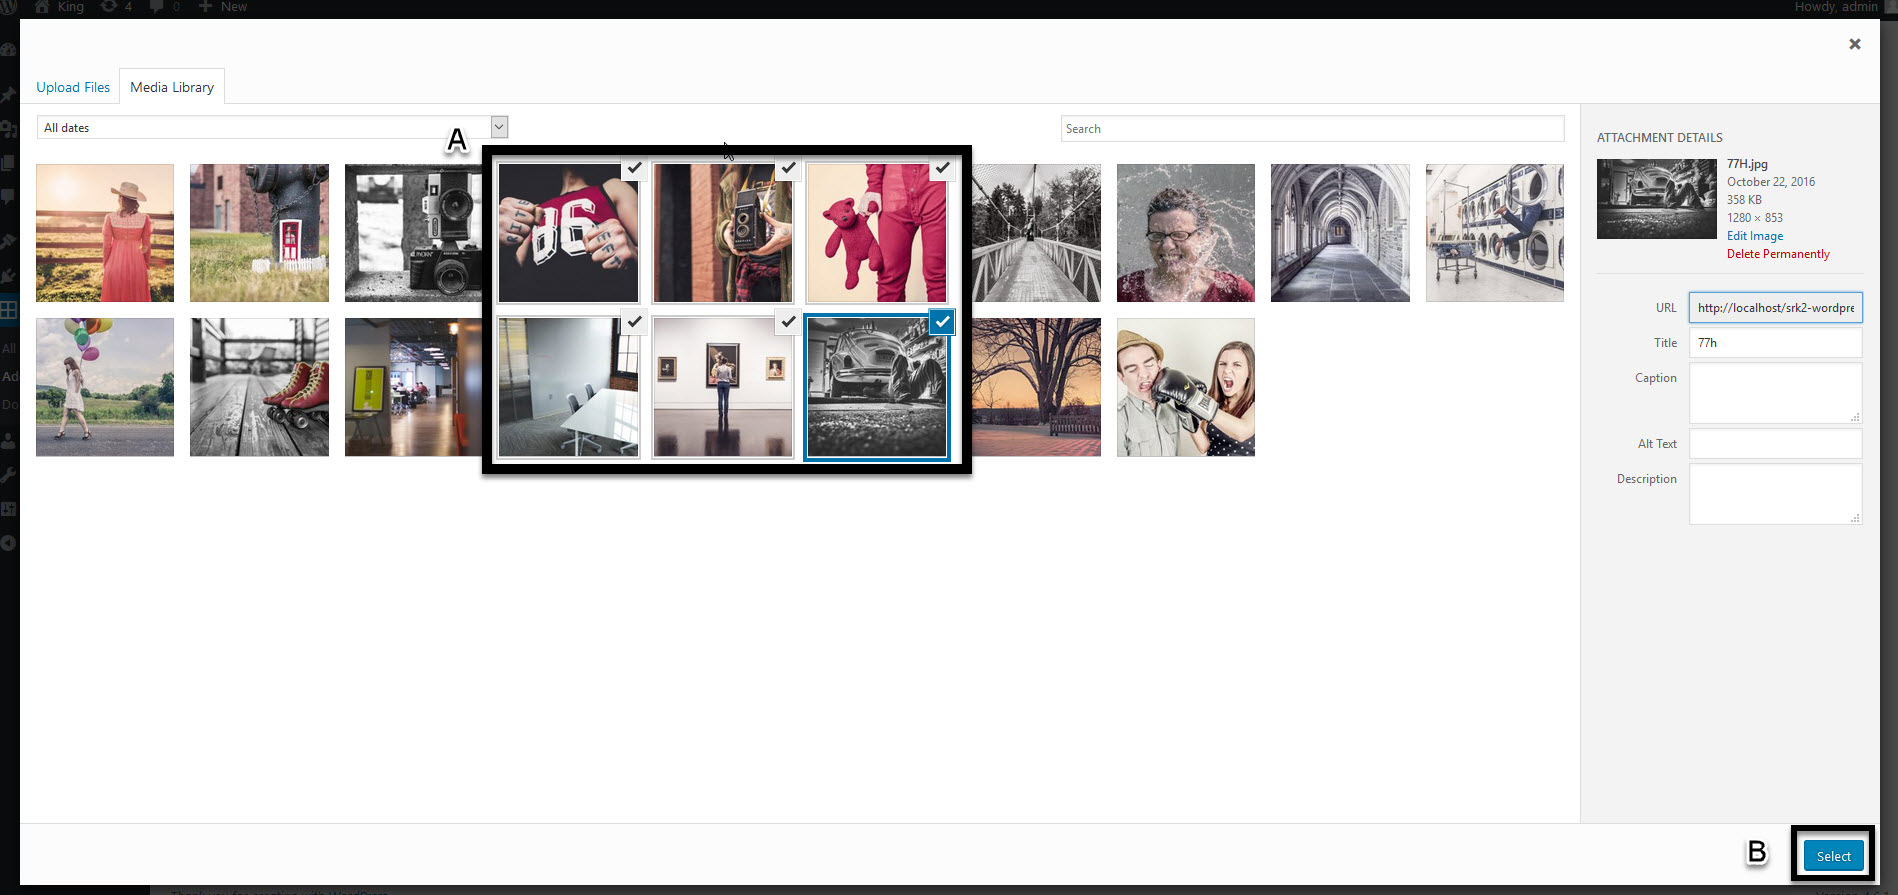
- Click on images to upload if you want upload multiple images use (Ctrl) key from the keyboard.
- After selecting photos click on “Select” button.
3. Publish & Copy Shortcode
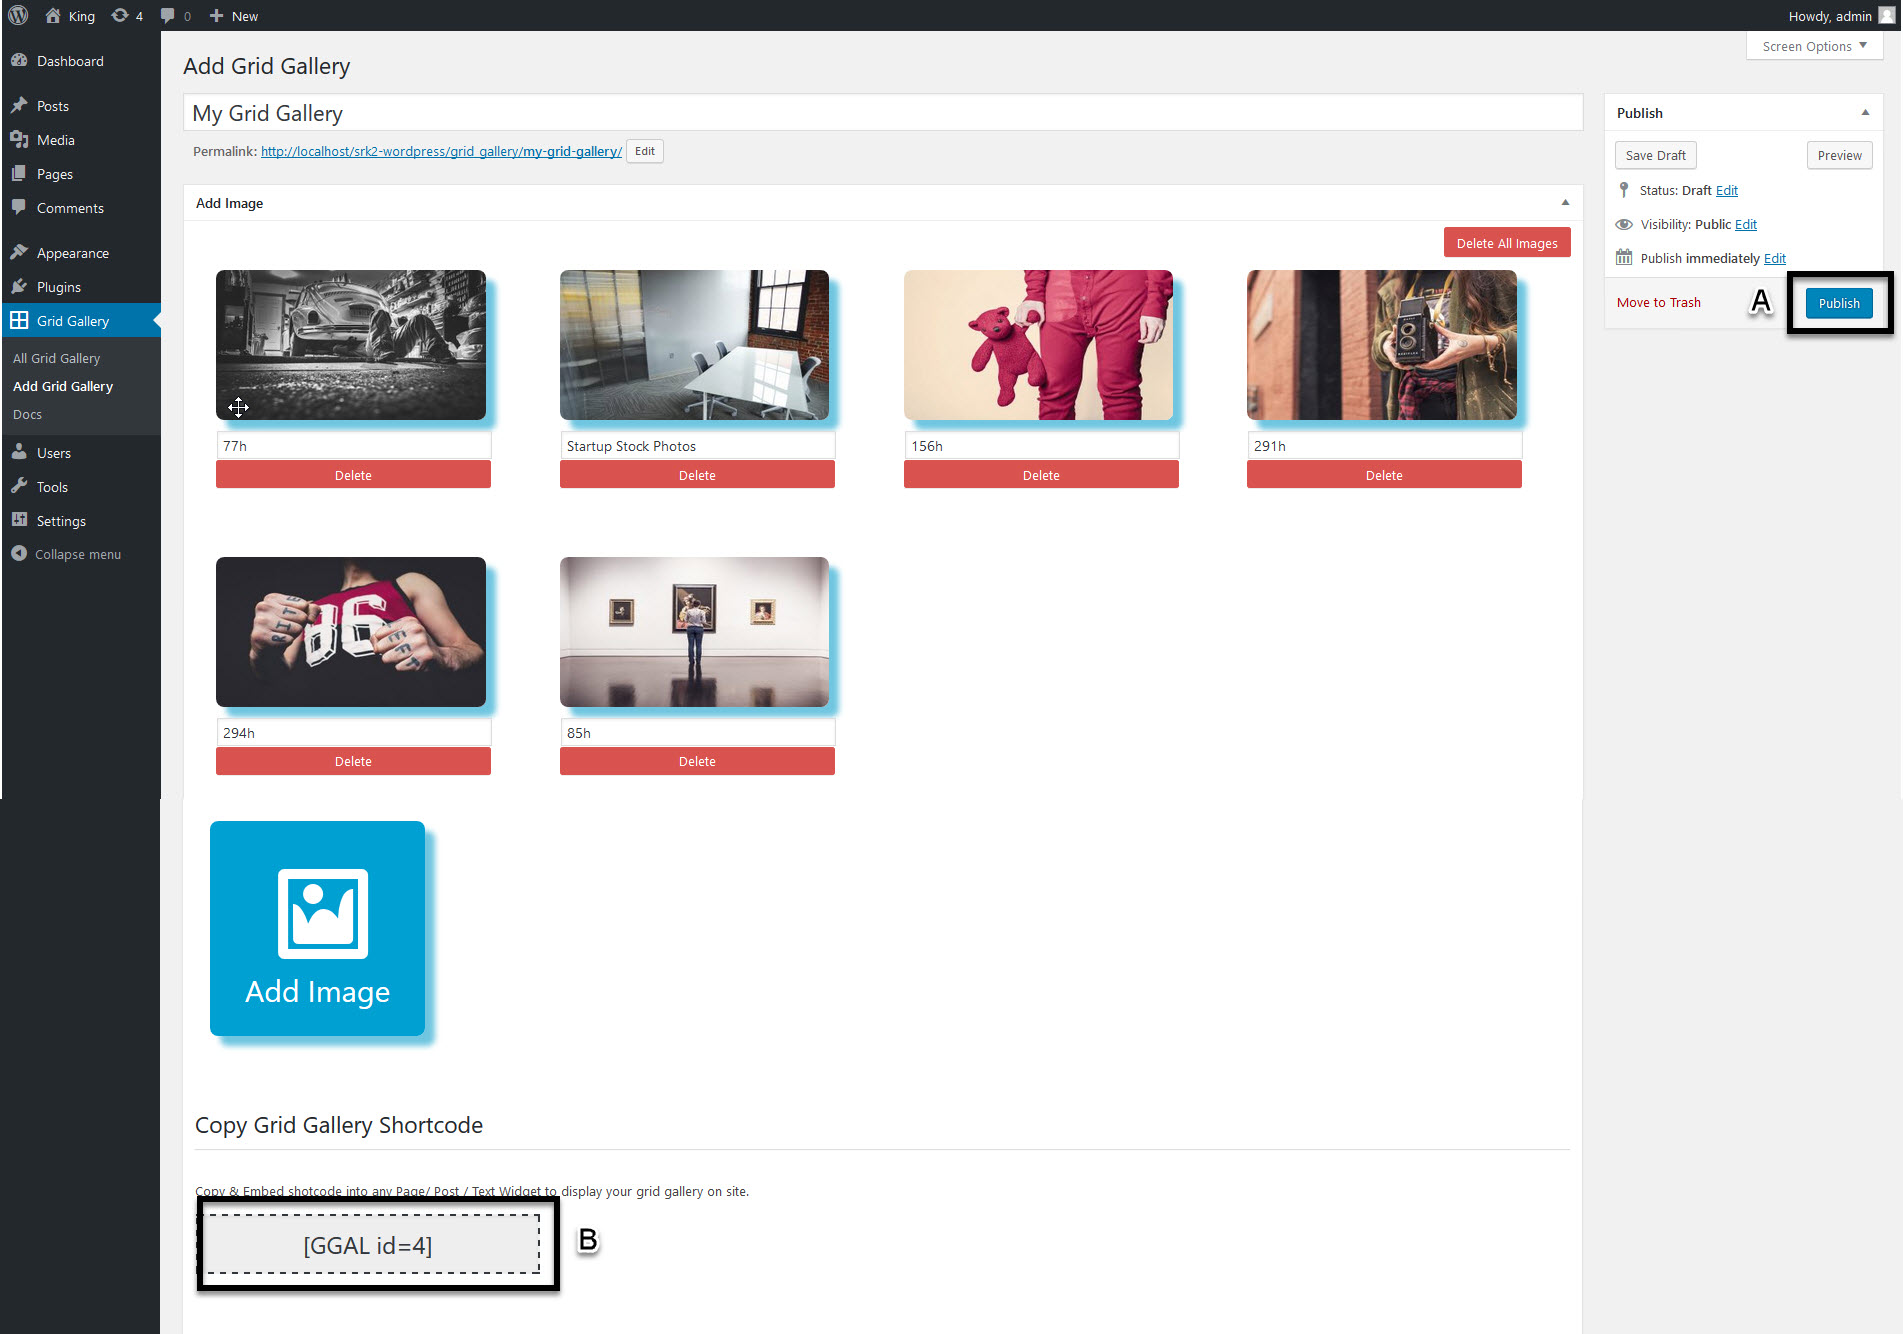
- Now click on publish button for save Grid Gallery with default settings.
- Copy the shortcode of Grid Gallery.
4. Show Grid Gallery On Page
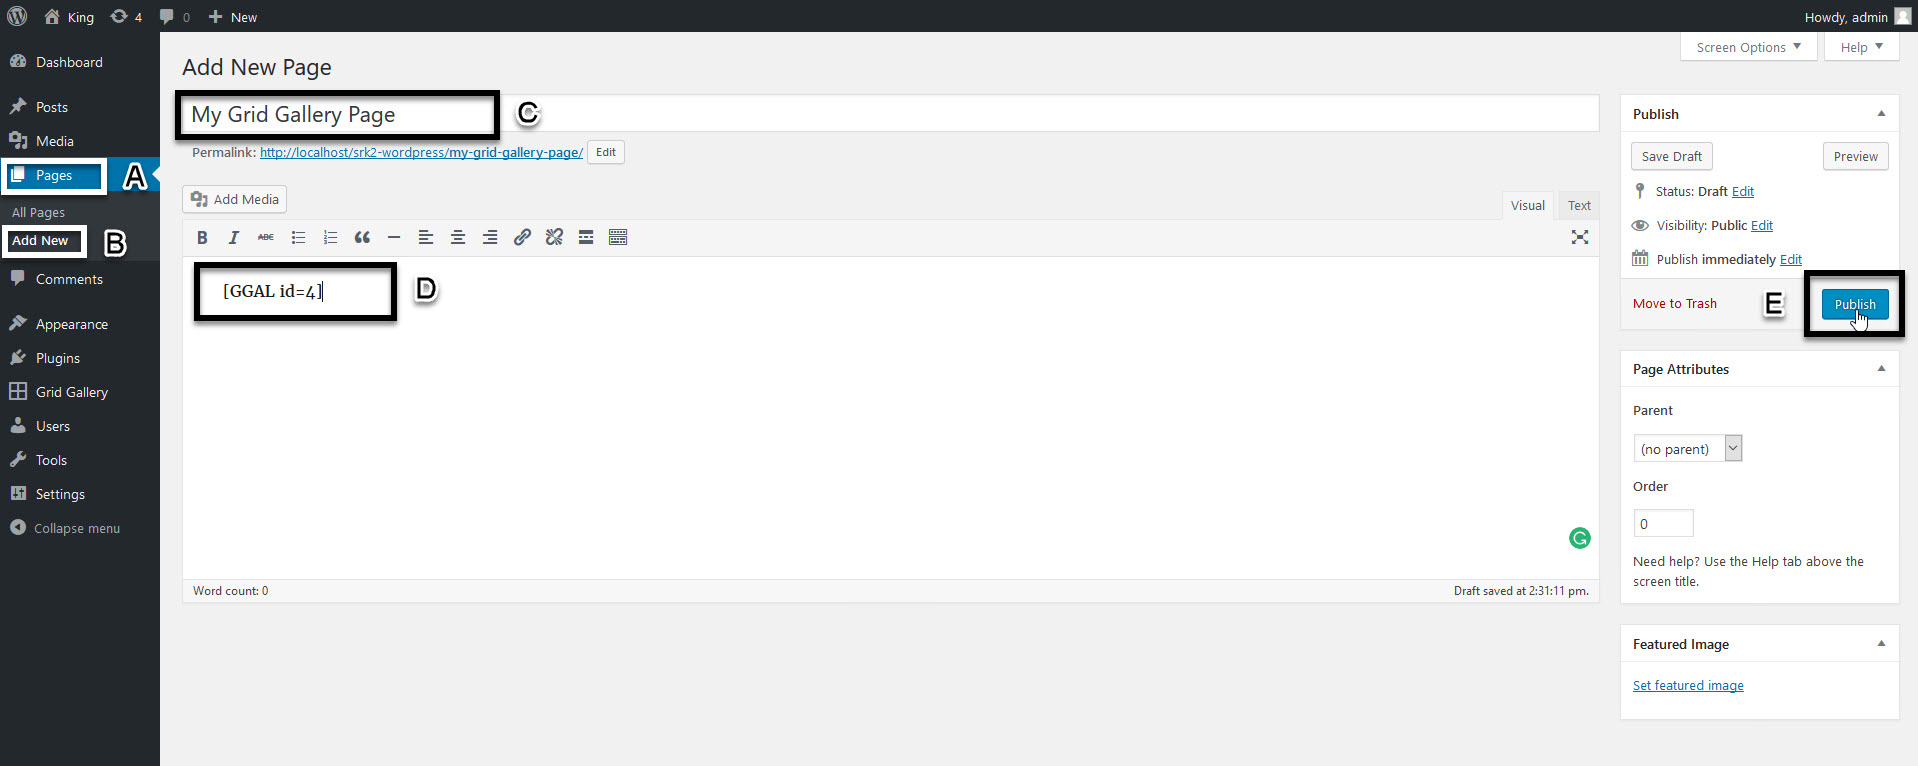
- Click on pages button from the admin menu bar.
- Click on add new.
- Type a page title in the text box.
- Paste Grid Gallery Shortcode in the Page content.
- Now click on “Publish” button.
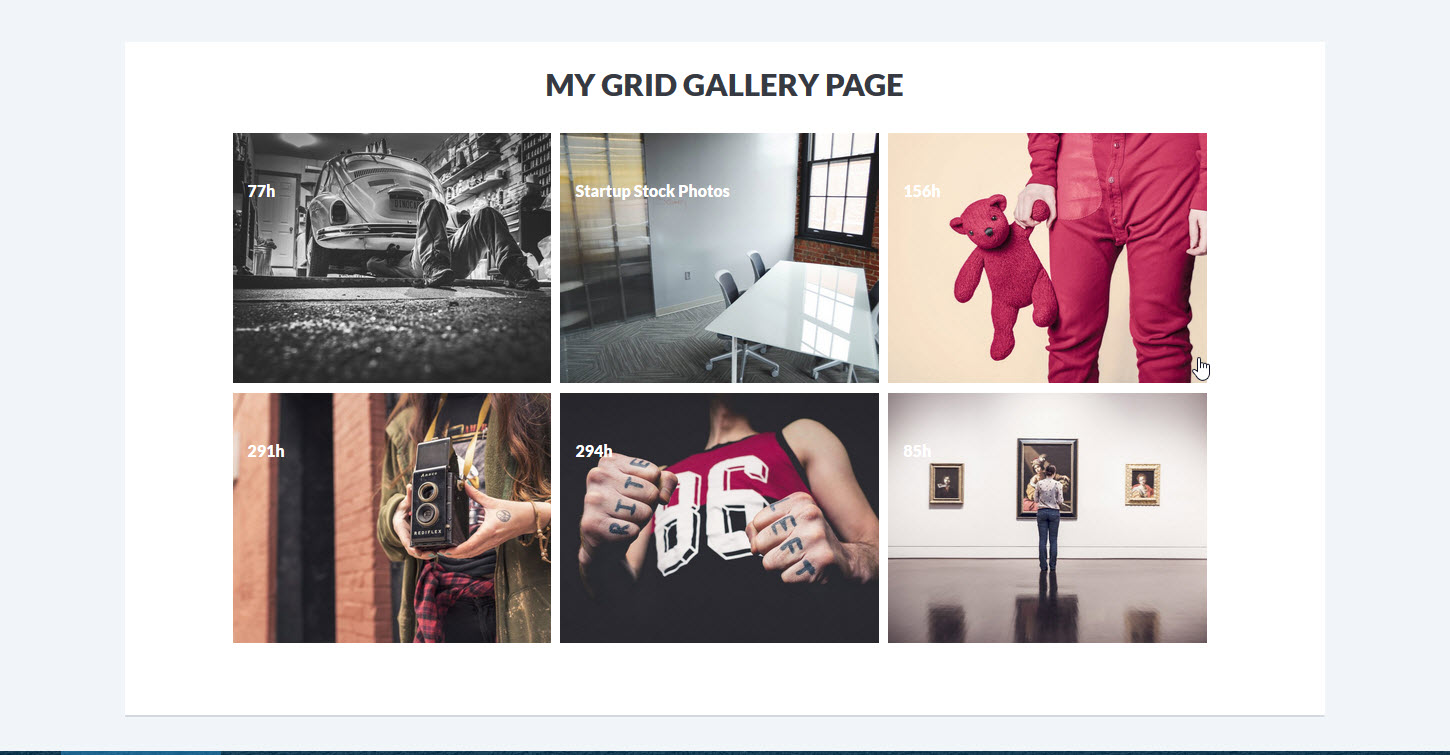
5. Grid Gallery Page Preview
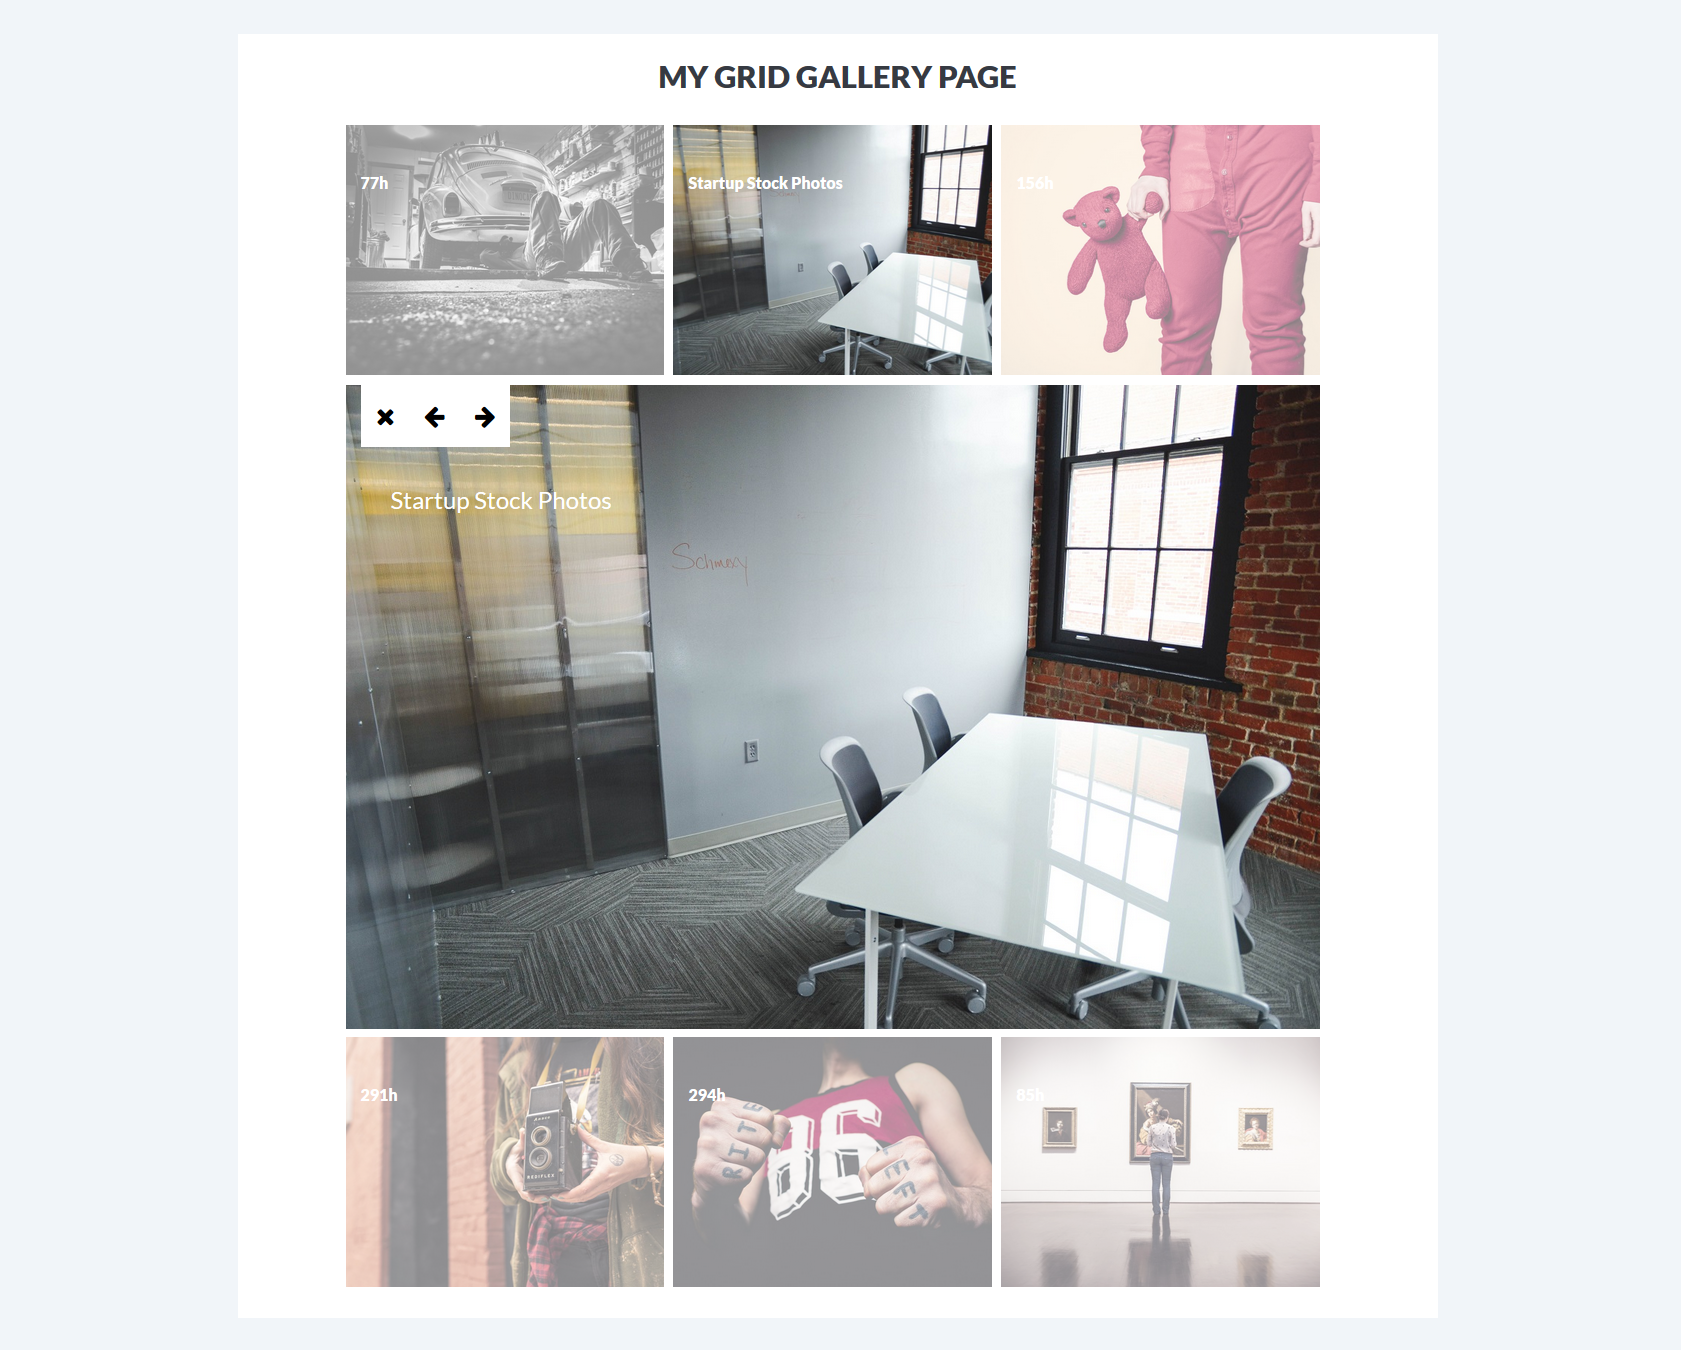
6. Grid Gallery Page Preview With Open Image
Thanks for reading “How To make Grid Gallery In WordPress” article.
