

What if you could get the most out of your browsing? Learn how to make Google Chrome Extensions of your own.
Have you ever been dissatisfied with the functions provided by your web browser? Even if you’ve spent hours exploring the Google Online Store, it’s not always as simple as pressing “download” to improve your web browsing experience.
This is where browser add-ons come into play. In this tutorial, we’ll look at how to create your own DIY Google Chrome Extension from the ground up.
What Is a Google Chrome Extension?
Modern browsers, such as Google Chrome, include a plethora of capabilities that make them simple to use and capable of meeting the demands of the majority of users. However, extending these basic features might have a variety of advantages. This is why browser makers normally allow for the creation of extensions, add-ons, and plug-ins for them.
This capability is available in Google Chrome, allowing anybody with web programming knowledge to easily construct their own Chrome Extensions. Like many websites, you can create an extension with HTML, JavaScript, and CSS.
Unlike websites, extensions may operate in the background as you browse, sometimes even interacting with the sites you visit.
What Functions Will Our Google Chrome Extension Provide?
We’ll create a basic Chrome extension that will allow you to visit the Make Use Of website and conduct a random search based on the article categories available there. Although this is a simple project, you will learn a lot.
You Will Discover How-To
- Develop a Google Chrome Extension
- Using a Chrome Extension, insert custom code into webpages.
- Simulate clicks by creating event listeners.
- Produce random numbers
- Use arrays and variables.
Make Your Own DIY Chrome Extension
Google has made it shockingly simple to develop your own Chrome Extensions, so you’ll be up and running in no time. The instructions below will only take 10 to 15 minutes to complete, but we invite you to experiment with your own code as well.
Step 1: Make the Files
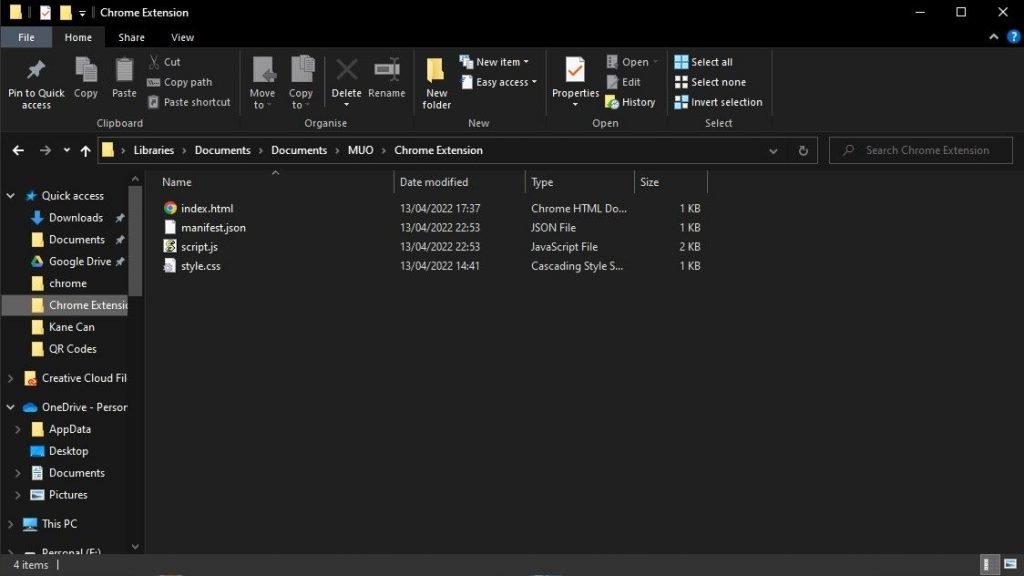
When you don’t want to share your extension, you can keep it on your local system. To construct our extension, we simply need four files: an HTML page, a CSS file, a JavaScript file, and a JSON file.
Index.html, style.css, script.js, and manifest.json were the names we gave our files. The manifest file must have this name in order to function correctly, but the others can have whatever name you choose as long as you modify your code accordingly.
These files should be placed in the same root folder.
Step 2: Create the Manifest File
Every Google Chrome Extension includes a manifest file. It informs Chrome about the extension while also implementing some basic settings. A name, version number, description, and manifest version must all be included in this file. We’ve also provided permissions and an action that loads index.html as the extension’s popup.
{
 "name": "MakeUseOf.com Automated Search",
 "version": "1.0.0",
 "description": "A search tool to find interesting articles",
 "manifest_version": 3,
 "author": "Samuel Garbett",
 "permissions": ["storage", "declarativeContent", "activeTab", "scripting"],
 "host_permissions": [""],
 "action":{
 "default_popup": "index.html",
 "default_title": "MUO Auto Search"
 }
}
Step 3: Create the HTML and CSS
Before we begin coding our script, we must first design a simple user interface (UI) using HTML and CSS. You may use a CSS library like Bootstrap to avoid writing your own, but our addon only requires a few rules.
The HTML, head, and body tags are all present in our index.html file. The head tag has the page title and a link to our stylesheet, while the body contains an h1 tag, a link to MakeUseOf.com, and another button that will be used as a trigger for a script. The script.js file is included in a script tag at the end of the document.
<html>
<head>
 <title>MUO Auto Search</title>
 <meta charset="utf-8">
 <link rel="stylesheet" href="style.css">
</head>
<body>
<h1>MUO Auto Search</h1>
<a href="https://www.makeuseof.com/" target="_blank"><button id="buttonOne">Go to MakeUseOf.com</button></a>
<button id="buttonTwo">Start Random Search</button>
</body>
<script src="script.js"></script>
</html>
Our CSS file is even simpler than our HTML file, as it only changes the style of five components. We have guidelines for html and body tags, as well as h1 tags and both buttons.
html {
 width: 400px;
}
body {
 font-family: Helvetica, sans-serif;
}
h1 {
 text-align: center;
}
#buttonOne {
 border-radius: 0px;
 width: 100%;
 padding: 10px 0px;
}
#buttonTwo {
 border-radius: 0px;
 width: 100%;
 padding: 10px 0px;
 margin-top: 10px;
}
Step 4: Create the JavaScript
The final step in this procedure is to create our script.js file.
The insertScript() function in this file is used to insert the other function (autoSearch()) onto the current page. This enables us to edit the page and use the search options currently available on the MakeUseOf.com website.
This is followed by an event listener that waits till the Start Random Search button is hit before running the previously discussed function.
The autoSearch() method is a little trickier. It starts with an array containing 20 of the MUO website’s categories, providing us a decent sample to pull from for performing random searches. After that, we use the Math.random() function to produce a random integer between 0 and 19 to choose an element from our array.
We now need to imitate a button click to open the MUO search box with our search word in hand. We first utilize the Chrome developer console to get the ID of the search button, which we then add to our JavaScript code using the click() method.
// This method incorporates our autoSearch functionality into the page's code
function insertScript() {
 // This chooses the operation's focused tab and invokes the autoSearch function
 chrome.tabs.query({active: true, currentWindow: true}, tabs => {
 chrome.scripting.executeScript({target: {tabId: tabs[0].id}, function: autoSearch})
 })

 // This closes the extension pop-up window that allows you to pick the website search bar
 window.close();
}

// This is an event listener that detects when our "Start Random Search" button is clicked
document.getElementById('buttonTwo').addEventListener('click', insertScript)

// This code chooses a topic at random from an array and
function autoSearch() {
 // This is an array in which we will store our search keywords const searchTerms = ["PC and Mobile", "Lifestyle", "Hardware", "Windows", "Mac",
 "Linux", "Android", "Apple", "Internet", "Security",
 "Programming", "Entertainment", "Productivity", "Career", "Creative",
 "Gaming", "Social Media", "Smart Home", "DIY", "Review"];

 // This creates a number between 0 and 19 at random
 let selectorNumber = Math.floor(Math.random() * 20);

 // The random number is used to choose an element from the array
 let selection = searchTerms[selectorNumber];

 // This mimics clicking on the MUO website search button
 document.getElementById("js-search").click();

 // This variables the MUO website search bar
 var searchBar = document.getElementById("js-search-input");

 // This enters our arbitrary search query into the search field
 searchBar.value = searchBar.value + selection;

 // The process is completed by activating the online form
 document.getElementById("searchform2").submit();
}
Step 5: Uploading Files to Chrome:/extensions
The files you just produced should now be added to the Chrome extensions page. After that, the extension will be available in Chrome and will automatically update anytime you make changes to your files.
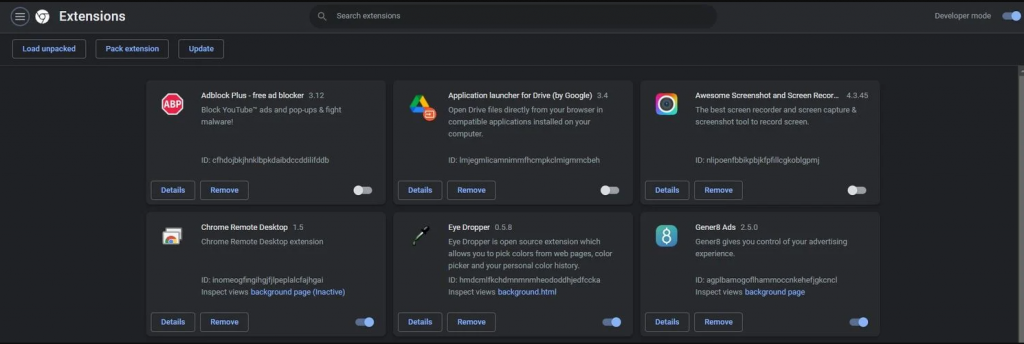
Open Google Chrome, navigate to chrome:/extensions, and ensure that the Developer Mode slider in the upper right corner is turned on.
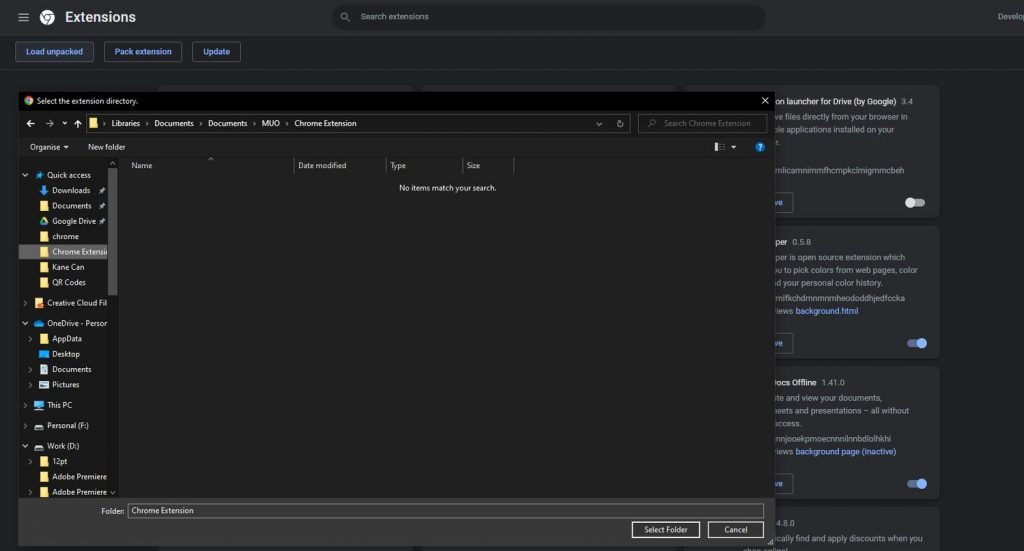
Click Load Unpacked in the upper left corner, then select the folder containing your extension files and click Select Folder.
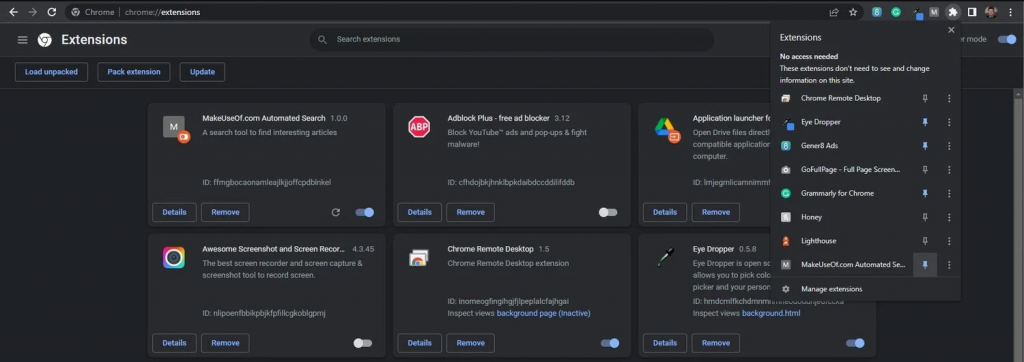
Once your extension has been loaded, click the puzzle piece icon in the upper right corner to pin it to the main taskbar for quicker access.
You should now be able to see the finished extension in your browser. It is important to note that this extension will only function on the MUO website or websites that use the same ID for their search button and bar.
Creating a Google Chrome Extension
This post merely touches the surface of the functionalities that you may incorporate into your own Google Chrome extension. Once you’ve mastered the fundamentals, it’s definitely worth your time to experiment with your own ideas.
Chrome extensions can help you improve your surfing experience, but avoid some of the known sketchy Chrome extensions for a safe and secure online experience.
