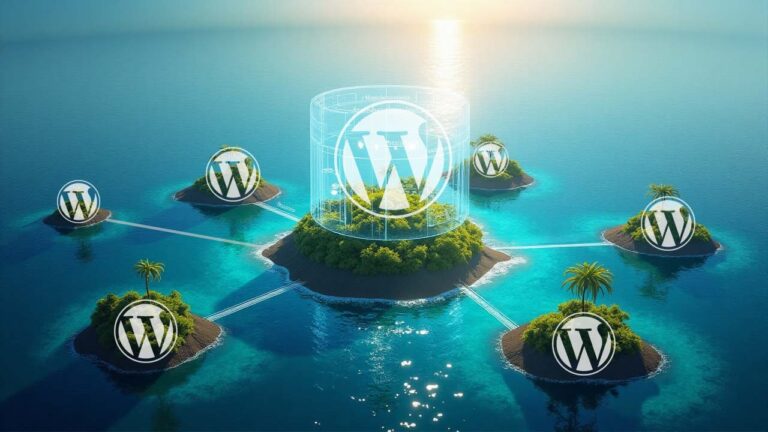
WordPress Custom Post Types: Expanding Your Content Possibilities

In the ever-evolving landscape of WordPress, content creators, and website owners are constantly seeking new ways to enhance their websites and offer unique experiences to their visitors. One powerful feature that enables this level of customization and expansion is custom post types.

Custom post types provide a way to extend the default post and page functionality in WordPress, allowing you to create and manage different types of content beyond traditional articles and static pages. With custom post types, you can organize and present diverse content in a structured and tailored manner, opening up a world of possibilities for your website.

In this blog post, we will dive deep into the world of custom post types and explore how they can expand your content possibilities. We will discuss the fundamentals of custom post types, their creation and customization, and various methods for displaying and styling them.

Understanding Custom Post Types

Custom post types are a core feature of WordPress that enables you to create and manage content beyond traditional posts and pages. While posts and pages serve as the default content types in WordPress, custom post types allow you to define your own content structures tailored to your specific needs.

It’s important to note that custom post types are distinct entities separate from posts and pages. They have their own unique characteristics, attributes, and behavior. By creating custom post types, you can organize and present your content in a more structured and meaningful way.

Purpose and Flexibility

The purpose of custom post types is to provide a flexible framework that accommodates different types of content. They allow you to go beyond the limitations of posts and pages and create content types that align with your website’s specific goals and objectives.

Custom post types offer immense flexibility in terms of content organization and presentation. You can define various attributes and fields that are relevant to your content types, such as featured images, custom taxonomies, metadata, and more. This empowers you to tailor the editing experience and front-end display to match the unique requirements of each content type.

Content Organization

One of the key benefits of custom post types is the ability to organize your content in a structured manner. With custom post types, you can establish logical hierarchies and taxonomies that make it easier for both you and your visitors to navigate and explore your website.

For example, if you’re running a photography website, you can create a custom post type called “Galleries” to showcase different photoshoots or categories. This way, you can categorize and present your photography content in a more organized and intuitive manner, enhancing the user experience.

Custom post types also allow you to create relationships between different content types. You can establish connections, such as linking a custom post type for “Events” to a custom post type for “Speakers,” enabling you to display event details along with associated speaker information.

Understanding the concept and purpose of custom post types lays the foundation for leveraging their full potential. In the following sections, we will explore the process of creating custom post types, customizing their attributes, and showcasing them on your website.

Creating Custom Post Types

Step-by-step Guide:

  • Identify the content type: Determine the specific type of content you want to create with a custom post type, such as portfolio items, testimonials, products, or events.
  • Register the custom post type: In WordPress, you can register a custom post type by using the register_post_type() function. This can be done in your theme’s functions.php file or through a custom plugin.
  • Define the post type’s attributes: Specify the various attributes of your custom post type, including its name, labels, description, capabilities, and supported features. These attributes control how your custom post type appears and functions within the WordPress admin interface.
  • Set up taxonomies and metadata: Consider whether your custom post type requires additional taxonomies (e.g., categories, tags) or custom fields to store specific information. You can use built-in taxonomies or create custom ones using the register_taxonomy() function. Similarly, you can use custom fields or meta boxes to capture and store additional data for your custom post type.
  • Save and test: Save your changes and test the creation of your custom post type. Verify that it appears in the WordPress admin menu and that you can create and manage the content of that type.

Methods for Creating Custom Post Types:

  • Manual coding: This approach involves manually writing the necessary code to register the custom post type and its attributes. It provides complete control over the post type’s behavior and can be implemented in your theme’s functions.php file or through a custom plugin.
  • Custom post type plugins: Several WordPress plugins, such as Custom Post Type UI and Pods, offer user-friendly interfaces to create and manage custom post types. These plugins simplify the process and provide a visual interface for defining post-type attributes, taxonomies, and custom fields.
  • Theme frameworks and builders: Some WordPress theme frameworks and builders, like Genesis and Elementor, provide built-in functionality for creating custom post types. These tools often offer pre-built templates and configurations for popular content types, making it easier to get started.

Common Use Cases:

Custom post types are incredibly versatile and can be applied to various scenarios, including:

  • Portfolio: Showcase your work or projects in a dedicated custom post type, allowing you to organize and present your portfolio items more effectively.
  • Testimonials: Create a custom post type for collecting and displaying customer testimonials or client reviews, adding credibility to your website.
  • Events: Manage and promote events with a custom post type that includes fields for event details, date, time, location, and more.
  • Products: If you have an e-commerce website, a custom post type for products can provide a structured way to manage and showcase your merchandise.
  • Team Members: Create a custom post type for team members or staff profiles, including fields for their bio, role, and contact information.

By creating custom post types, you have the flexibility to adapt WordPress to fit your specific content needs. In the next section, we will explore the customization options available for custom post types, allowing you to tailor their attributes and functionality to match your requirements.

Customizing Custom Post Types

Custom Fields and Taxonomies:

  • Custom Fields: Custom fields allow you to capture and store additional information for your custom post types. You can define specific fields such as text, numbers, dates, checkboxes, and more. Plugins like Advanced Custom Fields (ACF) or Toolset provide intuitive interfaces for creating and managing custom fields.
  • Taxonomies: Taxonomies help categorize and classify your custom post types. WordPress offers built-in taxonomies like categories and tags, but you can also create custom taxonomies to suit your content type. For example, if you have a custom post type for “Recipes,” you can create a custom taxonomy for “Cuisine” to categorize recipes by their respective cuisines.

Customizing the Editing Experience:

  • Meta Boxes: Meta boxes allow you to add custom fields to the editing screen of your custom post types. You can use plugins like ACF or Meta Box to create and manage meta boxes with fields for specific data related to your content type. This provides a user-friendly interface for entering and managing the additional information associated with your custom post type.
  • Gutenberg Blocks: With the introduction of the Gutenberg block editor, you can create custom blocks to enhance the editing experience of your custom post types. Gutenberg provides a visual block-based approach to building content, allowing you to create custom block types tailored to your specific needs. This enables content creators to have more control over the layout and presentation of their custom post types.

Template Customization:

  • Custom Post Type Templates: By default, WordPress uses a generic template to display custom post types. However, you can create custom templates to override the default layout and design. Creating a custom template for your custom post type allows you to have full control over the appearance and functionality of the content type. You can utilize template hierarchy or create custom template files using your theme or child theme.
  • Page Builders: If you prefer a visual approach to designing and customizing the display of your custom post types, page builders like Elementor, Divi, or Beaver Builder offer drag-and-drop interfaces to create unique layouts. These builders often provide dedicated modules or widgets that can be used specifically for custom post types, allowing you to visually customize the display without coding.

Considerations for Data Structure and Relationships:

  • Data Relationships: Custom post types can be linked to other post types or taxonomies, creating relationships and associations within your content. For example, you can establish a relationship between a custom post type for “Events” and a custom post type for “Speakers” by using plugins like Posts 2 Posts or by utilizing advanced custom field relationship fields.
  • Data Validation and Sanitization: When creating custom fields and attributes, it’s essential to ensure proper data validation and sanitization. This helps maintain data integrity and protects against malicious input. Plugins like ACF provide built-in field validation options, or you can add your own validation functions using WordPress hooks and filters.

Customizing your custom post types allows you to tailor their attributes, editing experience, and display to match your specific content needs. In the next section, we will explore different methods and techniques for displaying and styling custom post types on your WordPress website.

Displaying and Styling Custom Post Types

Custom Post Type Archive Pages:

  • Archive Template: By default, WordPress uses the archive.php template file to display the archive pages for custom post types. However, you can create a specific archive template for your custom post type by following the template hierarchy. For example, if your custom post type is named “portfolio”, you can create an archive-portfolio.php file to customize its display.
  • Custom Query: You can also use a custom query to retrieve and display the custom post type content on the archive page. This gives you more control over the query parameters, such as ordering, filtering, and pagination. WordPress provides the WP_Query class to create and execute custom queries.

Single Custom Post Type Pages:

  • Single Template: Similar to archive pages, you can create a specific template for displaying individual custom post type entries. By following the template hierarchy, you can create a single-portfolio.php file (assuming “portfolio” is your custom post type) to customize the layout and design of single entries.
  • Content Hooks: WordPress provides various hooks, such as the_content(), that allow you to customize the display of content within the single post type pages. You can utilize these hooks to modify the output, add additional content, or style the content in a unique way.

Customizing the Loop:

  • Template Tags: WordPress offers a variety of template tags, such as get_template_part() and the_post(), that allow you to retrieve and display specific information from your custom post type entries. These template tags provide flexibility in terms of which elements to display, how to format them, and where to position them within your template files.
  • Custom Queries: If you want more control over the loop, you can create custom queries using the WP_Query class. This allows you to retrieve specific custom post type entries based on criteria you define, and then loop through the results to display them as desired.

Styling Custom Post Types:

  • CSS Customization: You can style the display of your custom post types by targeting their respective CSS classes or IDs. WordPress generates specific classes for custom post types and their elements, making it easier to apply custom styles. Inspecting the HTML output of your custom post type pages can help you identify the relevant classes or IDs to target.
  • Custom Post Type-Specific Styles: To apply custom styles specifically to your custom post type, you can enqueue a separate stylesheet or use inline styles within the template files associated with your custom post type. This allows you to have fine-grained control over the appearance of your custom post type content.

By customizing the display and styling of your custom post types, you can ensure that they align with your website’s design and branding. In the next section, we will explore how plugins can extend the functionality of custom post types, providing additional features and capabilities.

Extending Custom Post Types with Plugins

Plugin Functionality:

  • Custom Fields and Meta Boxes: There are plugins available, such as Advanced Custom Fields (ACF) and Meta Box, that enhance the functionality of custom post types by providing intuitive interfaces for creating and managing custom fields and meta boxes. These plugins allow you to easily add additional data and fields to your custom post types without writing code.
  • Taxonomy Management: Plugins like Custom Post Type UI and Toolset allow you to manage and create custom taxonomies for your custom post types. These plugins offer user-friendly interfaces to define and organize taxonomies, providing more flexibility in categorizing and classifying your content.
  • Front-end Display and Templates: Some plugins, such as Custom Post Type Templates and Pods, enable you to create custom templates for displaying custom post types on the front-end. These plugins often provide drag-and-drop interfaces or template builders, allowing you to design and customize the appearance of your custom post-type content without writing code.
  • Relationships and Connections: Certain plugins, such as Posts 2 Posts and ACF Relationship Field, enhance custom post types by enabling you to establish relationships between different post types. This feature allows you to connect and display related content, such as associating products with categories or linking events to speakers.

Plugin Selection and Installation:

  • Research and Reviews: When selecting plugins to extend your custom post types, it’s essential to research and read reviews to ensure compatibility, reliability, and positive user experiences. Look for plugins with good ratings, active development, and a strong user base.
  • Plugin Installation: To install a plugin, navigate to the WordPress admin dashboard, go to the “Plugins” section, click “Add New,” and search for the desired plugin by name. Once you find the plugin, click “Install” and then “Activate” to enable its functionality.

Plugin Configuration and Integration:

  • Plugin Settings: After activating a plugin, you may need to configure its settings to match your requirements. This could involve specifying which custom post types to extend, setting up custom fields or taxonomies, or defining relationships between post types.
  • Integration with Custom Post Types: Most plugin interfaces provide options to integrate their features with custom post types. This typically involves selecting the appropriate custom post type(s) in the plugin settings or using hooks and filters to extend the plugin’s functionality to your custom post types.

Considerations and Best Practices:

  • Plugin Compatibility: Before installing a plugin, ensure that it is compatible with your WordPress version and other active plugins. Incompatible plugins can cause conflicts and affect the functionality of your custom post types.
  • Plugin Updates and Support: Choose plugins that are regularly updated and supported by the developers. This ensures that you receive bug fixes, security patches, and compatibility improvements over time.
  • Performance Impact: Be mindful of the performance impact of plugins on your website. Excessive use of plugins or resource-intensive plugins can slow down your site. Regularly review and optimize your plugin usage to maintain optimal performance.

Extending custom post types with plugins allows you to add advanced functionality and features without the need for extensive coding. However, it’s important to choose reliable and well-maintained plugins that align with your specific requirements. In the next section, we will discuss best practices for managing and maintaining custom post types on your WordPress website.

SEO Considerations for Custom Post Types

Permalink Structure:

  • Custom Post Type Slug: When creating custom post types, it’s important to define a clear and descriptive slug that reflects the content it represents. Consider including relevant keywords in the slug to improve the SEO relevance of your custom post-type URLs.
  • Permalink Settings: Ensure that your permalink structure is optimized for SEO. WordPress provides various options for customizing permalinks under the “Settings” > “Permalinks” section. Choose a structure that includes post name or custom structure with relevant variables to create clean and search engine-friendly URLs.

Meta Tags and Descriptions:

  • Meta Title: Each custom post type entry should have a unique and keyword-rich meta title that accurately describes the content. The meta title should be concise, compelling, and within the recommended character limit for search engine display.
  • Meta Description: Write unique and persuasive meta descriptions for your custom post-type entries. These descriptions should provide a brief summary of the content, include relevant keywords, and entice users to click through from search engine results pages.

XML Sitemaps:

  • Sitemap Inclusion: Ensure that your custom post types are included in your XML sitemap. XML sitemaps help search engines discover and index your content more efficiently.
  • Sitemap Submission: Submit your XML sitemap to search engines, such as Google Search Console and Bing Webmaster Tools, to inform them about the existence and structure of your custom post types. This helps search engines crawl and index your content accurately.

Schema Markup:

  • Structured Data: Implement schema markup for your custom post types to provide search engines with structured information about your content. Schema markup helps search engines understand the context and attributes of your custom post types, enhancing their visibility and appearance in search results.
  • Schema Types: Choose the appropriate schema types for your custom post types based on their content. For example, if you have a custom post type for “Products,” you can use the “Product” schema type to provide detailed information about the products.

SEO Plugins and Customization:

  • SEO Plugins: Utilize SEO plugins, such as Yoast SEO or All in One SEO Pack, to optimize your custom post types for search engines. These plugins offer features like meta tag customization, XML sitemap generation, and content analysis to improve the SEO of your custom post types.
  • Custom SEO Fields: Some SEO plugins and custom fields plugins provide additional SEO fields for your custom post types. These fields allow you to specify custom meta titles, meta descriptions, and other SEO-related attributes for each entry, giving you more control over how your custom post types are displayed in search engine results.

Content Optimization:

  • High-Quality Content: Ensure that the content within your custom post types is valuable, informative, and relevant to your target audience. High-quality content improves user engagement and increases the likelihood of receiving backlinks and social shares, which can positively impact SEO.
  • Keyword Optimization: Conduct keyword research and incorporate relevant keywords naturally into your custom post type content. Optimize headings, paragraphs, and image alt attributes with appropriate keywords to improve search engine visibility.

Implementing these SEO considerations for your custom post types can help enhance their visibility in search engine results and improve organic traffic to your website. It’s essential to regularly monitor and analyze the SEO performance of your custom post types and make adjustments as needed. In the next section, we will discuss best practices for managing and maintaining custom post types on your WordPress website.

Wrapping Up

We delved into understanding custom post types, and discussing their purpose and advantages. Custom post types enable you to organize and structure your content in a more meaningful way, tailored to the specific needs of your website or project. They offer flexibility in terms of content management, allowing you to create unique content types such as portfolios, testimonials, events, products, and more.

Custom post types are a valuable feature in WordPress that empowers you to create diverse and structured content types. By understanding, creating, customizing, extending, and optimizing custom post types, you can elevate your website’s content possibilities, improve user experience, and enhance search engine visibility.

We hope this blog post has provided you with comprehensive insights and guidance on harnessing the potential of WordPress custom post types. Start exploring and experimenting with custom post types to unlock new opportunities for your website’s content strategy.

How Computer Vision Is Revolutionizing Industries

Computer vision, a field at the intersection of artificial intelligence and image processing, is revolutionizing industries worldwide. By enabling computers to interpret and analyze visual data, it has transformed sectors such as manufacturing, healthcare, retail, and transportation. Computer vision applications range from quality control in manufacturing to medical imaging analysis in healthcare, and from visual search and recommendation systems in retail to autonomous vehicles in transportation.

Despite challenges, the future of computer vision looks promising with advancements in deep learning and integration with emerging technologies, opening up new opportunities for automation, optimization, and innovation. Its transformative power is reshaping how industries perceive, analyze, and respond to the visual world.

Computer Vision Applications in Manufacturing Industry

Computer vision has become a game-changer in the manufacturing industry, revolutionizing various processes and driving significant improvements in productivity, quality control, and automation. Here are some key applications of computer vision in manufacturing:

Quality Control and Defect Detection

Computer vision systems can analyze visual data in real-time to identify defects, inconsistencies, or deviations in the production line. By comparing images of manufactured products against predefined standards, computer vision algorithms can spot defects such as surface imperfections, incorrect dimensions, or faulty components. This allows for immediate intervention, reducing waste, and ensuring consistent product quality.

Object Recognition and Sorting

Computer vision technology enables machines to recognize and classify objects accurately. In manufacturing, this capability is used to automate sorting tasks, where products or components need to be categorized based on specific criteria such as size, shape, color, or markings. By employing computer vision algorithms, manufacturers can achieve high-speed, accurate, and efficient sorting processes, leading to streamlined operations and improved overall productivity.

Robotics and Automation

Computer vision plays a vital role in guiding robots and automation systems within the manufacturing environment. By integrating cameras and vision systems with robotic arms or automated machinery, computer vision enables precise object detection, localization, and manipulation. This allows robots to perform tasks such as picking and placing objects, assembly operations, or intricate manipulations with exceptional accuracy and adaptability. The combination of computer vision and robotics optimizes production workflows, enhances flexibility, and reduces the need for human intervention in repetitive or hazardous tasks.

Computer vision has transformed the manufacturing industry by enhancing quality control, enabling efficient object recognition and sorting, and driving automation through the integration of robotics. These applications lead to improved product consistency, reduced waste, enhanced operational efficiency, and ultimately, increased competitiveness in the manufacturing sector. As computer vision continues to advance, it holds immense potential for further optimizing manufacturing processes and unlocking new levels of productivity and innovation.

Computer Vision in Healthcare

The healthcare industry has witnessed a significant transformation with the emergence of computer vision. It has revolutionized diagnostics, medical imaging, and patient care, providing healthcare professionals with valuable insights from visual data. The use of computer vision algorithms and deep learning models has led to improved accuracy, efficiency, and patient outcomes. Below are some essential applications of computer vision in healthcare:

Medical Imaging Analysis

Computer vision algorithms excel at analyzing medical images such as X-rays, MRIs, and CT scans. They can automatically detect and segment anatomical structures, identify abnormalities or lesions, and assist radiologists in diagnosing various conditions. Computer vision techniques, combined with machine learning, enable more precise and efficient interpretation of medical images, leading to earlier detection of diseases, personalized treatment plans, and improved patient care.

Disease Diagnosis and Detection

Computer vision aids in the detection and diagnosis of various diseases by analyzing visual cues and patterns. For example, in dermatology, computer vision systems can analyze images of skin lesions to identify potential signs of skin cancer. Similarly, in ophthalmology, computer vision algorithms can analyze retinal images to detect signs of diabetic retinopathy or other eye diseases. Computer vision-based diagnostic tools offer faster, more accurate screenings, enabling early intervention and reducing the burden on healthcare providers.

Surgical Assistance and Planning

Computer vision technologies assist surgeons in planning and performing complex procedures. By integrating preoperative images, such as CT scans or MRIs, with real-time visual data during surgery, computer vision systems can provide surgeons with augmented reality overlays, highlighting critical structures, guiding incisions, or offering real-time feedback. This enhances surgical precision, minimizes risks, and improves patient safety.

The healthcare industry can greatly benefit from computer vision technology, which can provide sophisticated analysis of medical images, assist in diagnosing diseases, and facilitate surgical procedures. By incorporating these technologies, healthcare professionals can improve their diagnostic abilities, enhance treatment planning, and offer more personalized and efficient patient care. As computer vision technology continues to advance, it has the potential to revolutionize multiple aspects of healthcare, resulting in better outcomes and improved quality of life for patients.

Computer Vision in Retail and E-commerce

The utilization of computer vision has become a groundbreaking technology in the retail and e-commerce industries. It has brought about a significant change in the way businesses engage with their customers, streamline their operations, and improve the shopping experience. Through the utilization of computer vision algorithms and machine learning models, retailers can extract valuable insights from visual data, resulting in personalized recommendations, enhanced inventory management, and augmented reality experiences. Below are some essential applications of computer vision in the retail and e-commerce sectors:

Visual Search and Product Recommendation

Computer vision enables visual search capabilities, allowing customers to search for products by uploading images or using a camera to capture an item of interest. By analyzing visual features and comparing them with product catalogs, computer vision algorithms can provide accurate and relevant search results. Additionally, computer vision-powered recommendation systems leverage customer data and visual patterns to offer personalized product recommendations, enhancing customer engagement and driving sales.

Augmented Reality for Virtual Try-On and Product Visualization

Computer vision plays a crucial role in augmented reality (AR) experiences within the retail industry. By using computer vision algorithms to detect and track facial features or body movements, virtual try-on solutions enable customers to visualize how products such as clothing, accessories, or cosmetics would look on them. This enhances the online shopping experience, increases customer confidence, and reduces the likelihood of returns.

Inventory Management and Loss Prevention

Computer vision systems can help retailers optimize inventory management processes. By employing cameras and computer vision algorithms, retailers can automatically monitor and track inventory levels, detect out-of-stock items, and analyze shelf organization. Computer vision also aids in loss prevention by identifying suspicious behavior, such as shoplifting or fraudulent transactions, through real-time video analytics.

The retail and e-commerce industry has undergone a significant transformation with the advent of computer vision. This technology has enabled retailers to offer personalized recommendations, virtual try-on experiences, and efficient inventory management through visual search. By leveraging the capabilities of computer vision, retailers can enhance customer engagement, optimize operations, and create more immersive and personalized shopping experiences. With further advancements in computer vision, the retail industry is poised for innovation and improved customer satisfaction.

Computer Vision for Transportation and Logistics

Computer vision has emerged as a game-changing technology in the transportation and logistics sector, enabling a wide range of applications that improve efficiency, safety, and customer satisfaction. By leveraging computer vision algorithms and real-time visual data analysis, transportation and logistics companies can optimize route planning, enhance security, and streamline operations. Here are some key applications of computer vision in transportation and logistics:

Autonomous Vehicles and Self-Driving Technology

Computer vision plays a critical role in enabling autonomous vehicles. By using cameras and sensors, computer vision systems help vehicles perceive and understand their surroundings, detecting objects, pedestrians, and road signs. These visual cues are processed in real-time to make decisions and navigate safely, reducing the reliance on human drivers. Computer vision enables self-driving technology to enhance road safety, increase efficiency, and pave the way for the future of transportation.

Traffic Monitoring and Management

Computer vision systems can analyze live video feeds from cameras installed at key traffic points to monitor traffic flow, detect congestion, and identify accidents or hazards. This information can be used to optimize traffic signal timings, provide real-time traffic updates to drivers, and improve overall traffic management. By utilizing computer vision, transportation authorities can make data-driven decisions, reduce congestion, and enhance the efficiency of road networks.

Package Sorting and Delivery Optimization

Computer vision is utilized in logistics and package sorting centers to automate the process of identifying, tracking, and sorting packages. By using visual recognition algorithms, computer vision systems can quickly and accurately read labels, barcodes, or QR codes on packages, ensuring correct sorting and efficient delivery. Computer vision also enables route optimization by analyzing traffic conditions, weather, and other factors to determine the most efficient delivery routes, leading to cost savings and improved delivery speed.

Computer Vision in Security and Surveillance

The utilization of computer vision algorithms and real-time video analytics has made computer vision an essential technology in the domains of security and surveillance. It has enabled organizations to strengthen safety measures, thwart criminal activities, and effectively scrutinize and evaluate large volumes of visual data. Security and surveillance systems can identify potential hazards, recognize individuals, and furnish crucial insights for further investigation. Below are some significant applications of computer vision in the field of security and surveillance:

Facial Recognition and Biometric Identification

Computer vision enables robust facial recognition capabilities, allowing security systems to identify individuals from live video feeds or recorded footage. By analyzing facial features and comparing them against a database of known faces, computer vision algorithms can accurately identify individuals, detect unauthorized access, and enhance security measures in restricted areas. Biometric identification systems powered by computer vision offer a powerful tool for access control and surveillance.

Intrusion Detection and Threat Prevention

Computer vision systems can analyze video feeds from surveillance cameras to detect and identify potential threats or suspicious activities in real-time. By using object detection algorithms, computer vision can recognize objects, people, or behaviors that deviate from normal patterns and trigger alarms or alerts. This helps in preventing theft, vandalism, or unauthorized access, enhancing overall security measures.

Video Analytics for Crime Investigation

Computer vision technologies enable advanced video analytics for forensic investigations. By analyzing recorded video footage, computer vision algorithms can extract valuable information such as license plate recognition, object tracking, or behavior analysis. This aids law enforcement agencies in identifying suspects, reconstructing events, and gathering evidence, leading to more effective investigations and crime prevention.

Computer vision has transformed the field of security and surveillance by enabling facial recognition, intrusion detection, and advanced video analytics. These applications enhance safety, enable proactive threat prevention, and provide valuable insights for investigations. As computer vision continues to evolve, it holds the potential to revolutionize security and surveillance practices, making communities and public spaces safer and more secure.

Challenges and Limitations of Computer Vision

While computer vision has made significant advancements and brought about transformative changes in various industries, it also faces several challenges and limitations. It is important to be aware of these factors to ensure effective implementation and address potential issues. Here are some key challenges and limitations of computer vision:

  • Data Quality and Quantity: Computer vision algorithms heavily rely on high-quality and diverse training data for accurate performance. Obtaining a large and well-annotated dataset can be time-consuming and expensive, especially for specialized domains or rare events. Inadequate or biased training data may lead to suboptimal performance or unintended biases in the computer vision system’s outputs.
  • Limited Generalization: Computer vision algorithms often struggle to generalize well beyond the specific conditions they were trained on. Variations in lighting conditions, viewpoints, object appearances, or environmental factors can impact the algorithm’s performance. Achieving robustness and generalizability across diverse real-world scenarios remains a challenge.
  • Interpretability and Explainability: Deep learning models used in computer vision can be highly complex, making it challenging to interpret and explain the reasoning behind their predictions. Lack of transparency and interpretability can hinder trust, especially in critical applications such as healthcare or autonomous systems. Efforts are being made to develop techniques for making computer vision algorithms more explainable.
  • Privacy and Ethical Concerns: Computer vision technologies, such as facial recognition, raise privacy and ethical concerns related to surveillance, data collection, and potential misuse. Proper protocols, regulations, and transparency are necessary to ensure the responsible use of computer vision and protect individual privacy rights.
  • Real-time Processing and Hardware Limitations: Real-time processing of high-resolution visual data requires significant computational power and efficient hardware infrastructure. The deployment of computer vision systems in resource-constrained environments or devices with limited processing capabilities can pose challenges. Advancements in hardware acceleration, edge computing, and efficient algorithms are addressing these limitations.
  • Adversarial Attacks: Computer vision systems can be vulnerable to adversarial attacks, where subtle modifications to input images can lead to misclassification or fooling the algorithm. Robustness against such attacks remains an ongoing research challenge in computer vision.
  • Bias and Fairness: Computer vision algorithms can inherit biases present in the training data, leading to biased predictions or discriminatory outcomes. Ensuring fairness and addressing bias in computer vision models is a critical concern, requiring careful attention to data selection, preprocessing, and algorithmic design.
  • Integration and Scalability: Integrating computer vision systems into existing infrastructures and workflows can be complex, requiring compatibility, data synchronization, and system integration. Scaling computer vision solutions to handle large volumes of visual data in real-time is also a significant challenge.

Despite these challenges, continuous research and technological advancements are driving progress in computer vision. Overcoming these limitations will lead to more accurate, reliable, and ethical computer vision systems, unlocking the further potential for transformative applications across industries.

Future Trends and Opportunities in Computer Vision

Computer vision is a rapidly evolving field with exciting future prospects. As technology advances and new research emerges, several trends and opportunities are shaping the future of computer vision. Here are some key trends and opportunities to watch out for:

  • Deep Learning and Neural Networks: Deep learning has significantly propelled the progress of computer vision. Future advancements in deep neural networks, such as convolutional neural networks (CNNs) and generative adversarial networks (GANs), will continue to improve the accuracy and capabilities of computer vision systems. Enhanced architectures and training techniques will enable better object recognition, segmentation, and understanding complex visual scenes.
  • 3D Vision and Depth Perception: Incorporating depth perception into computer vision systems is a promising direction. By leveraging techniques such as stereo vision, LiDAR, or time-of-flight sensors, computer vision can gain a more comprehensive understanding of the 3D structure of the environment. This opens up opportunities for applications such as augmented reality, robotics, and autonomous navigation.
  • Multimodal Learning and Sensor Fusion: Integrating multiple sources of information, such as visual data, audio, or textual context, can enhance the robustness and contextual understanding of computer vision systems. Multimodal learning and sensor fusion techniques will enable a more comprehensive and nuanced analysis of complex scenes, improving object recognition, event detection, and human-computer interaction.
  • Edge Computing and Real-time Processing: The demand for real-time processing and low-latency applications is driving the shift toward edge computing. By bringing the computational power closer to the source of data, edge devices can perform real-time computer vision tasks, enabling applications such as surveillance, autonomous vehicles, and smart devices without relying heavily on cloud infrastructure.
  • Explainable and Ethical AI: As computer vision becomes more integrated into critical applications, there is a growing need for explainable and ethical AI. Efforts to develop transparent and interpretable computer vision models, address biases and ensure fairness and privacy will continue to gain importance. Research in trustworthy AI and ethical considerations will shape the future of responsible computer vision systems.
  • Industry-specific Applications: Computer vision will find widespread adoption in various industries, beyond its current applications. Industries such as agriculture, construction, healthcare, and entertainment will benefit from customized computer vision solutions. Applications may include crop monitoring, automated construction site analysis, surgical assistance, and immersive augmented reality experiences.
  • Collaborative Robotics and Human-Robot Interaction: Computer vision will play a key role in enabling safe and efficient collaboration between robots and humans. Vision systems will allow robots to perceive and understand human gestures, intentions, and emotions, facilitating natural and intuitive interactions. This opens up opportunities for collaborative manufacturing, healthcare robotics, and service robots.
  • Data Collection and Annotation: The availability of large-scale, high-quality datasets is crucial for training and advancing computer vision models. Future opportunities lie in developing efficient methods for data collection, annotation, and synthesis. Crowdsourcing, active learning, and synthetic data generation techniques will contribute to expanding the availability of diverse and annotated datasets.

These trends and opportunities indicate an exciting future for computer vision, with advancements in deep learning, multimodal perception, real-time processing, ethical considerations, and industry-specific applications. As research and technology continue to progress, computer vision will become increasingly integral to various aspects of our lives, enabling automation, enhancing human-computer interactions, and delivering innovative solutions across industries.

Wrapping Up

Computer vision has become a transformative technology with wide-ranging applications in various industries. It revolutionizes how we perceive and interact with visual data, leveraging advanced algorithms, deep learning models, and real-time processing. Computer vision finds application in manufacturing, healthcare, retail, transportation, security, and more, enabling quality control, medical imaging analysis, visual search, autonomous vehicles, threat detection, and other valuable functionalities.

Challenges such as data quality, interpretability, privacy, and ethics must be addressed through ongoing research, responsible development, and thoughtful implementation. The future of computer vision looks promising, driven by trends like deep learning advancements, 3D vision, multimodal learning, edge computing, and explainable AI, while maintaining a focus on ethics and fairness. Collaboration between researchers, practitioners, policymakers, and society is crucial to unlock its full potential and create a future where intelligent visual systems contribute to safer, more efficient, and more accessible solutions in diverse domains.

How To Fade Images On Mouseover In WordPress?

The fade images on mouseover effect is a popular visual effect used in web design to enhance the user experience. By adding a simple animation, the image smoothly fades in or out when the user hovers their mouse over it. This effect not only makes your website look more modern and engaging but also encourages users to interact with the content, potentially keeping them on your site for longer periods.

In this post, we will demonstrate how to implement a fading image effect when hovering over images in WordPress.

Continue reading to learn more!

Why does WordPress fade images on mouseover?

Animations can help draw attention to important items on your website, such as your website logo or a call to action, making your website more exciting.

There are various ways to use CSS animations in WordPress, but adding a hover effect to your photos can be particularly effective. When users hover over your images, they can fade in or out with the help of fade animation.

To enhance user engagement and create a storytelling experience on your website, consider incorporating a fading animation. As visitors scroll down the page, images can appear and disappear, adding to the narrative.

The fade picture on the mouseover effect is subtle, and won’t disrupt the visitor’s ability to read or any image optimization you have already implemented.

To learn how to implement this fading effect in WordPress, keep reading.

Adding Fade images on Mouseover to Every WordPress Image

Using WPCode is the simplest way to apply a fade effect to all of your images. Without having to change your theme files, you can effortlessly add custom code to WordPress with this free plugin.

Even newcomers can change their website’s code with WPCode without running the risk of blunders and typos that can lead to numerous typical WordPress issues.

The free WPCode plugin needs to be installed and activated initially.

Go to Code Snippets > Add Snippet after activation.

To begin, merely hover your cursor over “Add Your Own Code.”

Once it does, select “Use snippet.”

Provide a title for the customized code snippet to get started. Anything that aids in locating the snippet on the WordPress dashboard qualifies as this.

Choose the “Code Type” dropdown menu and choose “CSS Snippet” since we need to apply custom CSS to WordPress.

Add the following code snippet to the code editor:

.post img:hover{

opacity:0.6;

filter:alpha(opacity=60); /* For IE8 and earlier */

-webkit-transition: all2s ease;

-moz-transition: all2s ease;

-ms-transition: all2s ease;

-o-transition: all2s ease;

transition: all2s ease;

}

When a user holds their mouse on a picture, this code snippet will fade each one for 2 seconds. Simply substitute a larger number for “2s easy” to slow the image’s fading. Use “1s easy” or a lesser value if you want the image to fade out more quickly.

By modifying the opacity:0.6 line, you can also increase or decrease the “opacity.”

If you alter any of these values, be sure to alter them in all of the properties (webkit, moz, ms, and o) so that the fading effect seems uniform across all browsers.

When the snippet meets your approval, scroll to the “Insertion” area. Your code can be added by WPCode in a variety of places, such as after every post, to the frontend alone, or to the admin exclusively.

Click on “Auto Insert” to apply a fade effect to all of your photographs. Then select “Site Wide Header” from the “Location” dropdown menu after opening it.

You can then navigate to the top of the screen and select the “Inactive” toggle to make it “Active.”

To make the CSS snippet live, click “Save Snippet” at the end.

Now, you can see the fade effect in action by moving your mouse over any picture on your WordPress page.

Animations for Picture Fade on Individual Pages

Whether you own a photography website, a stock picture store, or any other website with a lot of photographs, using a fade effect on every single image can become irritating.

In light of this, you might just apply fading effects on a single page or post.

The good news is that you can construct unique shortcodes with WPCode. This shortcode can be added to any page, and WordPress will only display fade effects there.

Create a custom code snippet and add the fade animation code to it by simply following the steps outlined above. Then click “Save snippet” to finish.

After that, navigate to the “Insertion” section and choose “Shortcode” this time.

You can add the resulting shortcode to any page, post, or widget-ready area.

After that, proceed to publish the snippet using the same procedure as earlier.

You may now build a new “Shortcode” block on any page, post, or widget-ready area. The WPCode shortcode should then be pasted into that block.

After completing that, press either the “Update” or “Publish” button to make the shortcode live. The fade on mouseover effect can then be viewed by going to that page, page, or widget-ready region.

Featured Pictures with Image Fade Animations

You can also add fade animations to the post thumbnails or featured photos. On your home page, archive pages, and other significant places of your website, these are the post’s main image and frequently show next to the header.

Without animating every single image on your WordPress blog or website, you may make your site more eye-catching and engaging by fading highlighted photos on mouseover.

Create a new custom code snippet using the same procedure as above to add a fade animation to your post thumbnails.

Add the following code to the editor this time, though:


img.wp-post-image:hover{

opacity:0.6;

filter:alpha(opacity=60); /* For IE8 and earlier */

-webkit-transition: all2s ease;

-moz-transition: all2s ease;

-ms-transition: all2s ease;

-o-transition: all2s ease;

transition: all2s ease;

}

Then, pick “Auto Insert” from the “Insertion” box by scrolling to it. Then select “Site Wide Header” from the “Location” dropdown menu after opening it.

Next, using the same procedure as earlier, you can proceed to make the code snippet live.

You may now see the fade animation in action by moving your mouse over any featured image.

Animate various elements such as images, text, buttons, and more.

There are many other methods to use animations in WordPress besides just using fade effects to make images more attractive. For instance, you might utilize zoom effects to let people study an image in greater depth or flipbox animations to display text when a visitor hovers over an image.

SeedProd contains over 40 animations that you can add to photos, text, buttons, movies, and more if you want to experiment with different effects. With only a few clicks, you can even animate whole sections and columns.

Simply click on the material you wish to animate inside the SeedProd editor, and then choose the “Advanced” tab from the menu on the left.

The ‘Animation Effects’ section can then be expanded by clicking.

Following that, simply select an animation from the dropdown menu labeled “Entrance Animation,” which includes a variety of various fading effects.

Wrapping Up

Adding a fade effect to images on mouseover is a relatively simple and effective way to improve the overall design of your website. With just a few lines of CSS code, you can add an elegant touch to your images that will grab users’ attention and encourage them to engage with your content. By implementing this effect in WordPress, you can take advantage of the platform’s robust content management system and easily create beautiful, engaging websites that keep your visitors coming back for more. So let’s get started and learn how to create this stunning visual effect for your WordPress site!


The Best Methods To Make Compact Archives In WordPress

If you’ve been running a blog on WordPress for some time, you may have noticed that your sidebar is getting cluttered. This is because your archive, which contains a list of all your blog posts, has grown too long to fit comfortably in the sidebar. This can be detrimental to your website’s presentation, as it can make your sidebar look busy and cluttered.

To improve the appearance of your website, it’s important to have a more compact archive. This will make it easier for visitors to navigate your website and find the content they’re looking for. A clean and organized archive also gives your website a more professional look and feel, which can be important for building trust with your audience. In this article, we’ll explore the best methods for creating a more compact archive in WordPress.

Why Do WordPress Users Require Compact Archives?

You can easily display previously published content for users to go through on your website by adding an archive to WordPress. WordPress comes with a block and widget called “Archives” that may be placed in the sidebar of your WordPress site by default.

The ‘Archives’ block, on the other hand, only enables you to show your archives as a lengthy list or dropdown menu. A list will make your website appear busy, whereas a dropdown may be more easily missed by users because it is less obvious.

You can display your archives in the WordPress sidebar without taking up a lot of room by making them small. Moreover, you can include them in your “about” part or perhaps a separate “Archives” section.

Let’s look at how simple it is to add compact archives to WordPress.

Add Compact Archives to WordPress

With the Compact Archives plugin, it is simple to build compact archives in WordPress.

Installing and turning on the Compact Archives plugin is the first step.

There are now three styles available in the plugin for displaying small archives on your website.

Style 1: Laid-back three-letter month initials

Style 2: Compact Monthly Initials,

Style 3: Numeric Block

There are several simple methods for showing compressed archives on your website.

Choose any of the approaches listed below.

Method 1: Add Compact Archives to WordPress Posts or Pages

The plugin includes a simple-to-use block that you can add to your post or page that makes it incredibly simple to add compressed archives to your WordPress page or post.

In this tutorial, we’ll make a new page specifically for compact archives.

Access the Pages » Create New page by going to the admin sidebar. You can begin by entering a name for your page once a new page has opened in the block editor.

Next, you must search for the “Compact Archvies” block by clicking the “Add Block” (+) button at the top.

Simply click the block once you’ve found it to add it to your page.

The Block Settings panel is located in the right corner of the screen. From there, you must select a style for your archives.

Simply select your preferred style from the dropdown menu located beneath the “Pick Archive Type” option.

Also, you can decide whether or not you want your archived content to be capitalised.

To do that, select “Transform Text” from the drop-down menu that appears next to it.

When you’re finished, click the ‘Publish’ or ‘Update’ button at the top.

Your archives page will appear as shown.

Method 2: Create a widget for Compact Archives.

Moreover, you can use a widget to display your archive on your website.

In the Complete Site Editor, add the Compact Archives Block.

You must use the complete site editor to add the “Compact Archives” block if your website has a block-based theme.

To start the FSE, you must first go to the Appearance » Editor page from the admin sidebar.

To access the block menu from here, click the “Add Block” (+) button in the top-left corner of the screen.

The ‘Compact Archives’ block must then be added to the website’s preferred location.

Using the Block Options panel on the right after adding the block, you can alter its style and text parameters.

Don’t forget to save your settings by clicking the “Save” button at the top.

This is how your small archives will seem.

Using Widgets, Adding the Compact Archives Block

This approach is appropriate if you aren’t utilising a theme that is built on blocks.

The admin sidebar’s Appearance » Widgets page must be first visited.

To enlarge it once there, merely click the “Sidebar” tab.

The ‘Add Block’ (+) button in the sidebar tab must now be clicked.

With the “Widget Block Menu” now open, look for the “WPBeginner’s Compact Archive” block there.

Simply click the block to add it to the sidebar area once you’ve found it.

By adjusting the options in the Block Settings panel on the right after adding the “Compact Archives” block, you can modify the look and text of your archive.

To save your changes, don’t forget to click the “Update” button at the top.

This is how the ‘Compact Archives’ block will appear on your website sidebar after being added.

Method 3: Using Template Files to Show Compact Archives

Compact Archives includes helpful template tags that you can use if you’re creating a custom WordPress theme or wish to display archives in a theme template file.

All you have to do is add the next template tag to your code.

1<ul> <?php compact_archive(); ?> </ul>

Compact archives will be added to your page after you apply the tag.

The following template tag can be added to your code, though, if you wish to add a style to your archive.

<ul>

<?php compact_archive($style='initial', $before='<li>', $after='</li>'); ?>

</ul>

For instance, $style == ‘initial’ will just show the first letter of the month and should fit well inside a sidebar. Using $style == “block” will suit the page’s main column. When $style == “numeric”, months will appear in numbers.

Wrapping Up

In this article, we’ve explored several methods for creating a more compact archive in WordPress. Whether you choose to use the default archive widget, a plugin, or customize the code, there are several ways to improve the appearance of your website’s archive and make it easier for visitors to navigate.

When choosing a method, it’s important to consider your technical abilities, the level of customization you require, and your budget. If you’re a beginner with limited technical knowledge, using the default archive widget might be the easiest and most affordable option. If you need more customization options or have a larger budget, a plugin or custom code may be the way to go.

Having a clean and organized archive is crucial for the user experience and the overall presentation of your website. By implementing one of the methods discussed in this post, you can improve your own website’s archive and make it easier for visitors to find the content they’re looking for.

Best 3 Ways To Download Your WordPress Media Library

As a WordPress user, it is important to have a backup of all your media assets in case of any unforeseen events that may lead to loss of data. Whether it’s due to a server malfunction or human error, it’s always a good idea to have a backup of your WordPress media library.

One of the easiest ways to create a backup of your media library is by downloading all your files onto your computer. This ensures that you have all your media assets in one place and can be easily restored to your WordPress site should the need arise. Additionally, if you have more than one WordPress site, you can easily transfer media assets from one site to another.

In this article, we’ll guide you through the process of quickly downloading your full WordPress media library.

What could be the need to download the Media Library?

All of the media files that you have added to your site are kept in the WordPress media library. By downloading a copy of the media library and putting it on your computer, you can quickly make a backup of these media files if you wish to.

To backup your complete WordPress site, you may always employ a fully automated WordPress backup service (including plugins, themes, posts, and the media library). On the other hand, the majority of backup plugins do not provide a simple method for downloading and uploading your media library.

The media library might also be downloaded via FTP or the file manager in your WordPress hosting account, although both processes are a little challenging and complex for new users. Having said that, we’ll go through some simple steps for downloading your full WordPress media collection.

Step 1. Using the Export Media Library Plugin To Download A Media Library

Step 2: Download the Media Files and the Full WordPress

Step 3: Use WordPress settings to download the media library

Step 1. Using the Export Media Library Plugin To Download A Media Library

We’ll use a plugin to get the media files for this strategy. Installing and turning on the Export Media Library plugin is the first step.

Visit the Media » Export page from your admin area after activation.

Simply select the ‘Single folder with all files’ option from the dropdown menu next to the ‘Folder Structure’ option after you’ve arrived at the ‘Export Media Library’ page.

Your media has now been downloaded into a single folder. These will be downloaded in their original JPG, PNG, or SVG file formats.

Choose the “Nested Folder” option from the dropdown menu if you want your media to be organised into different folders according to the time it was uploaded.

After that, all of your media library’s content will be transferred to your computer as a zip file by simply clicking the “Download Zip” button.

Step 2: Download the Media Files and the Full WordPress

This solution is for you if you wish to back up your complete WordPress website, including the media library.

In order to build a comprehensive backup of your WordPress website, we’ll be utilising the Duplicator plugin, which is the finest backup plugin for WordPress currently available.

Installing and turning on the Duplicator plugin is the first step

After activation, you must click the “Create New” button on the Duplicator » Packages page in the admin sidebar.

The next step is to give your WordPress backup a name.

Once the backup has been downloaded to your computer, it can be anything that makes it easier for you to recognize it.

Click the “Next” button to proceed after that.

The next stage is checking your website for potential faults.

Simply click the “build” button to generate your package after the scan is finished.

Note: You must fix any errors that Duplicator highlights before running another scan and constructing your package.

After the package has been created, you must select the “Download Both Files” button.

The files for your installer and archive are now downloading simultaneously.

The media files from the backup of your WordPress website are currently being downloaded in your computer.

Step 3: Use WordPress settings to download the media library

This method demonstrates how to export your whole media library from the WordPress backend and import it into a different WordPress website.

Notably, you can obtain the media library using this method without the need for plugins. Nevertheless, because this method exports your media as an XML file, we do not suggest it.

If you wish to import your WordPress media library to one of your other websites, this method can be useful.

Visit the Tools » Export page from the WordPress admin dashboard to do that.

Simply check the box next to the ‘Media’ option now that you are on the ‘Export’ page.

You can choose a date range for a certain time period if you don’t want to download your complete library. Only the photos uploaded within the selected time period will be downloaded using this feature.

You can now download the export file by clicking “Download Export File”.

Your WordPress media library will now be saved as an XML file on your computer.

Installing and turning on the WordPress Importer plugin is the next step.

You can import your XML file to another WordPress website with this plugin.

In the admin sidebar, go to the Tools » Import page first.

Then you can just click the “Run Importer” link that is located beneath the “WordPress” option.

You need to click the “Select File” button on the “Import WordPress” page after doing this to proceed.

You can now upload an XML file from your computer’s media collection.

When you’re finished, don’t forget to upload the media library by selecting the ‘Upload file and import’ button.

Remember, creating a backup is only the first step in protecting your WordPress media library. Be sure to store your backup files in a secure location, and regularly update your backups to ensure that you have the latest version of your media assets. With a little bit of preparation and planning, you can safeguard your media library and ensure that your website is always up and running. Don’t wait until it’s too late; take action today and start backing up your media assets.

How To Create A Multilingual Sitemap In WordPress?

Do you want to boost the search engine rankings of your website’s multilingual pages?

Building a multilingual sitemap allows Google, Bing, and other search engines to easily identify and index your content. You may increase international search traffic simply by making it easier for search engines to find multilingual content on your WordPress site.

We’ll show you how to make a multilingual sitemap for WordPress in this article.

Why Make a WordPress Multilingual Sitemap?

A sitemap is a file that contains all of your WordPress website’s vital information. It is in XML format and is intended for search engines rather than humans.

Building an XML sitemap for your multilingual website aids search engines in finding and indexing your content more quickly. For example, if you have many domains or subdomains that are translated into multiple languages, you’ll need to establish a sitemap for each one.

A sitemap is critical for your WordPress SEO. Assume you’ve just launched a new multilingual website. Your new site will have few backlinks, making it difficult for search engines to find your new articles and pages.

The sitemap allows search engines to learn about fresh information in another language. This will cause your multilingual pages to be indexed and displayed in search results.

Having stated that, let’s look at how to make a multilingual sitemap in WordPress.

Creating a WordPress multilingual sitemap

WordPress generates an XML sitemap for new websites by default. WordPress will display the default XML sitemap if you add wp-sitemap.xml to the end of the domain.

This feature, however, is quite limited and not very flexible. 

You have no say over what content is added or removed from the sitemap.

The All in One SEO (AIOSEO) plugin is the best approach to construct an XML sitemap in WordPress. 

It is the greatest WordPress SEO plugin for optimizing your website for search engines.

It also generates a sitemap for a bilingual website and allows you more flexibility over which pages and website parts appear in the sitemap.

The sitemap feature is offered for free in the AIOSEO Lite version. 

If you need extra functions, such as video sitemaps, news sitemaps, redirections manager, and link helper, we recommend the AIOSEO Pro edition.

You must first install and activate the AIOSEO plugin.

The AIOSEO setup wizard will appear after activation. Simply click the ‘Let’s Get Started’ button and follow the directions on the screen. For more information, see our article on how to install the All in One SEO plugin for WordPress.

Then, from your WordPress dashboard, navigate to All in One SEO » Sitemaps and confirm that the ‘Enable Sitemap’ option is activated.

AIOSEO will generate a sitemap for your multilingual website instantly.

To preview it, click the ‘Open Sitemap’ button or just add ‘sitemap.xml’ to your website’s Address.

Please keep in mind that if you use WPML to construct multilingual sites, AIOSEO will automatically deliver sitemaps in many languages.

Your sitemap URL, for example, will be something like /nl/sitemap.xml, /de/sitemap.xml, or /fr/sitemap.xml.

If you use TranslatePress to develop your multilingual WordPress site, you must install their SEO pack extension, which is perfectly compatible with AIOSEO.

Extra Multilingual Sitemap Configuration

Scroll down in the AIOSEO Sitemaps settings to see more choices for further customizing your multilingual sitemaps.

The plugin allows you to include all article types and categories in the sitemap by default. It also lets you incorporate date archives and author sitemaps.

But, you can access more options by unchecking the ‘Post Types’ and ‘Taxonomies’ boxes.

Assume you have translated content set up as a custom post type. Simply check that box to include that post type in the sitemap while excluding other post kinds.

You can also add additional pages from your multilingual website to the sitemap.

Assume you’ve translated a pillar article or evergreen content into another language. With AIOSEO, you can add the page URL to the sitemap and help search engines find your content more quickly.

To enable the option, scroll down and select the ‘Extra Page’ toggle. Following that, you can enter the page URL and set the priority and frequency.

AIOSEO allows you to exclude specific articles, pages, and phrases from your WordPress sitemaps.

For example, you can include different multilingual posts and pages that are not included in the sitemap. These could be “contact us” pages or terms of service pages that have been translated into another language.

You must first enable the ‘Advanced Options’ option. Then, in the ‘Exclude Posts / Posts’ form, enter the URLs, and in the ‘Exclude Terms’ field, enter the terms.

Search Engine Submission of Your Multilingual Sitemap

After you’ve generated a multilingual sitemap, you should submit it to various search engines. Google, Bing, and other search engines can readily find new content this way.

Upload a Multilingual Sitemap to Google

Google Search Console is a free Google tool for monitoring your site’s performance in search results. It assists you in determining which keywords people use to locate your website and resolving any issues that may prevent you from appearing on Google.

Uploading your multilingual sitemap to the Search Console allows Google to discover new content more quickly.

Simply sign in to your account and select the ‘Sitemaps’ option from the menu on the left. Then, under the ‘Add a new sitemap’ option, enter your multilingual sitemap URL and click the ‘Submit’ button.

Multilingual Sitemap Submission to Bing, Yahoo, and DuckDuckGo

Similarly, you can use Webmaster Tools to submit the sitemap to Bing. The best thing is that when you submit your website to Bing, it is automatically submitted to Yahoo and DuckDuckGo.

By creating a multilingual sitemap for your WordPress site, you can improve your search engine optimization (SEO) efforts and increase your international reach. With our step-by-step guide, you can create a multilingual sitemap for your WordPress site and optimize it for search engines. By doing so, you can enhance the visibility of your multilingual pages and attract more traffic from around the world. Start boosting your website’s search engine rankings today with a multilingual sitemap!

Disable Lazy Load in WordPress for Better Image Loading

What is Lazy Load? Do you want to disable Lazy Load to avoid sluggish loading?

In today’s world, website speed and user experience are crucial factors in determining the success of a website. One of the ways to improve website speed is by using lazy load, a technique that defers the loading of images until the user scrolls down to the area where the image is located.

While this technique can help reduce initial load times, it can also lead to delayed loading of images, causing a poor user experience. Disabling lazy load in WordPress can improve image loading times, resulting in a better user experience.

WordPress by default includes a lazy load feature that postpones the download of images and other media to speed up page load times.

Unfortunately, for some websites, the delay in displaying graphics and other media may negatively impact the user experience.

This article will demonstrate how to quickly disable lazy load in WordPress using both a plugin and a code solution.

Lazy Loading

In WordPress 5.5, lazy image loading was initially introduced. Later, it included iframe embeds in the lazy load functionality (e.g., YouTube videos, Spotify, and other embeds).

By loading content and the viewable area as rapidly as possible, this approach enhances the speed and functionality of your website.

A speedier website is advantageous for both users and search engine optimization. Speed is one of the ranking factors that search engines such as Google take into account.

To further speed up page load time, you may simply lazy load comments and Gravatars in addition to photos and embeds.

By using your browser’s Inspect tool to right-click on an image and choose it, you can observe how lazy loading works.

This will divide the screen of your browser and display the HTML source code. You can now see that the image now has the “loading=lazy” property applied.

Now, generally speaking, we don’t advise removing lazy load because of your WordPress website’s overall benefits. When it’s turned off, websites may load more slowly and have poorer conversion rates and SEO rankings.

Unfortunately, for some websites, lazy loading might occasionally degrade the user experience.

The user experience for your customers may be ruined if, for example, you run a photography website where the photographs make up the majority of your content.

In other situations, you can be utilising a different lazy loading solution and only wish to disable the built-in lazy load function of WordPress.

Let’s now look at how simple it is to disable lazy load in WordPress.

Approach 1: With WPCode, disable WordPress’ lazy loading (Recommended)

By adding a special piece of code to your theme’s functions.php file, you can easily turn off WordPress’ slow load functionality.

Note:- Keep in mind that even the smallest mistake when entering the code can destroy your website and prevent users from accessing it.

For this reason, if you want to add custom code to your website, we advise using the WPCode plugin.

It is the greatest plugin for custom code snippets and makes it incredibly simple for beginners to add custom code to their website in a secure manner.

Installing and activating the WPCode plugin is the first step.

After activation, go to the Code Snippets » + Add Snippet page.

By doing this, you’ll be sent to the ‘Add Snippets’ screen, where you may add a number of ready-to-use code snippets to your website.

Click the “Use Snippet” button after selecting “Add Your Own Code (New Snippet)” from this menu.

You can begin by entering a name for your code snippet once you are on the “Create Custom Snippet” page.

Everything that will make it easier for you to recognize the code snippet and its function qualifies.

Then, from the dropdown menu next to the “Code Type” option, choose “PHP Snippet.”

Afterwards, paste the next line of PHP code into the “Code Preview” box.


add_filter( 'wp_lazy_loading_enabled', '__return_false');

The code will appear as shown when it is pasted into the “Code Preview” box.

Scroll down to the ‘Insertion’ area after inputting the code.

Simply select “Auto Insert” as the insertion mode in this case. Once you activate the snippet, this will guarantee that all of your custom code is automatically executed throughout your website.

The next step is to simply turn the “Inactive” switch to “Active” at the top of the page.

Don’t forget to execute and save your customized snippet by clicking the “Save Snippet” button after that.

The lazy loading function on your WordPress website will be disabled once this unique code snippet is active.

You can check by selecting Inspect from the browser menu when you right-click on a picture.

The loading=lazy property will no longer be present in the image’s HTML source.

Approach 2: Disable lazy loading by Using a plugin

The Disable Lazy Load plugin is a great alternative if you don’t want to add any code to your website.

The Disable Lazy Load plugin simply has to be installed and turned on.

The plugin is ready to use right out of the box and doesn’t need to be configured. Once turned on, your site’s lazy load functionality will be automatically disabled.

Lazy Loading and SEO

When it comes to SEO, lazy loading can have both positive and negative effects. On the positive side, lazy loading can improve page load times, which is a key factor in search engine ranking algorithms. Faster page load times can lead to better user engagement and lower bounce rates, which are positive signals for search engines.

On the negative side, lazy loading can make it more difficult for search engines to crawl and index content on your website. Search engines may not be able to access and index content that is loaded only when the user scrolls to it, which could potentially result in lower search rankings.

To address this issue, you can use several techniques to make sure that search engines can crawl and index all of the content on your website, including content that is loaded using lazy loading. For example, you can use the “noscript” tag to provide search engines with an alternative version of the content that is loaded using lazy loading, or you can use the “Intersection Observer” API to trigger the loading of content when it comes into view.

Overall, lazy loading can have a significant impact on your website’s performance and SEO, but with proper implementation, you can mitigate any potential negative effects and reap the benefits of faster page load times.

Wrapping Up

Disabling lazy load in WordPress can significantly improve the image loading speed and user experience of your website. By following the steps outlined in this article, you can easily disable lazy load on your WordPress site and achieve faster load times, which can lead to better engagement, increased conversions, and ultimately, greater success for your website. Remember to regularly monitor your website’s performance and adjust your optimization techniques as needed to ensure a smooth and satisfying user experience for your visitors.

We will sincerely hope that this article has shown you the correct way to disable lazy load in WordPress.

How To Remove Powered By WordPress Footer Links

By default, many WordPress themes display a disclaimer at the bottom of every page on your website. This disclaimer usually includes language such as “Proudly powered by WordPress” or “Theme by XYZ” with a link back to the theme’s creator or the WordPress.org website.

While this disclaimer may seem harmless, it can actually detract from the professionalism of your website. Visitors to your site may see the disclaimer and assume that your site is amateurish or not fully developed. It can also give the impression that you are using a free, basic template rather than investing in a custom design.

In addition to potentially harming your website’s image, the default disclaimer also takes up valuable space at the bottom of every page. This space could be used to display additional information such as links to related content, calls-to-action, or your own copyright notice. By removing the default disclaimer, you can take full advantage of the space available in your website’s footer and use it to showcase your own content.

The WordPress Footer Credits: Why Remove Them?

The “Proudly powered by WordPress” disclaimer and a link to the official WordPress.org website are shown in the footer area of the basic WordPress themes.

A lot of theme creators go one step further and include their own credits in the footer. The disclaimer that the Astra WordPress theme is included is seen in the following image.

Even while it’s excellent for the software developers, the “Powered by WordPress” footer might detract from the professionalism of your website, especially if it’s a commercial website. Additionally, it informs hackers that you use WordPress, which can aid them in accessing your website.

For instance, if you don’t use a custom login URL, hackers can access your login page by adding /wp-admin to the url of your website. Additionally, this disclaimer connects to another domain, which encourages visitors to abandon your website. Your bounce rate and pageviews may suffer as a result.

Removing WordPress footer credit links is allowed?

Since WordPress is free and distributed under the GPL license, removing the footer credits link from your website is totally legal. In essence, you are allowed to use, modify, and even share WordPress with other people under this license. When you download a WordPress plugin or theme from the official WordPress directory, it is distributed under the same GPL license.

The majority of commercial plugins and themes are really GPL-licensed. This implies that you have complete freedom to customize WordPress any way you see fit, including by eliminating the footer credits from your company website, online store, or blog.

In light of this, let’s look at how to get rid of the powered-by WordPress footer links.

1. Using the theme settings, removing the “Powered by” link

The footer and credit links are frequently included in theme options since most competent theme writers are aware that users want to be able to alter and remove them.

In your WordPress admin panel, navigate to Appearance » Customize to discover if your theme has this feature.

Now you may check for any options that allow you to edit the footer of your website, and then select that choice. For instance, the ‘Footer Builder’ component of the Astra theme.

Simply pick “Copyright” from the “Footer” section if you’re using this theme. By doing this, a little editor will appear where you may amend or even remove the footer content.

Whatever method you use to remove the disclaimer from the bottom, don’t forget to hit “Publish” to make the adjustment visible on your website.

2. Using full site editing, removing the “Powered by” credit

You can get rid of the footer disclaimer if you’re using a block theme by utilizing Full Site Editing (FSE) and the block editor. Although it won’t work with all themes, this is a quick and simple solution to remove the “Powered by” credit from your whole site.

Go to Appearance » Editor to start the editor.

After that, browse to the footer of your website and click to choose the “Powered by” disclaimer. You may now swap out the disclaimer with your own material or even remove it entirely.

Click “Save” whenever you are satisfied with how the footer appears. You may now see the update in action by going to your website.

3. Using code to remove the WordPress disclaimer

Another method is to update the footer.php code if you are unable to find a way to delete or adjust the footer credits through the WordPress customizer. The credit may be removed from any WordPress theme using this approach, which isn’t the easiest for beginners to use.

We advise keeping a backup of your website’s code before making changes so you can restore it if something goes wrong. Remember that any modifications you make to your WordPress theme files directly will be lost if you upgrade the theme. In light of the foregoing, we advise developing a child theme because doing so enables you to upgrade your WordPress theme without losing personalization.

First, you must use an FTP client, such as FileZilla, to connect to your WordPress site. Alternatively, you can use a file manager that is offered by your WordPress hosting provider. If you’ve never used FTP before, you may view our detailed instructions on connecting to your site with FTP.

Open the folder for your current theme or child theme by going to /wp-content/themes/ after connecting to your site.

Locate the footer.php file inside this folder, then use a text editor like Notepad to see it.

Find the code area with the “powered by” text in the text editor. The code, for instance, appears as follows in the WordPress theme Twenty Twenty-One:

<div class="powered-by">
                <?php
                printf(
                    /* translators: %s: WordPress. */
                    esc_html__( 'Proudly powered by %s.', 'twentytwentyone' ),
                    '<a href="' . esc_attr__( 'https://wordpress.org/', 'twentytwentyone' ) . '">WordPress</a>'
                );
                ?>
            </div><!-- .powered-by -->

You may either completely remove this code or alter it to suit your needs. For instance, you could wish to substitute your own copyright notice for the “Proudly powered…” disclaimer.

Save the file after making your modifications, then upload it to your server. If you check your website, you’ll notice that the footer credit is no longer there.

Warning! At all costs, avoid using the CSS Method!

You could see a CSS trick on certain WordPress tutorial websites for hiding the footer credit links by using display: none. Although it seems straightforward, it’s terrible for your WordPress SEO. In an effort to rank higher, many spammers employ this precise strategy to conceal links from users while still displaying them to Google.

If you use CSS to hide the footer credit, Google can consider you to be a spammer and your website will drop in the search results. In the worst instance, Google may even remove you from its index, making it impossible for you to ever show up in search results.

Instead, we fervently advise employing any of the techniques we illustrated above. If none of these approaches work for you, your other options include switching WordPress themes or paying a WordPress developer to do it for you.

Exploring Internet of Things(IoT): Definition, Real-World Applications, and Future Prospects

The Internet of Things (IoT) refers to the interconnectivity of physical devices, vehicles, home appliances, and other items embedded with electronics, software, sensors, and connectivity which enables these objects to connect and exchange data. IoT allows for objects to be sensed and controlled remotely across existing network infrastructure, creating opportunities for more direct integration between the physical world and computer-based systems, resulting in improved efficiency, accuracy and economic benefit.

IoT can range from simple devices such as smart home appliances to complex systems like industrial machines and healthcare equipment. The data generated by these connected devices can be used to improve decision-making, automate processes, and enhance the overall user experience.

IoT technology relies on several key components, including:

  • Sensors and Actuators: These devices are responsible for sensing physical parameters (e.g., temperature, humidity) and taking actions based on that data (e.g., turning on a fan).
  • Connectivity: IoT devices need to communicate with each other and with a central system. This communication is typically achieved through Wi-Fi, Bluetooth, or cellular networks.
  • Cloud Computing: IoT devices generate large amounts of data, which needs to be stored and analyzed. This is often done through cloud computing platforms.
  • Analytics: IoT data is analyzed to extract insights and trigger actions. This can be done using machine learning algorithms, statistical models, or rule-based systems.

IoT is a rapidly growing field with the potential to transform many industries, including healthcare, transportation, manufacturing, and agriculture.

Examples of Internet of Things(IoT)

The Internet of Things (IoT) has a wide range of applications across many industries and aspects of daily life. Some examples include:

Smart Homes

Smart homes are a popular application of Internet of Things (IoT) technology, where various home appliances and systems are automated and controlled through connected devices. Smart homes use sensors, actuators, and other IoT-enabled devices to provide homeowners with greater convenience, comfort, and control.

One of the key aspects of smart homes is the use of IoT technology to control home appliances and systems such as lighting, heating, and security. For example, smart thermostats use data from sensors to learn your schedule and adjust the temperature accordingly, ensuring a comfortable home environment. Similarly, smart lighting systems can be controlled using a smartphone app, allowing you to turn lights on or off, adjust brightness levels, or set schedules, even when you’re away from home.

In addition to comfort and convenience, smart homes can also help to improve energy efficiency by automatically controlling heating, cooling, and lighting systems based on occupancy, weather conditions, and other factors. This can lead to reduced energy usage and lower energy bills.

Smart homes can also enhance security by integrating with home security systems to monitor and control access to the home. For example, smart locks can be controlled using a smartphone app, allowing you to remotely lock or unlock doors, or receive alerts when someone enters or exits your home.

Smart homes are a prime example of how IoT technology can be used to automate and control various home appliances and systems, providing homeowners with greater convenience, comfort, and control, while also improving energy efficiency and security.

Healthcare

The healthcare industry is increasingly using Internet of Things (IoT) technology to improve patient care and outcomes. IoT devices are being used to monitor patients remotely, track vital signs, and provide medical professionals with real-time data to help diagnose and treat conditions.

One example of IoT in healthcare is the use of wearable devices, such as smartwatches or fitness trackers, to monitor patients’ health. These devices can track heart rate, steps, and sleep patterns, and transmit this data to a doctor or medical professional for analysis. This allows healthcare professionals to monitor patients’ health in real-time, even when they are not in the hospital, providing a more complete picture of their health status.

Another application of IoT in healthcare is the use of smart medical devices, such as smart inhalers or glucose monitors, to collect and transmit data to healthcare providers. This can help healthcare professionals monitor patients’ health, identify potential issues, and provide more personalized care.

IoT technology is also being used to improve the efficiency and quality of healthcare delivery. For example, IoT-enabled medical devices can be used to automate routine tasks, such as monitoring and ordering supplies, freeing up medical staff to focus on more critical tasks.

IoT technology is playing an increasingly important role in the healthcare industry, allowing healthcare professionals to monitor patients’ health remotely, track vital signs, and improve the efficiency and quality of care delivery. The use of IoT in healthcare has the potential to greatly improve patient outcomes and revolutionize the way healthcare is delivered.

Transportation

The transportation industry is using Internet of Things (IoT) technology to improve the efficiency and safety of transportation systems. IoT technology allows vehicles and transportation infrastructure to communicate with each other, providing real-time data to optimize routes, reduce congestion, and improve the overall transportation experience.

One example of IoT in transportation is connected cars, which can communicate with each other and with traffic management systems to optimize routes and reduce congestion. For instance, connected cars can share real-time traffic information, such as road conditions and accidents, to help drivers make informed decisions and avoid traffic delays. Additionally, connected cars can communicate with traffic management systems to optimize routes and reduce congestion, improving the efficiency of transportation systems.

Another application of IoT in transportation is the use of smart sensors and other IoT devices to monitor the performance of transportation infrastructure, such as bridges and roads. This data can be used to identify potential problems and make repairs before they become major issues, improving the safety and efficiency of transportation systems.

In addition, IoT technology is also being used to improve the efficiency of public transportation systems, such as trains and buses. For example, IoT-enabled devices can be used to monitor the performance of trains and buses, allowing transportation providers to optimize schedules and reduce downtime.

IoT technology is playing a significant role in the transportation industry, providing real-time data and communication capabilities to optimize routes, reduce congestion, and improve the efficiency and safety of transportation systems. The use of IoT in transportation has the potential to greatly improve the transportation experience and revolutionize the way people and goods are moved.

Agriculture

The agriculture industry is using Internet of Things (IoT) technology to improve productivity, reduce waste, and increase yields. IoT devices, such as sensors and other monitoring devices, are being used to collect data on soil moisture, temperature, and other environmental factors. This information is then used to optimize irrigation and fertilization practices, leading to improved crop health and increased yields.

One example of IoT in agriculture is the use of soil moisture sensors, which can monitor the amount of moisture in the soil and provide farmers with real-time data on water usage. This information can be used to optimize irrigation practices, reducing water waste and improving the health of crops.

Another application of IoT in agriculture is the use of environmental sensors, such as temperature sensors and weather stations, to monitor the conditions of crops. This information can be used to make informed decisions about fertilization practices, improving the health of crops and increasing yields.

IoT technology is also being used to improve the efficiency of livestock management. For example, IoT-enabled devices can be used to monitor the health and behavior of livestock, providing farmers with real-time data to make informed decisions about feeding and care practices.

IoT technology is playing a significant role in the agriculture industry, providing real-time data on soil moisture, temperature, and other environmental factors. The use of IoT in agriculture has the potential to greatly improve agricultural productivity, reduce waste, and increase yields, leading to a more sustainable and efficient food production system.

Manufacturing

The manufacturing industry is using Internet of Things (IoT) technology to optimize industrial processes and increase efficiency. IoT-enabled devices and machines can communicate with each other, providing real-time data and allowing for more informed decision-making.

One example of IoT in manufacturing is the use of connected machines, which can communicate with each other to coordinate production and reduce downtime. For instance, connected machines can share real-time information on their performance and maintenance needs, allowing manufacturers to identify and address potential issues before they cause major problems.

Another application of IoT in manufacturing is the use of smart sensors and other IoT devices to monitor the performance of industrial processes. This information can be used to optimize production and reduce waste, leading to increased efficiency and improved bottom line.

IoT technology is also being used to improve supply chain management in the manufacturing industry. For example, IoT-enabled devices can be used to track the movement of goods and monitor inventory levels, allowing manufacturers to make informed decisions about production and ensure that they have the necessary materials to meet demand.

IoT technology is playing a significant role in the manufacturing industry, providing real-time data and communication capabilities to optimize industrial processes and increase efficiency. The use of IoT in manufacturing has the potential to greatly improve productivity and reduce waste, leading to a more sustainable and efficient industrial system.

Energy

The energy industry is using Internet of Things (IoT) technology to improve energy management and reduce waste. IoT devices and systems can provide real-time data and communication capabilities, allowing for more informed decision-making and optimization of energy generation and distribution.

One example of IoT in energy is the use of smart meters, which can monitor energy usage in real-time and provide customers with detailed information about their energy consumption patterns. This information can be used to make informed decisions about energy usage and reduce waste.

Another application of IoT in energy is the use of smart grid systems, which can optimize energy generation and distribution to meet demand. Smart grid systems can communicate with each other and with energy producers, allowing for real-time monitoring of energy usage and more efficient distribution of energy.

IoT technology is also being used to improve the efficiency of renewable energy systems, such as wind and solar. For example, IoT-enabled devices can be used to monitor the performance of wind turbines and solar panels, providing real-time data on energy production and allowing for more informed decision-making.

IoT technology is playing a significant role in the energy industry, providing real-time data and communication capabilities to improve energy management and reduce waste. The use of IoT in energy has the potential to greatly improve energy efficiency, reduce waste, and lead to a more sustainable energy system.

These are just a few examples of how IoT is being used to improve various industries and aspects of daily life. The potential applications of IoT are vast and will likely continue to grow as the technology evolves and becomes more widespread.

Enhancing Web Development with Internet of Things (IoT) Technology

The Internet of Things (IoT) can play a significant role in web development in several ways:

  1. Improved User Experience: IoT devices can be integrated into web applications to provide a more interactive and personalized experience for users. For example, a website could use data from a wearable device to personalize its content based on the user’s activity levels or preferences.
  2. Real-time Data Collection: IoT devices can collect data from the real world in real-time, and this data can be used to improve web applications. For example, a website could use data from sensors in a smart home to control heating and lighting, or from a weather station to provide local weather information.
  3. Automation: IoT devices can automate many tasks and processes, which can simplify web development. For example, a web application could use IoT devices to automate repetitive tasks or to trigger actions based on specific events or conditions.
  4. Integration with Other Technologies: IoT devices can be integrated with other technologies, such as cloud computing and big data analytics, to provide new functionality and insights. For example, a web application could use data from IoT devices to generate reports and visualizations, or to provide real-time alerts.
  5. Security: IoT devices can improve security by monitoring and controlling access to web applications and sensitive data. For example, a web application could use IoT devices to implement two-factor authentication or to monitor and block unauthorized access attempts.

The integration of IoT devices with web applications can provide many benefits, including improved user experience, real-time data collection, automation, integration with other technologies, and enhanced security.

Future of the Internet of Things (IoT)

The future of the Internet of Things (IoT) is promising and rapidly evolving. The following are some of the trends and predictions for the future of IoT:

Increased Adoption

As IoT technology continues to mature and become more affordable, it is expected to see a significant increase in the number of connected devices and systems across various industries such as healthcare, transportation, manufacturing, retail, and agriculture. This will result in a more connected world where physical objects can communicate with each other and with other systems, leading to new possibilities for automating processes and improving decision-making.

For example, in the healthcare industry, IoT technology can be used to improve patient care by enabling remote monitoring, enabling real-time access to medical data, and improving the accuracy of diagnoses. In the transportation industry, IoT technology can be used to improve road safety, reduce emissions, and optimize traffic flow.

The continued growth of IoT technology is expected to have a significant impact on various industries, creating new opportunities for innovation and growth, and leading to a more connected and efficient world.

Development of 5G

5G is the fifth generation of cellular network technology and it is poised to have a significant impact on the Internet of Things (IoT). 5G networks are designed to offer higher speed, lower latency, and increased reliability compared to previous generations of cellular networks. This will greatly enhance the capabilities of IoT devices and enable new use cases that were not possible before.

With 5G, IoT devices can communicate faster and more efficiently, allowing for real-time data transfer and processing. This means that 5G networks can support more connected devices and higher data volume, leading to an increase in the number of IoT applications. For example, in the healthcare industry, 5G can be used to provide real-time monitoring of patients and remote surgery, which requires a high-speed, low-latency connection.

In addition to improved communication, 5G also enables new IoT applications such as augmented reality, virtual reality, and autonomous vehicles, which require large amounts of data to be processed in real-time. These applications have the potential to transform various industries and revolutionize the way we live and work.

Moreover, 5G networks also provide improved security and privacy, as they are designed with these considerations in mind. This is especially important for IoT applications, as they often involve sensitive personal or corporate data.

The development of 5G networks will greatly enhance the capabilities of IoT devices and enable new use cases, leading to increased innovation and growth in the IoT industry.

Edge Computing

Edge computing is a computing paradigm that brings data processing closer to the source of data, rather than relying on central servers to process and store the data. This approach is becoming increasingly important as the number of IoT devices grows, as it allows for faster data processing and reduces latency.

In traditional centralized computing models, data from IoT devices is transmitted over the network to centralized servers for processing and storage. However, as the number of IoT devices increases, the amount of data generated becomes too large to be processed and stored in a centralized manner. This can result in increased latency and decreased reliability, as the network may become congested and the central servers may become overwhelmed.

Edge computing addresses this issue by enabling data processing to occur closer to the source of data. This reduces latency and improves reliability, as data is processed near the device that generated it, rather than being transmitted over long distances. Edge computing also enables real-time processing and decision-making, which is essential for many IoT applications.

For example, in the manufacturing industry, edge computing can be used to process sensor data from production machines in real-time, allowing for faster detection of issues and more efficient maintenance. In the transportation industry, edge computing can be used to process data from autonomous vehicles in real-time, allowing for faster and safer decision-making.

The growth of IoT is driving the development of edge computing, which enables faster and more reliable data processing and reduces latency, leading to improved performance and efficiency in various industries.

AI and Machine Learning

The Internet of Things (IoT) generates massive amounts of data, which can be analyzed and used to drive insights and improvements in various industries. The integration of Artificial Intelligence (AI) and Machine Learning (ML) into IoT devices is a key enabler for this, as it allows this data to be analyzed in real-time and used to improve decision-making and automation.

AI and ML algorithms can analyze data from IoT devices and provide real-time insights and predictions. For example, in the healthcare industry, AI and ML can be used to analyze patient data and predict health outcomes, allowing for earlier detection of issues and improved patient care. In the manufacturing industry, AI and ML can be used to analyze production data and predict equipment failures, allowing for more efficient maintenance and improved production efficiency.

Furthermore, AI and ML algorithms can be integrated into IoT devices to provide autonomous decision-making and control. For example, in the agriculture industry, AI and ML algorithms can be used to control irrigation systems based on real-time weather and soil moisture data, leading to improved crop yields and water conservation. In the energy industry, AI and ML algorithms can be used to optimize energy consumption and reduce waste, leading to improved efficiency and reduced costs.

The integration of AI and ML into IoT devices will allow for real-time analysis of data generated by IoT devices, leading to improved decision-making, automation, and efficiency in various industries.

Increased Security

The widespread adoption of the Internet of Things (IoT) technology has raised security and privacy concerns, as these connected devices often transmit and store sensitive personal or corporate data. As IoT technology becomes more widespread, security will become a critical concern, and efforts will be made to improve security and privacy.

One of the key ways to improve security in IoT is the development of new security protocols. These protocols will ensure that IoT devices are secure from cyber-attacks and unauthorized access. For example, the use of encryption and secure authentication mechanisms can help protect the data transmitted by IoT devices. In addition, secure firmware updates can ensure that IoT devices are protected against known vulnerabilities.

Another way to improve security in IoT is the use of blockchain technology. Blockchain is a decentralized ledger that provides a secure and transparent way to store and manage data. By using blockchain, IoT devices can be linked to a secure and decentralized network, which can help prevent unauthorized access and cyber-attacks.

Moreover, increased regulations and standards for IoT security and privacy will also play a crucial role in ensuring the security and privacy of IoT devices. Governments and industry organizations are working to establish regulations and standards that ensure IoT devices meet minimum security and privacy requirements.

As IoT technology becomes more widespread, security and privacy will become critical concerns. Efforts will be made to improve security and privacy, including the development of new security protocols and the use of blockchain technology, leading to a more secure and trustworthy IoT ecosystem.

Interoperability

Interoperability refers to the ability of different systems and devices to communicate and work together seamlessly. With the growth of the Internet of Things (IoT), there will be an increase in the number of connected devices and systems, and there will be a need for greater interoperability between these devices to ensure seamless communication and integration.

Currently, many IoT devices use different communication protocols and standards, which can make it difficult for these devices to communicate and work together. As a result, there is a need for standardization and interoperability in IoT, to ensure that different devices and systems can communicate and work together seamlessly.

To address this issue, industry organizations and standards bodies are working to develop common protocols and standards for IoT, which will ensure that different devices and systems can communicate and work together. For example, the Internet Protocol Suite (TCP/IP) is widely used in IoT, as it provides a common language for different devices to communicate.

In addition, cloud computing and edge computing can also play a crucial role in ensuring interoperability in IoT. By using cloud and edge computing, data from different devices can be processed and analyzed in real-time, allowing for seamless integration and communication between different devices and systems.

The growth of IoT will lead to an increase in the number of connected devices and systems, and there will be a need for greater interoperability between these devices to ensure seamless communication and integration. Efforts to standardize and ensure interoperability in IoT will play a critical role in the development of a seamless and integrated IoT ecosystem.

The future of IoT is expected to bring about many exciting new developments and opportunities, transforming the way we live and work. It is a technology with the potential to revolutionize many industries and aspects of daily life.

Wrapping UP

The Internet of Things (IoT) is a rapidly evolving technology with a promising future. With increased adoption, the deployment of 5G networks, the growth of edge computing, the integration of AI and machine learning, improved security, and greater interoperability, IoT has the potential to revolutionize many industries and aspects of daily life. The future of IoT is exciting and full of opportunities, and it will be interesting to see how this technology continues to evolve and shape our world in the years to come.

You can create an amazing presentation using this IOT presentation template.

Step-by-Step Guide To Starting A Business: From Business Plan to Marketing

Starting a business can be an overwhelming endeavor. There is so much to do from coming up with a solid plan to finally executing it. But it is actually quite a manageable affair. UHY Hacker Young group reports that around 726,000 start-ups were created in the UK in 2020. That is a 14% increase from the previous year, far outpacing the global average. 

Starting a business is not a challenge, the challenge is starting a successful one. In this article, we will cover some of the basic steps you need to follow to become a business owner. Hopefully, by the end of this article, you will have a better idea of what to do, and the task in front of you won’t seem as daunting. 

Business Plan 

A business plan is like a blueprint for your business. It helps you map out the key details of your business, such as your target market, competition, and unique selling points. It also helps you set goals and create a plan to achieve them.

Creating a business plan can appear intimidating, however, it can be manageable by conducting research on your desired industry and potential competitors. This research can help determine your target audience and differentiate your business.

Once you have a clear understanding of these key details, you can start outlining your plan. This should include information on your financial projections, marketing strategies, and operational plans. Make sure to be realistic and specific about your goals.

It is important to remember that your business plan has to be a document. You should review and update it regularly as your business grows and evolves. It’s okay to not have all the answers right away, it’s normal to start with what you have and continue to add information as you progress.

Legal Structure

When it comes to legal structure, there are several options to choose from, such as sole proprietorship, partnership, LLC, and corporation. Each has its own set of advantages and disadvantages, so it’s important to choose the one that’s best for your business.

A sole proprietorship is the simplest and easiest structure to set up, but it also means that you’re personally liable for any debts or legal issues the business may face. On the other hand, a corporation offers more protection for the business owner, but it also comes with more compliance and reporting requirements.

It’s important to understand and comply with all the regulations that apply to your business. This could include tax laws, labor laws, and environmental regulations, among others. If you don’t comply with these regulations, it can result in hefty fines and penalties.

It’s a good idea to consult with a lawyer or accountant to help you choose the right legal structure and ensure that your business is in compliance with all applicable laws and regulations.

Creating a Business Profile 

Having a business profile on online directories, search engines, or social media platforms is a great way to build an online presence for your business. This can help potential customers find you and learn more about your business.

There are various online directories available for free where you can list your business, which can be useful for reaching out to potential customers. We Get You Found is one such directory based in the UK. As a new business owner, make creating an attractive profile on such platforms a priority.

When creating a business profile, you’ll need to have some key information ready, such as your business name, address, phone number, website, and a brief description of what your business does. Ensure that the information listed is accurate and current. Including visuals such as images or videos can effectively showcase your products or services.

Designing a website 

Having a professional-looking website is crucial for any business these days. It serves as a platform for customers to learn about your business and access your products or services. Even Linkedin reports that 79% of entrepreneurs with a business website expect to grow by at least 25% in the next three to five years, as opposed to 64% of those without. 

When designing a website, you’ll need to choose a website builder, select a design that matches your brand, and make sure the website is easy to navigate. It’s crucial to optimize your website for search engines to make it easily discoverable by potential customers.

You can either design and develop the website by yourself or hire a web developer to do it for you. Either way, make sure that the website is mobile-friendly, secure, and loads quickly. Statista reports that mobile devices now account for 59% of web traffic. Therefore, if you don’t optimize your website for mobile, you will not only lose customers, but it will also rank lower in Google search results. 

Marketing 

Marketing is essential for any business, as it helps you reach your target audience and promote your products or services. When developing a marketing strategy, you’ll need to identify your target market, choose the right marketing channels, and create content and messaging that resonates with your audience.

There are various ways to market your business such as social media, email marketing, and influencer marketing. You can also use traditional methods such as print advertising, billboards, and events. Online marketing definitely seems a lot more lucrative nowadays, but you should also know that according to Zippia, 82% of consumers trust print ads more when it comes to making a purchase decision. 

You can test different methods and see what works best for your business. The key is to stay consistent and be creative in your approach. With a well-crafted marketing plan, you can reach more potential customers and increase your revenue.

Starting a business can seem like a daunting task, but by following these steps and breaking them into small goals, it can be done. It’s important to remember that your business plan is a living document and to consult with professionals when needed. With the right approach and consistency, you can increase your chances of success.