
Animator is a code-free point-and-click interface for creating bespoke WordPress animations. It’s created by the same team as CSS Hero and is simple to use – find out more in our comprehensive Animator review.
Assessment
While Animator is quite enough for non-technical users, sophisticated users may benefit simply because it can speed up the process. Even if you are skilled in developing your own CSS, you may want to use Animator to save time.
Finding an Animator
Want to give your WordPress site enticing scroll and time-based animations?
These animations can be created by yourself if you are a CSS savvy. Yet, for the rest of us, there is no simple way to add animations to content in WordPress.
Animator, a new standalone plugin from the CSS Hero team, alters that by providing you with a simple point-and-click interface for setting up various types of animations on your WordPress site, regardless of whether you’re using the native editor or a page builder plugin.
This enables you to still build up animations on your site even if you’re not technically savvy. Even though you can write your own CSS, Animator’s UI can help you speed up your workflows.
What Does Animator Offer?
The main advantage of Animator is that it allows you to add a plethora of various animations to your site without requiring any CSS, JS, or other in-depth technical knowledge.
Instead, you may control your animations with a point-and-click interface that includes an animation timeline.
If you’re familiar with the popular CSS Hero plugin, you’ll recognize Animator. In a word, Animator is the CSS style equivalent of CSS Hero.
Let’s go through some of the most important aspects in further depth.
Interface using Point-and-Click
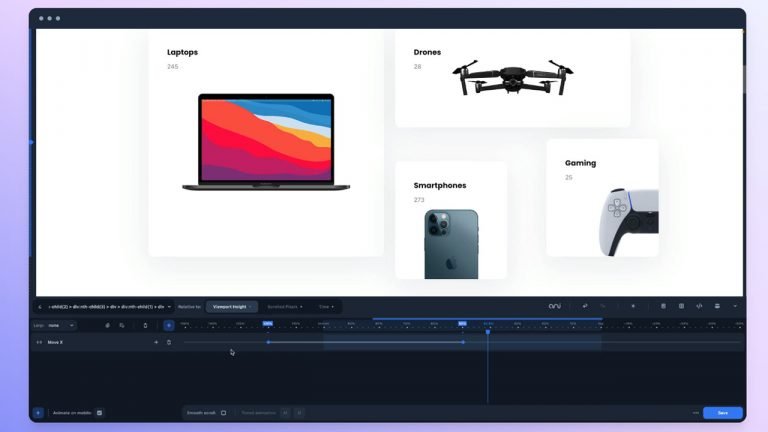
Animator has a simple point-and-click interface to help you control your animations.
There are two major components:
- A full-width visual preview of your site – when you add animations, you can see how they look on the live preview right away. This is quite useful for making little tweaks without having to constantly reload a different preview.
- An animation timeline – It enables you to create one or more animations based on the user’s scroll behavior or time. You can move objects around and change settings to achieve the desired effect.
In the hands-on portion, you’ll get a much more extensive look at this interface…
Yet, it is quite simple to use.
3+ High-Level Animation Modes with Lots of Animation Properties
Animator has three high-level options to assist you in setting up your animations:
- Parallax – “tween” animations based on the percentage location of an element in the viewport. Tween is an abbreviation for in between, and the main notion is that it allows you to create parallax scroll effects.
- Scroll – After the user has scrolled a certain amount of pixels, relevant CSS styles or animations are triggered. When the visitor scrolls down the page, for example, you may apply state-specific styles to your header.
- Timed – Animations are created on a predetermined timetable. For instance, adding a float motion to an element to make it stand out.
Here are some generic Animator samples demonstrating the various animation modes:
Aside from the high-level animation options, you can additionally animate a wide range of CSS attributes, including the following:
- Background color
- Background position
- Box shadow
- Font size
- Letter spacing
- Opacity
- Perspective
- Rotate X, Y, or Z
- Scale
- Skew X or Y
- Width
- …lots more
To make things easier, Animator contains presets for many of these:

Nevertheless, you can also build your own animation, allowing you to go beyond the presets if necessary.
Compatible with the Native Editor, Themes, and Page Builders
Animator works with third-party themes and page builder plugins in addition to the core WordPress editor.
This includes, but is not limited to, the tools listed below:
- Elementor
- Beaver Builder
- Divi
- WPBakery Page Builder
- Avada
- Astra
- Oxygen
Animator should be able to work on any element on your site, independent of where it came from.
For example, you may enjoy Beaver Builder for design but believe that its animation possibilities are too restrictive for your needs.
You can add more complicated animations to your Beaver Builder designs by installing Animator alongside Beaver Builder.
Modify animations manually or export them (For More Advanced Users)
While Animator is designed to allow non-technical users to create animations with a point-and-click interface, more expert users may appreciate that Animator still allows you to access the underlying code if you wish to make direct changes.
If necessary, you can also export the app data.

Standalone Plugin
While Animator is created by the CSS Hero team, it is not required to have CSS Hero installed in order to use it.
That is, Animator is a stand-alone plugin.
Having said that, Animator still works well with CSS Hero, so you may use both if you want code-free control over your site’s styling.
How to Use the Animator Plugin to Make WordPress Animations
Now that you know what Animator has to offer, let’s look at what it’s like to use it on your site.
Following, We’ll walk you through the process of creating WordPress animations with Animator and a demo site built with the Astra theme and the native WordPress editor.
#1. Activate the Animator Interface on the page you want to animate.
To begin, open the Animator interface on the page that includes the material you wish to animate.
If you want to animate a sitewide element (such as your header), simply open any page that contains your header. Whatever animations you create will be applied to all instances of that header.
To access the Animator interface, simply click the Hero Animator option on the WordPress toolbar while viewing the appropriate page.

#2. Choose the Element You Want to Animate.
When you launch the Animator interface, you should see a visual preview of your page at the bottom, as well as the Animator interface.
To begin, click on the element you want to animate in the live preview to choose it.
When you hover over the live preview, Animator will display some additional information about each piece, assisting you in selecting the correct one.
To animate an image in test design, for example, We’ll simply choose it:

You can also input a CSS class or ID manually, which may be required for some background pictures.
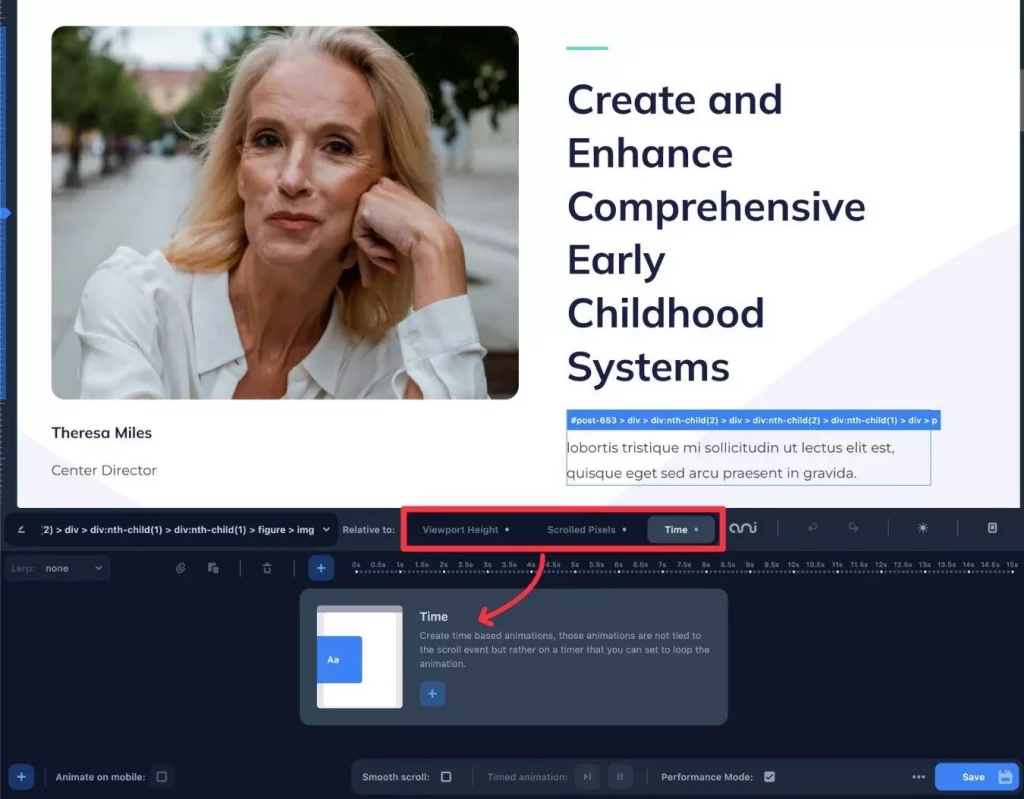
#3. Choose an Animation Mode
After you’ve chosen the element to animate, use the Relative to box to select the animation mode.
You have three possibilities once more:
- Viewport Height (AKA parallax)
- Scrolled Pixels
- Time
You’re essentially making a declarative statement, such as “I want to animate [this element] relative to [this animation mode]”.
Tip – It should be noted that you can apply numerous types of animations to a single element. You could, for example, include both a time-based animation and a parallax animation (viewport height).
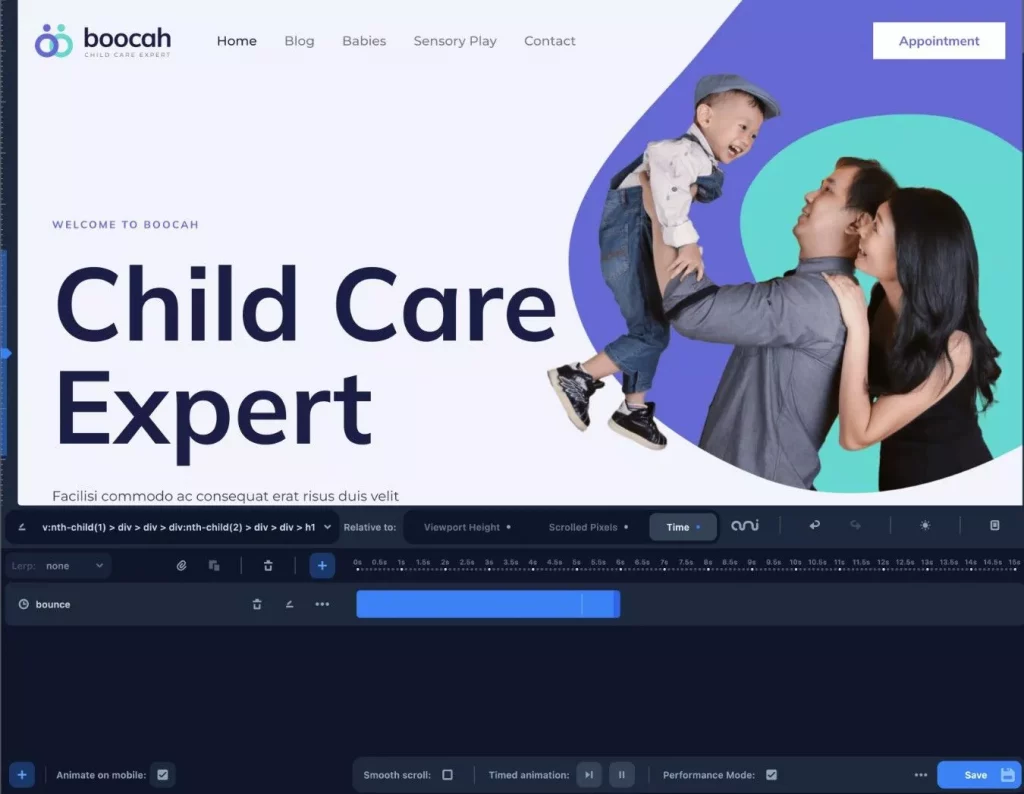
#4. Create Your Animation Using the Timeline
Now that you’ve decided what to animate, you can use the timeline to create your animation.
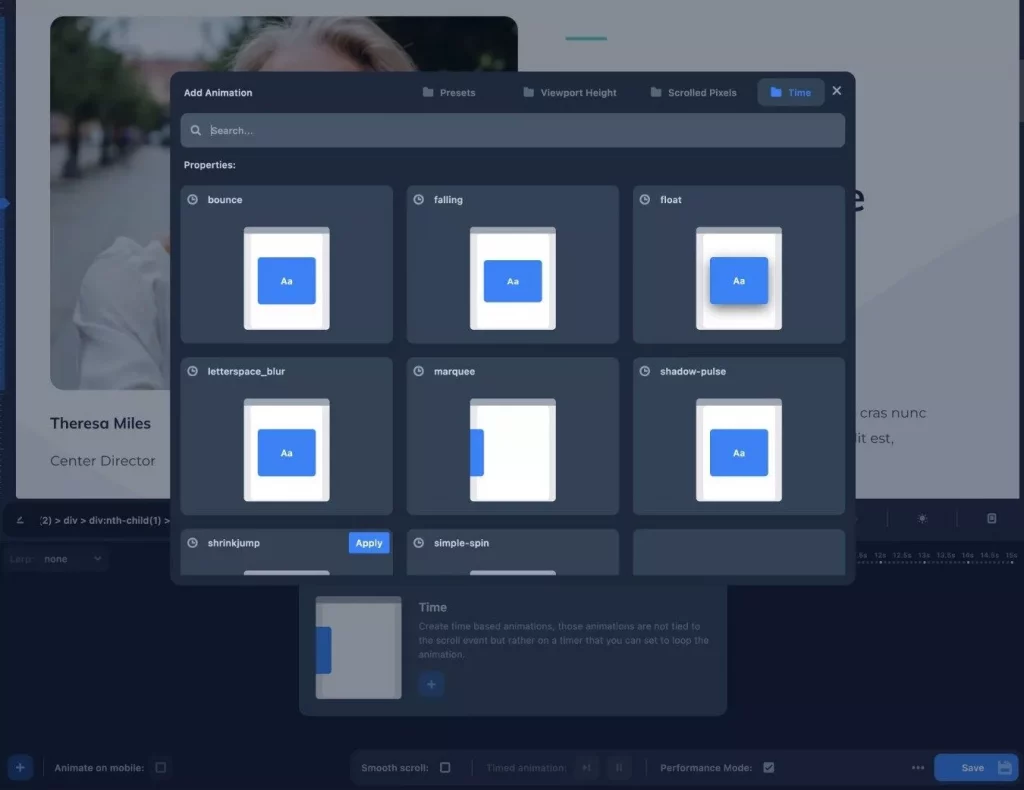
To do so, click the plus sign next to Add Animation:
This will open a popup containing the many types of animations that can be used with that animation mode.
For instance, some of the preset parameters for a time-based animation include the following.
- Bounce
- Falling
- Float
- Letterspace blur
- Marquee
- Shadow pulse
- Shrink jump
- Simple spin
You can get animated previews of how the animation might look, which is really helpful in selecting the perfect animation.
You can also design your own animation type if you want to accomplish anything that isn’t on the predefined list.
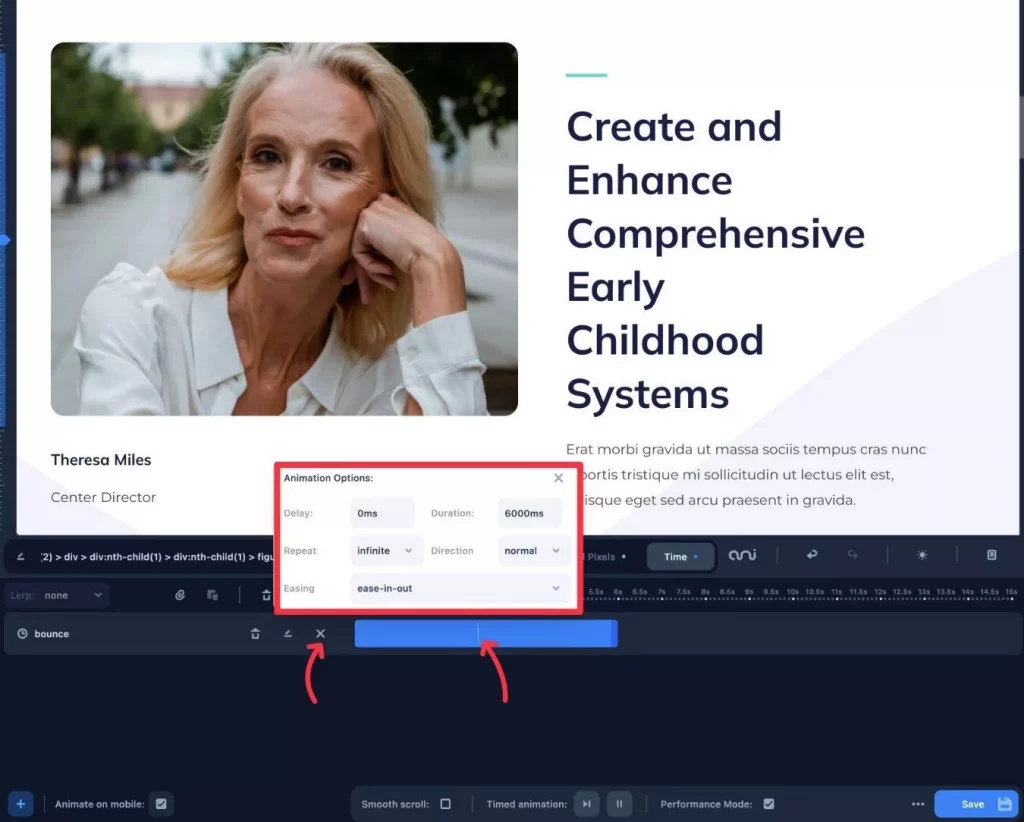
When you select an animation, it will appear on the timeline. The animation will also be applied to the live preview, allowing you to see precisely how it will appear on your site.
When you use a time-based animation, a line will display on the timeline bar as the animation completes, which is quite useful.
You can change the length of the animation by dragging the bar on the timeline.
Also, you may access more sophisticated settings by clicking the three dots symbol, such as whether or not to loop the animation (and if so, for how long).
If you wish to create numerous animations, simply repeat the procedures for each animation.
The animations might then be arranged on the timeline to obtain the desired effect.
If you want to use numerous time-based animations, make sure to disable endless looping.
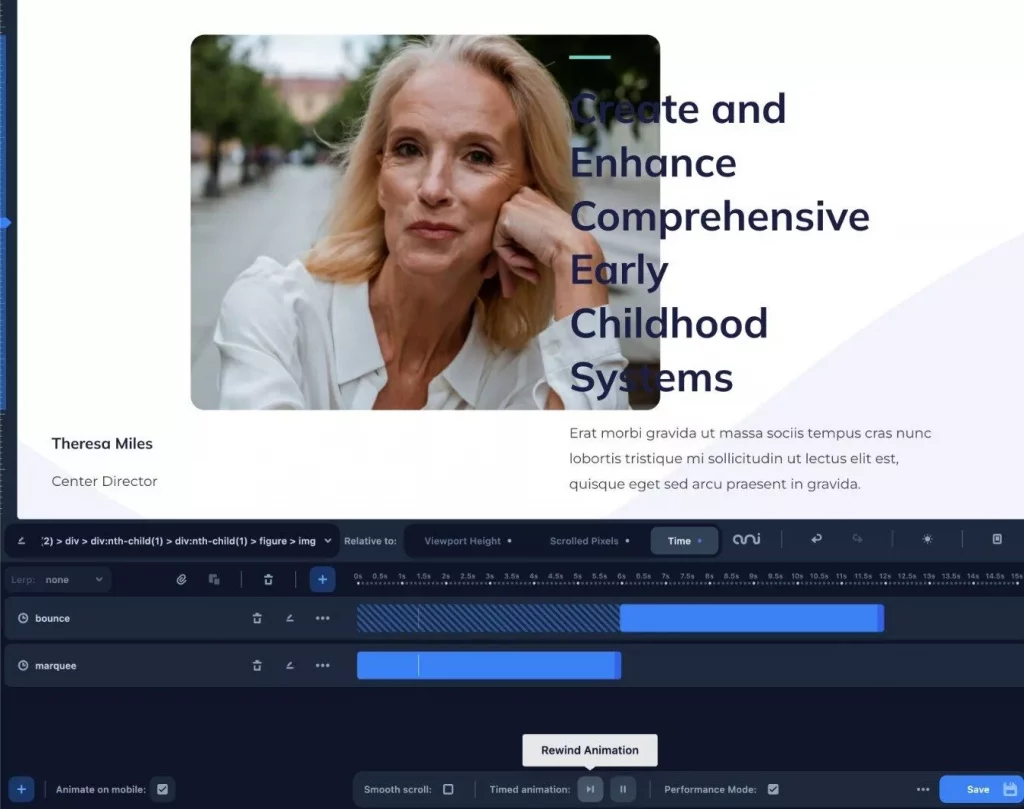
You are also not limited to making the same style of animation. Technically, you could apply both time and scroll-based animations to the same element.
Animator allows you to control LERP (Linear interpolation) to smooth the scroll behaviors of parallax scrolled items.
To change this, use the Lerp drop-down menu on the left side of the screen.
#5. Upload Your Animations
After you’re satisfied with your animations, simply click the Save button to make them live on your site.
There’s also a helpful feature that allows you to choose whether or not to publish your animations to your site’s mobile version.
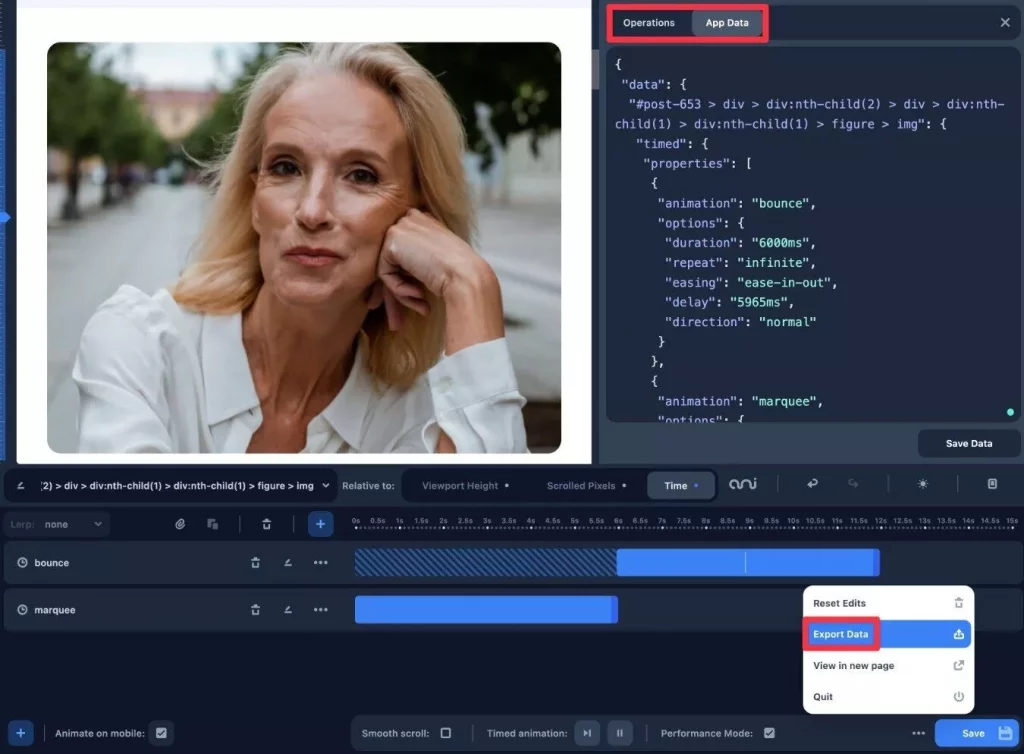
How to Edit, Export, or Manipulate Your Code Directly
Animator also allows advanced users to access the raw JSON data of their animations. You can use this to re-edit your animations, or you can copy/paste it to a text file to get a complete snapshot of the current animations.
There’s also an Operations panel for more technical users, which allows you to dynamically change the plugin’s data JSON object by adding your own javascript code. I’m not a developer, so I’m not sure what potential this brings, but I’m sure developers will welcome the increased control.
These options are available by clicking the three dots icon next to the Save button and selecting Export Data.
Pricing
Animator only has a premium edition, but it’s reasonably priced for what it provides.
It costs $49 for unlimited sites and one year of maintenance and updates at the regular price.
Wrapping Up
Animator fulfills its promise of providing easy-to-use point-and-click animations. Its timeline-based interface allows for effortless organization and management of animations, and the visual preview feature saves time by eliminating the need to reload the website.
Although Animator is user-friendly for non-technical individuals, even experienced users can benefit from its time-saving capabilities, even if they have the skills to develop their own CSS.
If you want to give Animator a try, click the links below to get started:
