
Are you interested in harnessing the power of WordPress for efficient banner ad management?
Monetizing your blog often involves strategically placing banner ads, and many bloggers rely on ad management software to optimize their ad revenue while ensuring a positive user experience.
Streamlining the process of ad management within WordPress is made simple with the AdRotate plugin. AdRotate is a widely recognized and trusted tool that empowers you to seamlessly exhibit and control advertisements on your WordPress website. Its feature-rich capabilities encompass scheduling, tracking, and ad rotation.
In this article, we’ll show you how to use the AdRotate plugin to manage advertisements in WordPress.
Why Use a WordPress Plugin for Ad Management?
Advertisement programs such as Google Adsense and others require publishers to include a code snippet on their website in order for adverts to be displayed.
You can achieve this as a WordPress publisher by either modifying the code in your theme files or by using an ad management plugin.
If you are a beginner who recently started a blog, adding code to theme files is not the best answer. You cannot effectively handle different ad sizes or positions. You also raise your chances of making a mistake that results in unexpected WordPress issues.
Using an ad management plugin, on the other hand, allows you to effortlessly post ads anywhere on your website. Multiple ad codes can be saved, rotated, and displayed or hidden on separate pages.
Let’s look at how to use the AdRotate plugin to manage advertisements in WordPress like a pro.
Manage Ads in WordPress with AdRotate Plugin
The first step is to install and activate the AdRotate plugin.
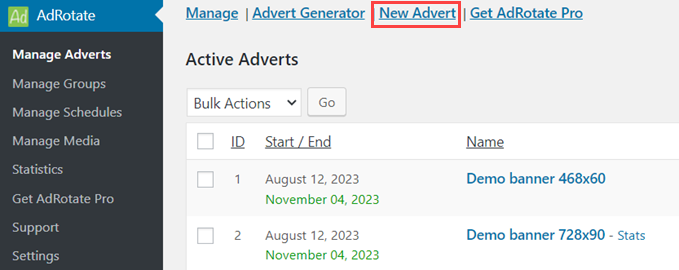
After activation, go to AdRotate » Manage Adverts and click the ‘New Advert’ option to create your first ad.
This will take you to the page where you can add a new ad. You must give your ad a title because it will help you recognize it in the WordPress admin area.
When you’re finished, you can paste the ad code generated by your advertising network, such as Google Adsense. Self-hosted ads can also be generated by generating your own code.
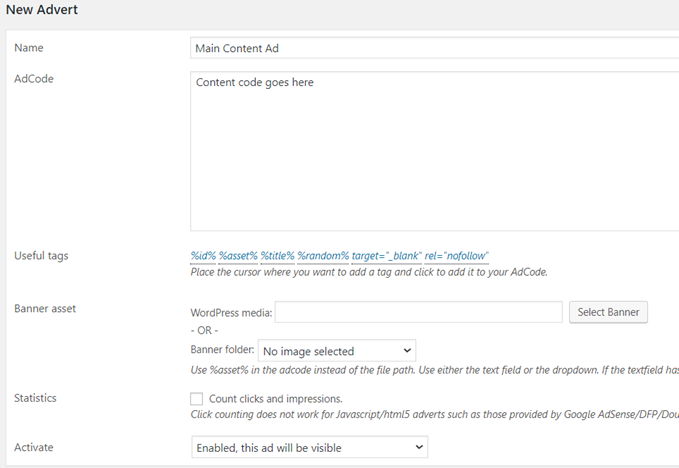
You can submit banner graphics and enable click tracking for hosted advertisements. To make this ad visible on your WordPress site, click the activate button.
Then, scroll down to the usage and schedule part of the page. You can schedule your ad here and get the shortcode to paste into your posts, pages, or sidebar widgets.
Remember to click the ‘Save Advert’ button to save your settings. You can repeat this process as many times as you wish, and then choose which adverts to display on your site.
Grouping Your Ads
Many WordPress blogs participate in various advertising networks and partner programs. You may also have advertising spots in various places and sizes. For easy management, grouping allows you to effortlessly divide your ads into multiple categories.
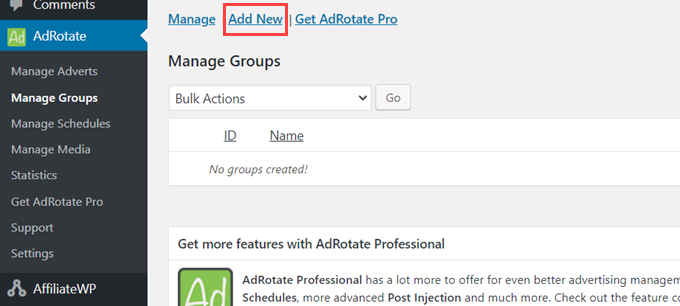
To create a new group, go to AdRotate » Manage Groups and click the ‘Add New’ button.
This will take you to the page where you can create a new group. You must first provide a title for the group.
This will make it easier to find the group in your WordPress admin area.
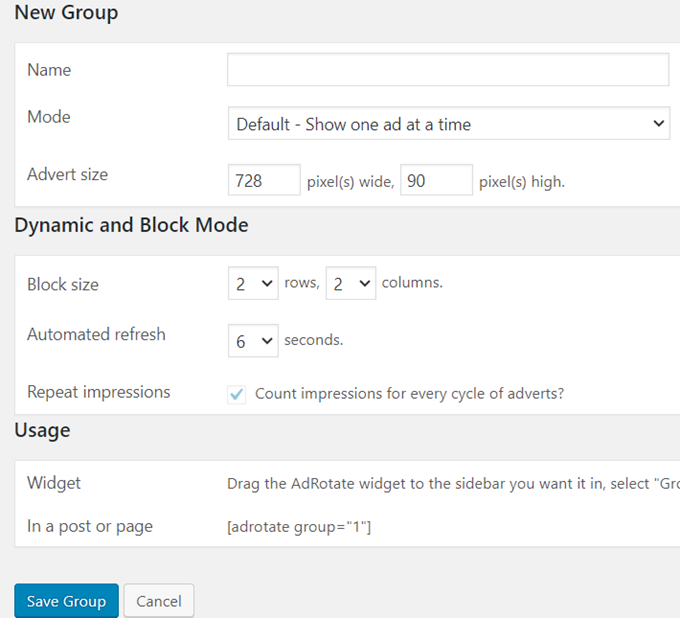
The following step is to choose a display mode. AdRotate allows you to tailor how ads from a given group are displayed.
You can, for example, show one ad from the group at a time, a block of advertising, or dynamic mode, which changes the ad every few seconds.
Then, select the group auto display choices. AdRotate allows you to integrate ads from a group into posts, pages, and sidebar widgets automatically.
At the bottom of the page, you will find all of your advertising that you can associate with that group. Simply choose the ads you want to include and then press the ‘Save Group’ button.
Manually Inserting Ads in WordPress
While you may attach your advertising to groups and have them automatically insert into posts, pages, categories, and widgets, some publishers may desire more detailed control over which ads appear where.
AdRotate makes it simple to place advertisements on your WordPress site.
Each ad on your site has its own shortcode, which you can copy and paste into your WordPress posts, pages, or even custom post types.
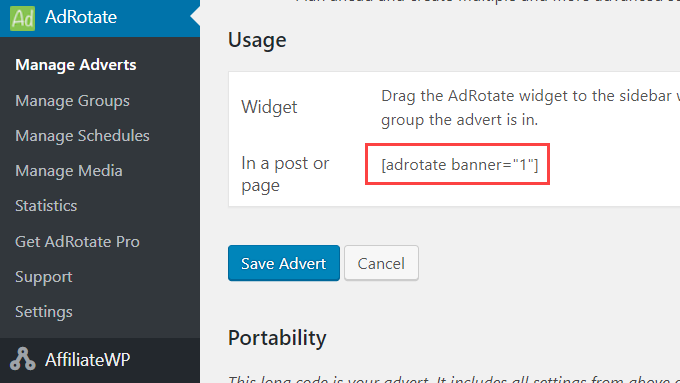
To change an ad, go to AdRotate » Adverts and click on it. To copy the shortcode, scroll down to the usage area on the Edit Ad page.
Similarly, you can modify a group to obtain the shortcode, which you can subsequently use anywhere on your website.
To display advertisements in your WordPress sidebar, navigate to Appearance » Widgets and add the AdRotate widget to your sidebar.
Always refer to the official documentation of the AdRotate plugin for the most up-to-date and detailed instructions. We hope that this article has helped you to understand how to handle ads in WordPress using the AdRotate plugin.
Wrapping Up
In conclusion, using the AdRotate plugin for WordPress provides a user-friendly and efficient way to manage banner ads on your website. Whether you’re a beginner or an experienced publisher, this plugin offers a range of features to help you monetize your blog effectively. By allowing you to schedule, track, and rotate ads, AdRotate empowers you to optimize your ad earnings while maintaining a positive user experience.
The plugin simplifies the process of inserting and managing ads, making it accessible to users of all skill levels. With options to group your ads for better organization and control, as well as the flexibility to manually insert ads where you desire, AdRotate gives you the tools needed to take charge of your advertising strategy.
