Want to reclaim control of your inbox and better organize your emails? Learn how to utilize color-coded labels in Gmail to increase productivity.
Managing your emails can be time-consuming, tiresome, and overwhelming. Inboxes may quickly fill up, and an untamed inbox can feel like a hole you’ll never be able to escape from. However, this is not always the case!
Color-coding your emails is an excellent method to organize them and keep track of the communications. We’ve gone over how to make and use colored labels in Gmail to organize your emails in great detail below.
Make Labels
The first step in organizing your emails is to create a label. The steps for making labels are described below. These methods apply to both the Gmail online interface and EasyMail for Gmail, but they do not apply if you use Gmail offline.
To proceed, follow these steps:
- Open your browser and navigate to your Gmail inbox.
- Expand the More section on the left side of the screen.

- Select Create a New Label from the drop-down menu.
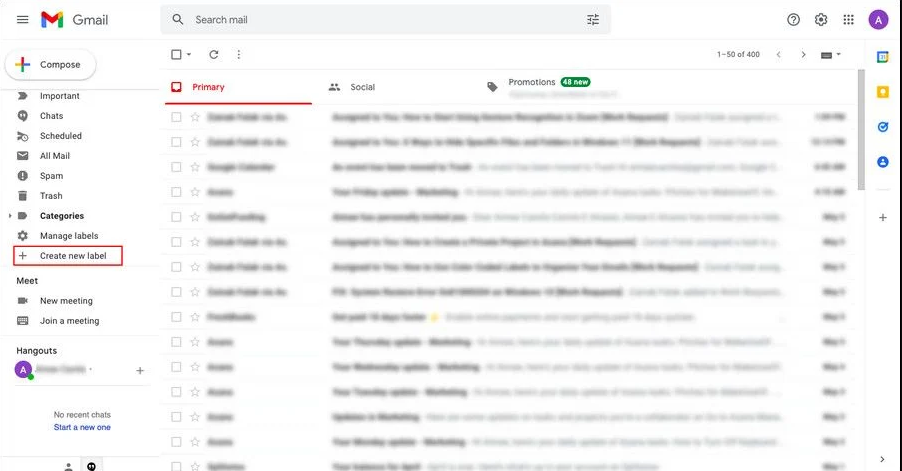
- In the following dialogue, give the label a name and click the Create button.

If these procedures do not work for you, you can try establishing a new label in Gmail’s settings. What you need to do is:
- Click the gear button in the upper-right corner of your Gmail inbox and select See all settings.

- Go to the Labels tab in the next window and scroll down the page.
- As illustrated below, click the Create new label button.

- Enter a label name and click the Create button.
You have just created a new label with success.
Emails should be color-coded.
Now that you’ve generated a new label, color code it to make it stand out from the rest of the emails in your inbox. You must do the following:
- Navigate to the left pane of your Gmail window and look for the newly generated label.

- Hover your mouse over the label and then click the three dots that appear next to it.
- Navigate to Label color and select your preferred color. In the same context menu, you can also add a custom color by clicking Add custom color.

Use a Filter
After you’ve added color to your label, you can label the targeted emails in your inbox. There are two ways to proceed.
You can either label the current emails in your inbox or manually apply the filter to the targeted emails. The latter will label all future emails automatically. You can also do both!
1. Existing Emails Should Be Labeled
To label the existing emails in your inbox, follow these steps:
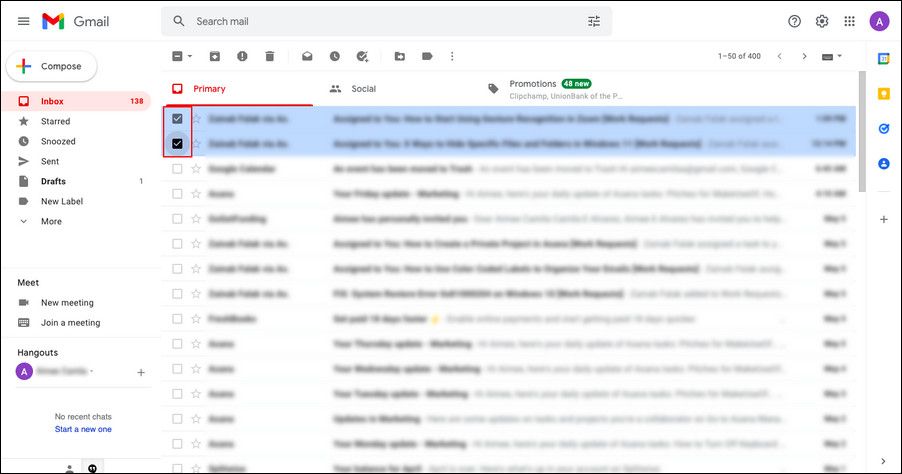
- Select the targeted emails by clicking on the checkboxes associated with them to label the messages in your inbox.
- On the toolbar, select the label icon.
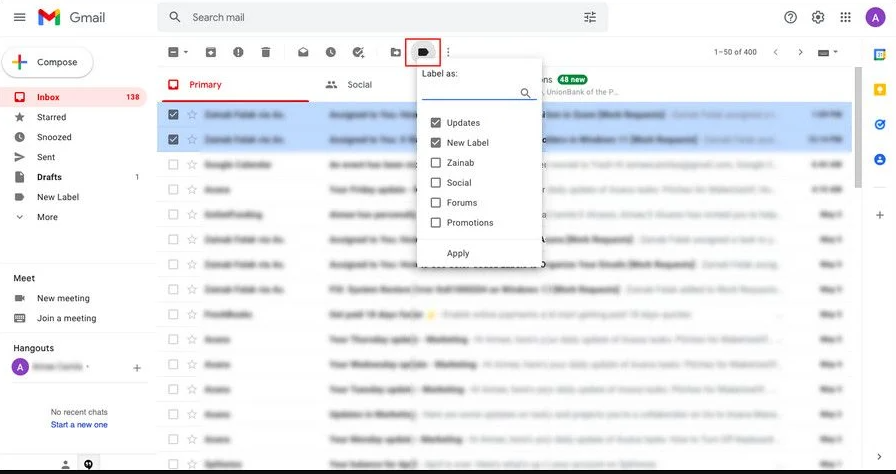
- Then, check the box next to the label you want to apply and click Apply to save your changes.

To label a single email, right-click on it and select Label as > [desired label].
2. Label Email Addresses Manually
If you manually apply the labeling filter to email addresses, all future emails from those addresses will be color-coded. To do so, follow these steps:
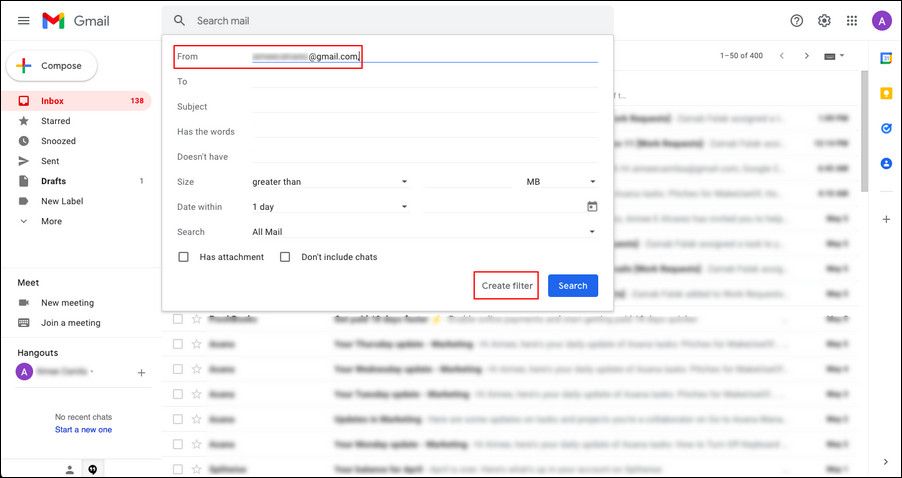
- In the address bar at the top of the window, click the Show search options icon.

- Enter the desired address in the text field associated with From and then click Create filter.
- Check the box next to Apply the label to expand its drop-down menu in the following dialogue.

- Select the desired label and click Create filter once more.

From now on, the emails you receive from this email will be color-coded. If you’re a productivity nerd like us, you should think about using Gmail add-ons to boost your productivity.
Take Back Control of Your Inbox
The above steps should assist you in better organizing your emails and regaining control of your inbox. Organizing and managing your email will allow you to spend less time dealing with it and more time focusing on the things that will lead to your success.
