
When you think of the greatest pair of all time, you probably think of a pair like Batman and Robin, Mickey and Minnie. Then, there is a very modern pair of WordPress and Google Analytics.
While they might not the greatest partners, I bet they’d be pretty high up there for WordPress design, development, and marketing professionals.
If you have a WordPress website, you must also have Google Analytics (GA) – no questions asked. It’s not like the two can’t exist without one another (as in any healthy relationship), but I’d argue that the universe just doesn’t seem right when the two aren’t paired up. The question is: how do you make this love affair?
Pairing Google Analytics’ Tracking Code and WordPress
You are most likely to have at least one of three options to help you connect Google Analytics to your WordPress site:
– Add Google Analytics with a plugin;
– Create a Google Analytics WordPress plugin; or
– Add Google Analytics to WordPress without a plugin.
That last one? We show you in this post where to find your Google Analytics code and how to add Google Analytics to WordPress without a plugin.
Note: We do not recommend adding Google’s tracking code without a plugin.
Wait, What?

This is right. We will show you how and where to add the code for analytics tracking, but we sincerely believe that either of the other two options will better serve you and your website.
Why?
Adding Google Analytics to WordPress with plugins is easy, fast and hassle-free;
If you code GA in WP yourself, you will have to add the Google Analytics code again when you switch themes; And
The Google Analytics plugin sets all the features automatically, saving you time.
Now, we get it. If you want control over how GA tracks your data, then you must add the Google Analytics tracking code manually. Or, if you are learning the basics of how WordPress works, then this is an easy task to start with.
Whatever your reasons (and do let us know yours the comments! we’d love to know), let’s jump in.
How to Add Google Analytics Without a Plugin?
You are only six simple steps away from manually adding the tracking code.
Step #1: Create a Google Account
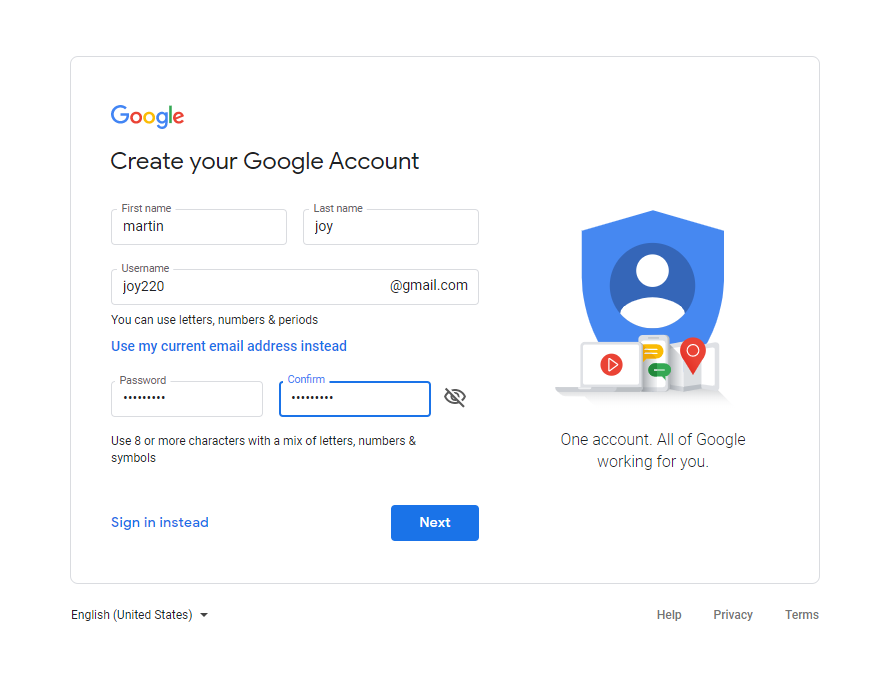
If you haven’t already, create a Google account and set up your website – a property.
Step #2: Log in to Google Analytics


With your Google account created, you can now sign into Google Analytics. Select your email address and log in.
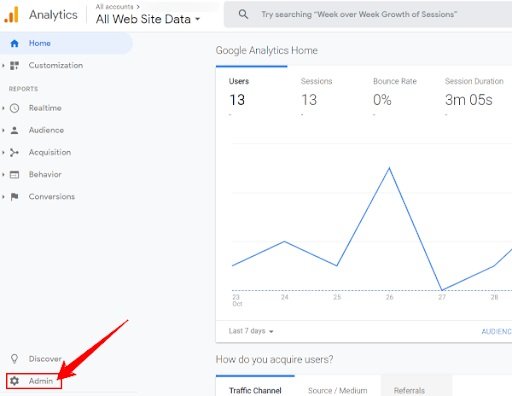
Step #3: Get Your Google Analytics Tracking ID
Once you have login into Google Analytics, go to the admin area in the lower-left corner of your Google Analytics dashboard.
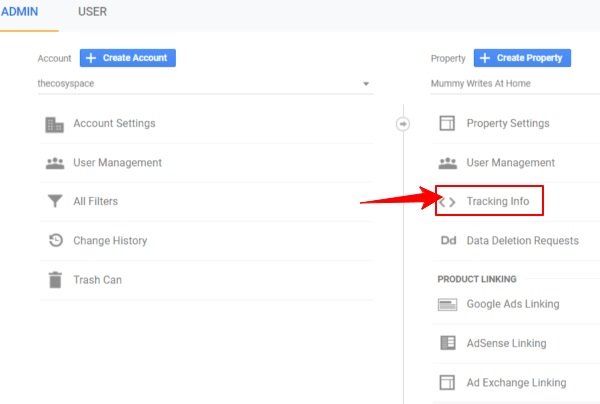
You will see three columns of admin setting controls. In the middle column, click Tracking Info, and then choose the Tracking Code option.
Step #4: Copy Your Tracking Code
The Tracking Code tab will open and show your property’s specific tracking ID with the full Google Analytics tracking code.
Once you get your GA tracking code, you need to copy it completely.
Step #5: Log in to WordPress and Add the Code
Note: You should always create a child theme for your WordPress site before editing the theme files.
So, wherein the HTML of your webpage should you place your analytics tracking code?
Log into the backend of your WordPress website.
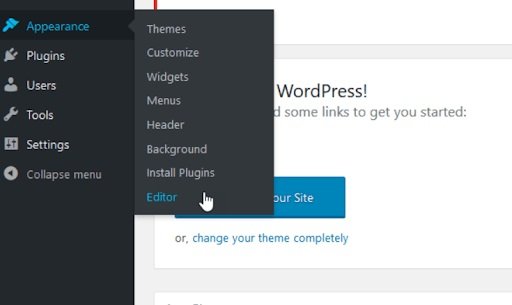
Once login, go to the Appearance> Editor tab in the sidebar. On this screen, you display all the files on your site to the right, and the Google Analytics code snippet of each file is displayed in the middle of the page.
Unless you’re planning on tracking visitor activity on just a few pages of your website (unlikely), you’ll want to include some code somewhere that will automatically implement tracking site-wide.
Where can you do this?
See the header-right file of the header.php. Click on it to open it; The code editor will appear in the middle of your screen.
Look for the closing tag within the code. A simple Ctrl + F will help you find it quickly.
Once you find it, place your cursor just before the tag and paste it into your Google Analytics tracking code. Then click the update file button under the code editor to save your changes.
Step #6: Test Your Connection To GA While Waiting
After adding Google Analytics to WordPress, it takes anywhere from 24 to 48 hours to populate new data.
When you do not immediately start seeing data for any traffic to your site, you can test the connection you have established.
Try going back to the tracking code page in Google Analytics. To the right of your tracking ID is the status update. To confirm that everything works properly, click on Send Test Traffic. This will open your site in a small window.
If all is well, your account should update to show an active user number of 1. User!
If the active user count does not appear immediately, be patient. Google says this can take up to a minute.
