
Do you know how to edit Featured Images in wordpress in bulk? Would you like to learn more about it?
In WordPress, the featured photo (also known as a featured image) is an image that represents a specific post or page. It is typically displayed prominently on the page, such as in a header or thumbnail. Adding, changing, or removing featured photos in WordPress is generally a straightforward process.
When it comes to adding a featured photo to a WordPress post or page, you can do so while creating or editing the content. Within the WordPress editor, there is usually an option to set a featured image. You can either upload a new image from your computer or select an existing image from your media library. Once you’ve chosen the image, it becomes the featured photo for that particular post or page.
Changing a featured photo for a single post or page is also relatively easy. You can navigate to the post or page in question within the WordPress admin area, edit it, and then edit featured image as desired. By replacing the existing image with a new one, you can update the featured photo without much effort.
If you need to change the featured photos for multiple pages in WordPress, it can become more time-consuming and require additional work. By default, WordPress doesn’t provide a built-in way to change the featured photos for multiple posts or pages simultaneously. This means that if you have a significant number of pages, you would need to manually edit each one individually to update their featured photos.
Why You May Need to Bulk Edit Featured images in WordPress?
Featured photos, often known as post thumbnails, are an essential component of many websites. Almost all recent WordPress themes include built-in support for featured photos, which may be shown in many places of your WordPress website, including your blog archives.
You’ll want to make sure your featured photos look beautiful and reflect your brand as an important aspect of your WordPress blog or website. Keeping this in mind, you may need to bulk edit featured images in WordPress at some time. For example, you may install a new WordPress theme and then opt to create fresh featured photos to complement your new theme.
In the regular WordPress editor, you may edit featured images for a specific page or post. Changing the featured picture for a large number of different pages and articles, on the other hand, may be tedious and time-consuming. Keeping this in mind, let’s look at how to bulk modify featured photos in WordPress.
How to Edit Featured Images in WordPress in Bulk?
The Quick Featured images plugin is the simplest method to mass modify featured images in WordPress.
This plugin allows you to easily modify every featured picture on your website. It also includes sophisticated filters for changing the featured photos for various categories, tags, post kinds, and more.
Before you begin utilising the Quick Featured Images plugin, keep in mind that you cannot reverse any bulk adjustments. If you alter your featured photographs and are dissatisfied with the results, this might cause issues.
With this in mind, it is recommended that you backup your WordPress website before installing this plugin. If you don’t currently have a backup solution, there are numerous excellent WordPress backup plugins that will allow you to backup your website automatically.
After making a backup, install and activate the Quick Featured Images plugin. If you need assistance, please visit our instructions on installing a WordPress plugin.
Go to Featured Images » Overview in the left-hand menu after activation. Click the following link on this screen: ‘Bulk set, change, and remove featured images for existing articles.’

This page lets you bulk modify your featured photographs in a variety of ways.
The ‘Set the selected image as a new featured image’ radio button is your first option.
This option locates all posts and pages that do not have a featured picture. You may then select a new featured picture for all of these pages and posts.
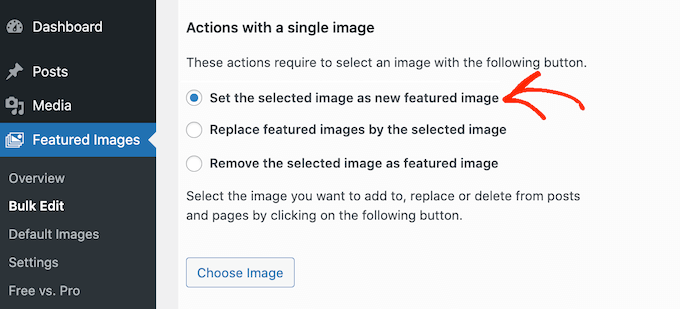
‘Replace featured photos with the selected image’ is another option. This will allow you to replace any current featured photos with a new one.
The following option is ‘Remove the selected image as featured image.’ This allows you to choose a certain image and then delete it from anywhere it appears on your website. This is ideal for deleting an out-of-date prominent picture, such as one with your site’s previous logo.
Click the Choose Image button after picking one of these radio options.
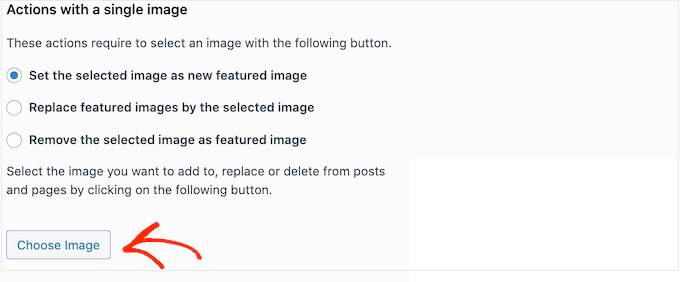
You may now select the picture to be used in the bulk edit. You have the option of using a picture from your WordPress media library or uploading a new one.
After that, scroll to the bottom of the screen and click the ‘Next’ button.

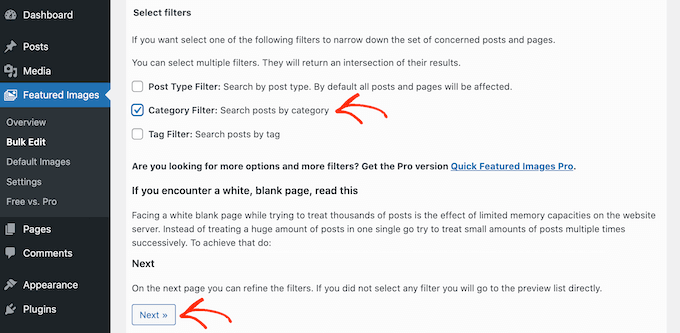
You may adjust how WordPress handles bulk edits on this screen.
Depending on whether you’re adding, editing, or removing a featured picture, the options you see may differ. For example, if you choose the ‘Set the selected image as new featured image’ radio button, you may choose whether to override or ignore all currently featured photos.

On this panel, you may change how WordPress handles bulk modifications.
The options you see may alter depending on whether you’re adding, modifying, or removing a featured image. If you pick the ‘Set the selected image as new featured image’ radio button, for example, you may choose whether to override or ignore all current featured photographs.

You may select more than one option. If you wish to bulk modify posts with a certain tag, for example, tick the ‘Post Type Filter’ and ‘Tag Filter’ boxes.
After you’ve checked one or more boxes, click the ‘Next’ button.
You will now see several options for customising your filter. If you tick the ‘Post Type Filter’ box, for example, you may pick between the ‘Posts’ and ‘Pages’ boxes.

If you ticked the ‘Category Filter’ or ‘Tag Filter’ boxes, you’ll see a dropdown menu.
You may use this dropdown to select the category or tag where you wish to bulk modify.

When you’re satisfied with your filter’s configuration, scroll to the bottom of the screen.
You may then go to the ‘Preview filtering’ option.
The Quick Featured Images plugin now displays a preview of all the pages and posts affected by the bulk modification.
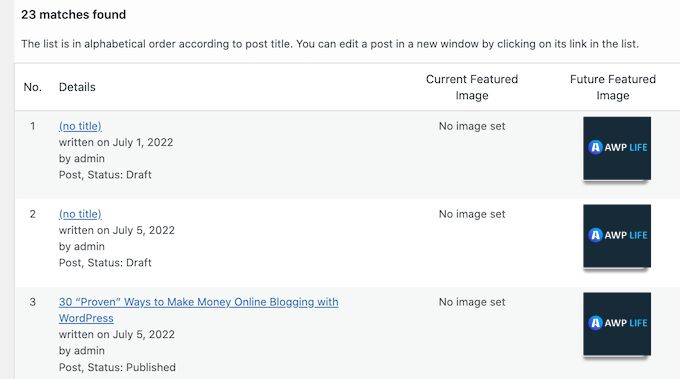
If you’re satisfied with the preview, go ahead and click the ‘Apply’ button.
Images Featured Quickly will now mass modify all of your WordPress website’s relevant featured photos.
How to Make Multiple Images Randomly Featured?
When you bulk change featured photos in WordPress, you may wind up utilising the same featured image for several articles. Duplicate photos might make your website appear monotonous and repetitive.
Keeping this in mind, you might choose to choose your featured photographs at random. The Quick Featured photos plugin allows you to choose photos from your WordPress media library. The plugin will then randomly insert these featured photos into your pages and articles.
You may mass modify your photographs in this manner without producing a large number of duplicate featured images.
Click on ‘Bulk set, replace, and remove featured images for existing articles’ again to set your featured photos at random.
Once there, select ‘Set numerous photos randomly as featured images.’
You may then open the WordPress media library by clicking the ‘Choose Images’ option.

Hold down the Shift key and then click all of the photographs you wish to use as featured images at random.
After that, click on the ‘Choose Images’ option. After that, select ‘Next’ from the bottom of the screen.

By default, Quick Featured photos will apply these photos at random to all of your WordPress pages and posts.
Do you just want to utilise these photos for particular sorts of content, categories, or tags? Then, using the same procedure as stated previously, you may design a filter.
Quick Featured Images will offer a sample of all the pages and posts that it intends to update when you apply a filter. Check the thumbnail to see which picture the plugin has allocated at random to each page or post.
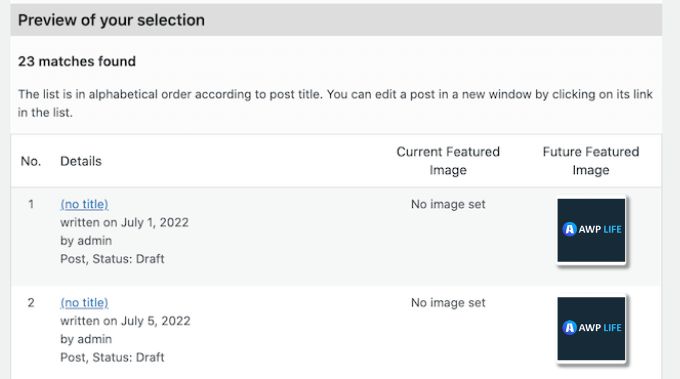
If you’re satisfied with the preview, click ‘Apply.’ The new photos will now be added to your pages and posts by Quick Featured photos.
How to Bulk Remove Featured photos in WordPress?
There may be occasions when you do not want to use featured photos on your website. For instance, you may be attempting to improve WordPress performance, or you could be using a theme that just does not look well with featured photos.
Quick Featured photos allows you to quickly delete all featured photos from your pages and articles.
Filters may also be used to eliminate featured photos from pages, articles, or material with a certain tag or category.
Simply select the ‘delete all featured images without existing image files’ option button in WordPress to bulk delete featured photos. If you are ready to proceed, click ‘Next.’

You may now add filters by following the steps shown above.
After you’ve created one or more filters, click the ‘Next’ button.
As usual, the plugin will display a preview of all the pages and posts that will be modified as part of this bulk edit. Because you are removing the featured picture, the ‘Future Featured picture’ column will display ‘No image set’ rather than a thumbnail preview.
If you’re ready to remove the featured picture from these pages and posts, simply click the ‘Apply’ button.

Featured photos (post thumbnails) are an integral part of many websites, including WordPress sites. They enhance the visual appeal and brand representation of your blog or website. While you can easily modify the featured photo for individual pages or posts using the standard WordPress editor, making bulk changes to featured photos for multiple pages can be a cumbersome task. However, there are methods available, including plugins, that can simplify the process and allow you to efficiently update featured photos across your WordPress site.
