

Cryptocurrency-exchange is a free WordPress theme with very fine-tuned design, typography, and color used for all types of cryptocurrency-related business. Cryptocurrency theme is useful for all type of websites like cryptocurrency blog, news, market, exchanges, coins, hardware, mining, algorithm, business, or even cryptocurrency live update website. You can easily set up and configure the theme the same as the demo.
How to setup Cryptocurrency-Exchange free WordPress theme?
We are explaining everything with detailed guidelines below, follow and set up the Cryptocurrency-exchange theme on your website.
Main Steps
1. Download and Activate
2. Adding Navigation Menu
3. Setup Homepage
4. Enable Slider Section on Homepage
5. Enable Service Section on Homepage
6. Enable Portfolio Section on Homepage
7. Enable Blog Section on Homepage
8. Enable Testimonial Section on Homepage
9. Enable Email & Icon Settings Section on Homepage
10. Import demo data using XML file
1) Download and Activate
Login into your WordPress website admin dashboard. Simply, Go to the Appearance > Themes > Add New
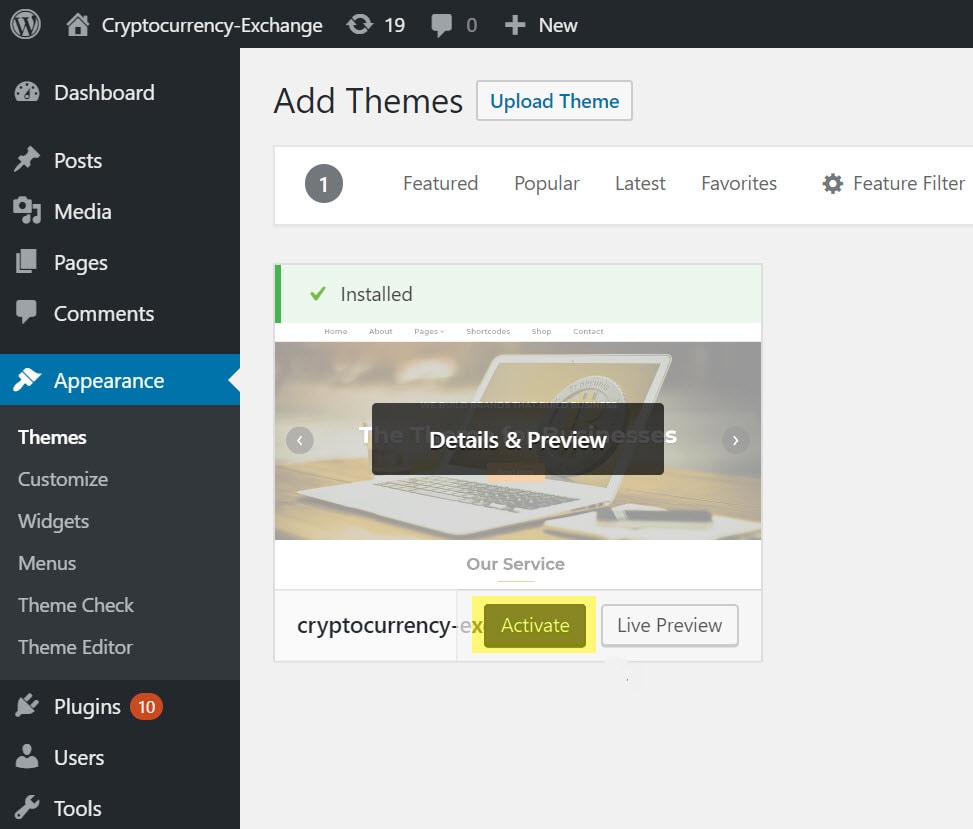
Check the highlighted area into the screenshot

On Add Themes page type the “cryptocurrency-exchange” into the Search box, WordPress will display the cryptocurrency-exchange theme into a search result and click on the Install button

After the theme installation finished click on the Activate button to activate the theme on the website.
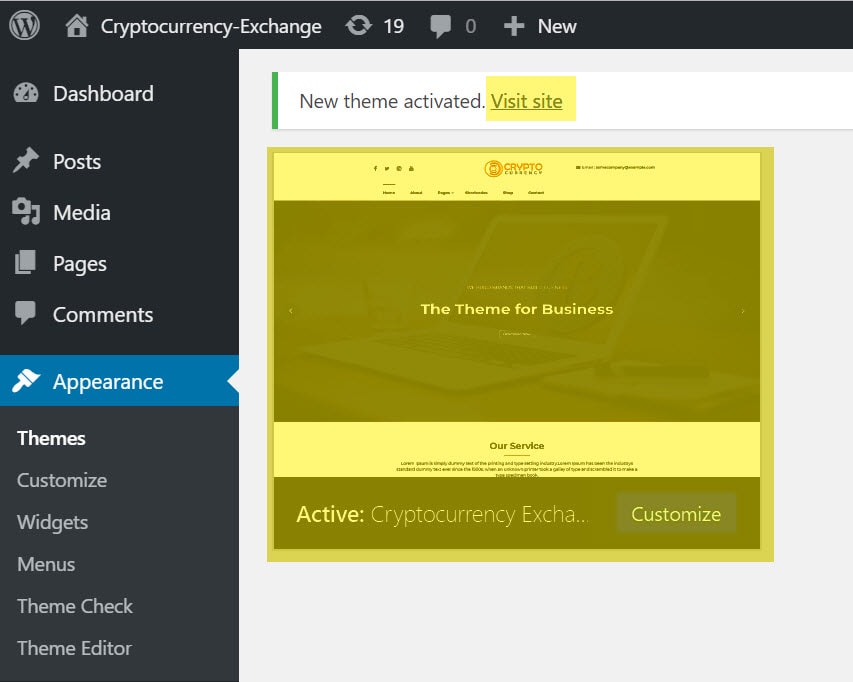
The cryptocurrency-exchange theme has been activated on the website. You can visit the site with the newly activated theme.
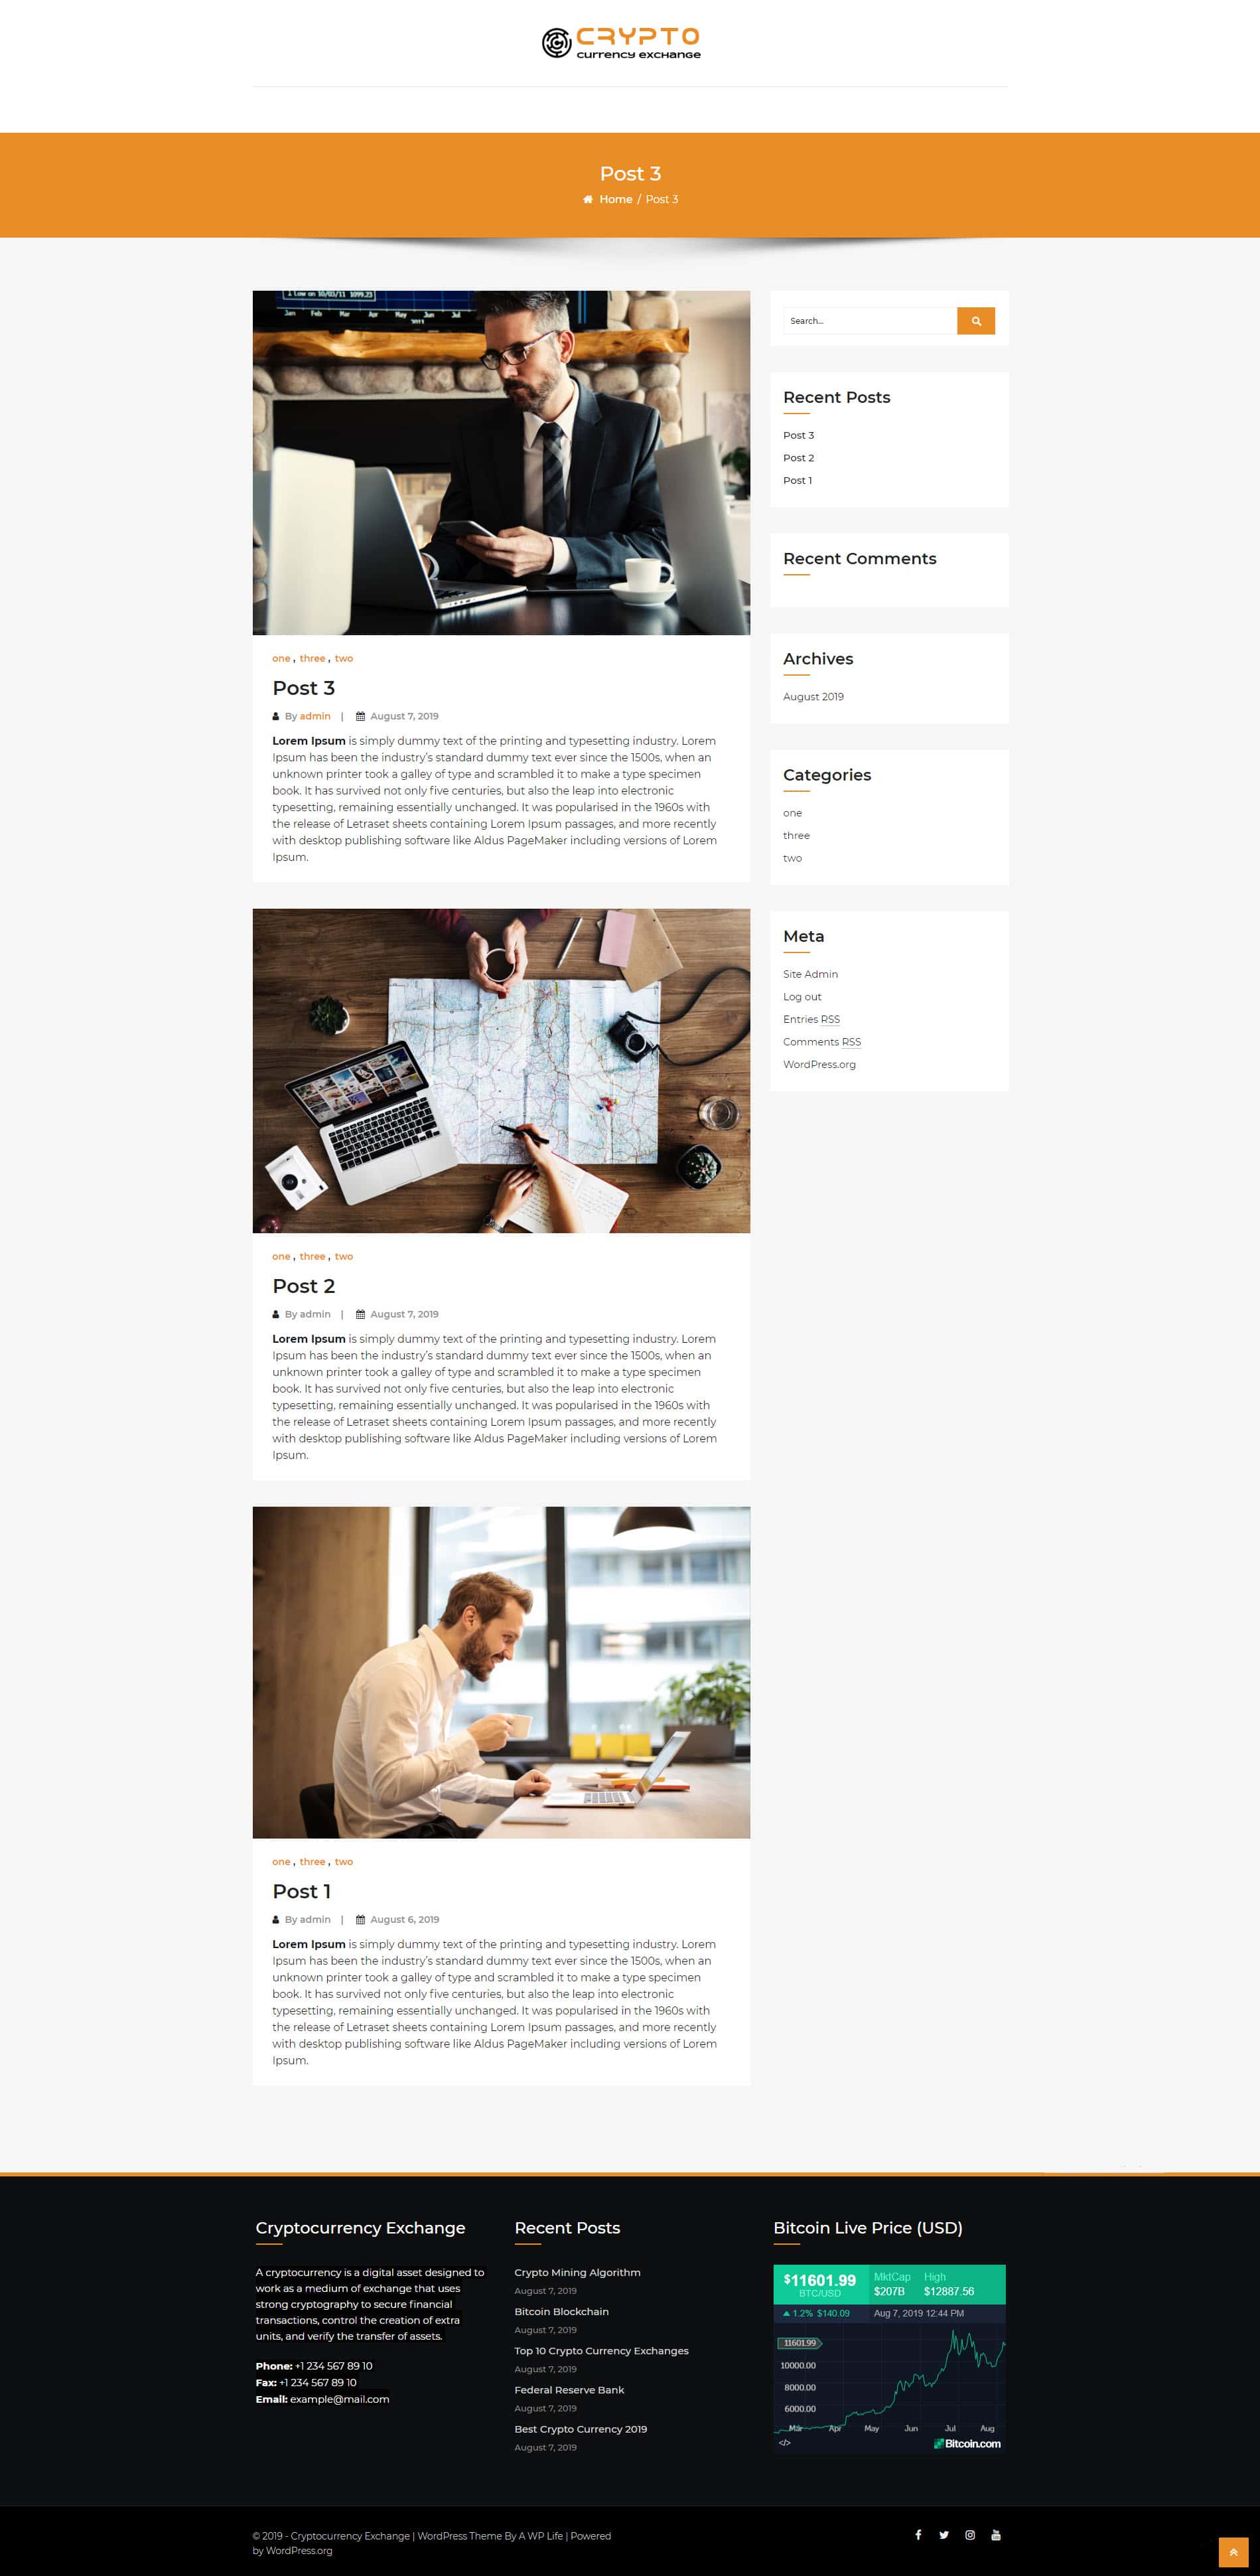
Your website will look like this:
2. Adding Navigation Menu
The first step is to create a navigation menu for your website. But, before creating a navigation menu, you need to create some pages which will be used in your navigation menu. You can make some sample pages like Home, About, Service, Blog, etc.
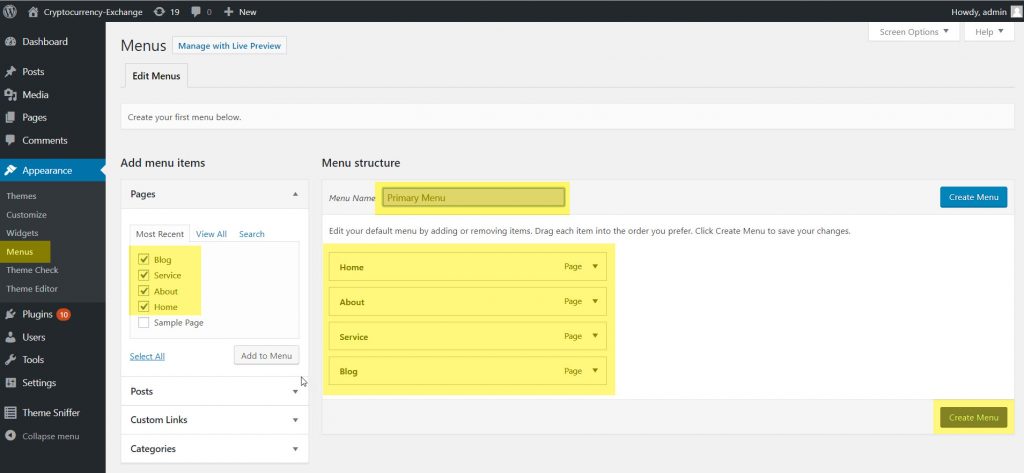
Simply, Go to dashboard Appearance > Menu and follow the screenshot.
A) Write a Menu Name as “Primary Menu”, you can name it according to you.
B) Select the pages to add to the menu
C) Set the menu pages position by drag and drop option
D) Click on Create Menu button
After creating the menu it will show Menu Setting, this setting allows you to choose the menu display position on the homepage like Primary, Header, and Footer. The location feature depending on themes character, some themes provide multiple menus location for it.

The site navigation has been added successfully, check the navigation preview on the homepage.

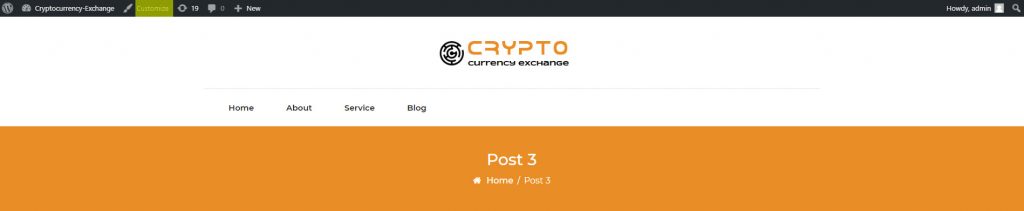
3. Setup Homepage
Currently, the homepage will show the post with right sidebar page. Now open the theme customizer to set up the homepage and click on the Customize button at the top bar.
Set the Homepage Settings tab into the customizer.
A) simply, Set Your Homepage Display – A static page
B) Choose Homepage – Home (Home is a page, which is created during navigation menu creation)
C) Set Posts page – Blog (Blog is a page, which is created during navigation menu creation)
D) Click- on the Publish button.

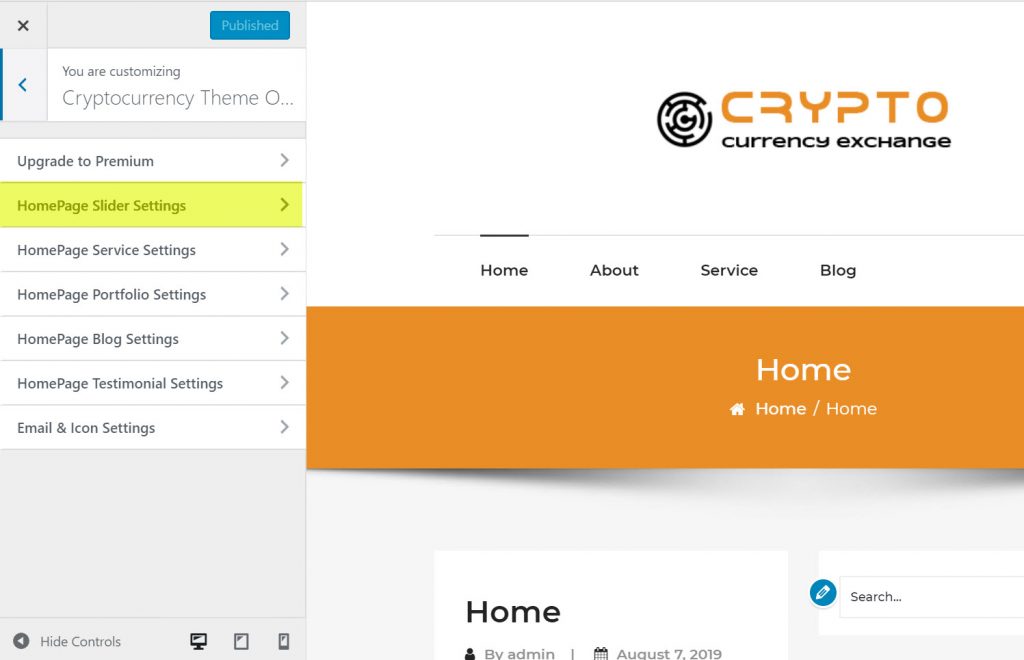
4. Enable Slider Section on Homepage
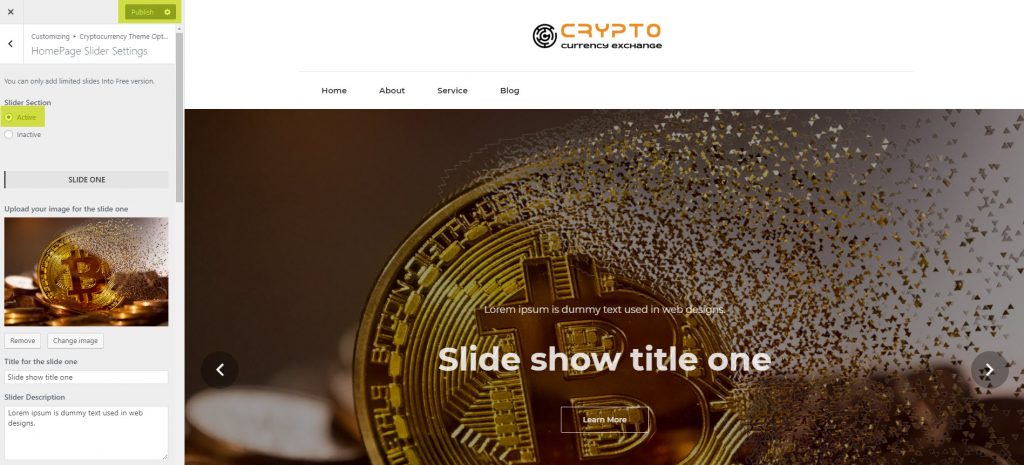
After activating cryptocurrency-exchange homepage, you will see first setting tab HomePage Slider Settings.
Here at Home Page Slider Setting or Slider Section, Make it Active to enable the slider on the homepage. Now, you can change the Title for the slide, Slider Description, Button-Link, and Button Text. You can add three slides to the slider section. and the premium version can add multiple slides without any limit.
5. Enable Service Section On Homepage
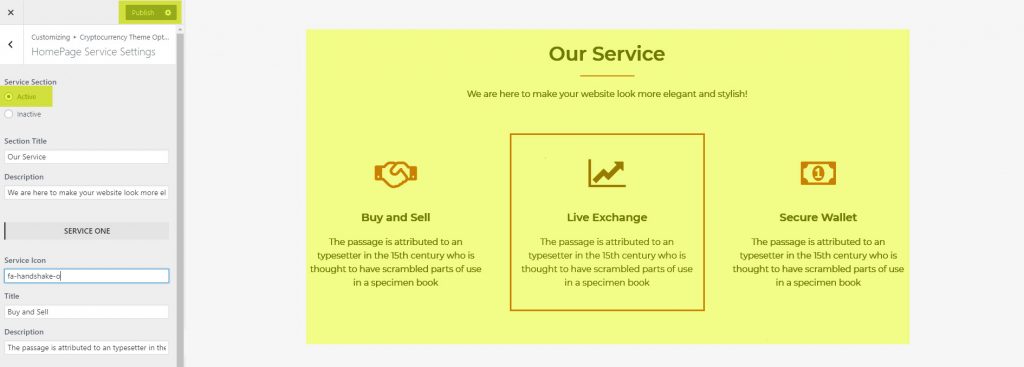
Move back to your customizer settings and select the HomePage Service Settings setting tab.

In HomePage Service Setting Select Service Section – Active to enable the service on the homepage. Now, you can change the section title, description service icon, service title, service description. You can add up to Three services in that section. In premium version can add multiple services without any limit.
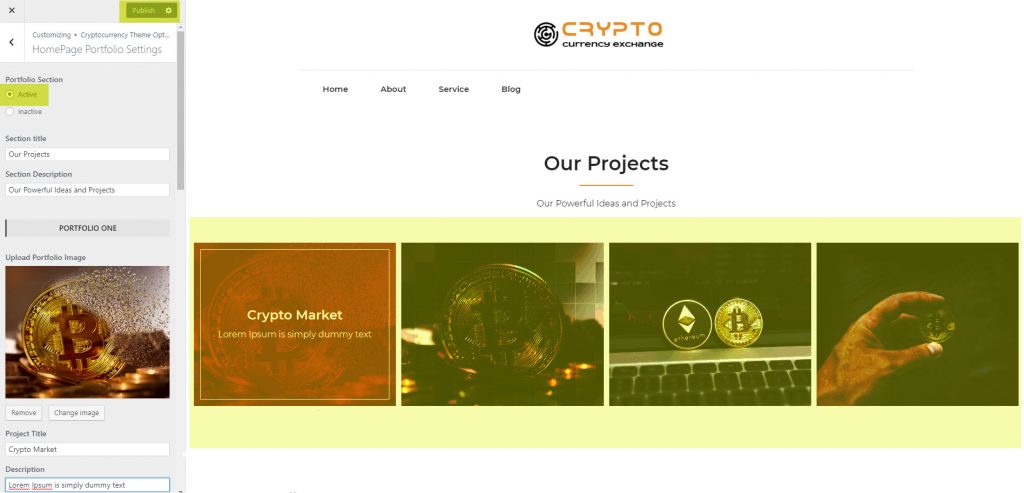
6. Enable Portfolio Section On Homepage
Step back in customizer settings and select the HomePage Portfolio Settings setting tab.
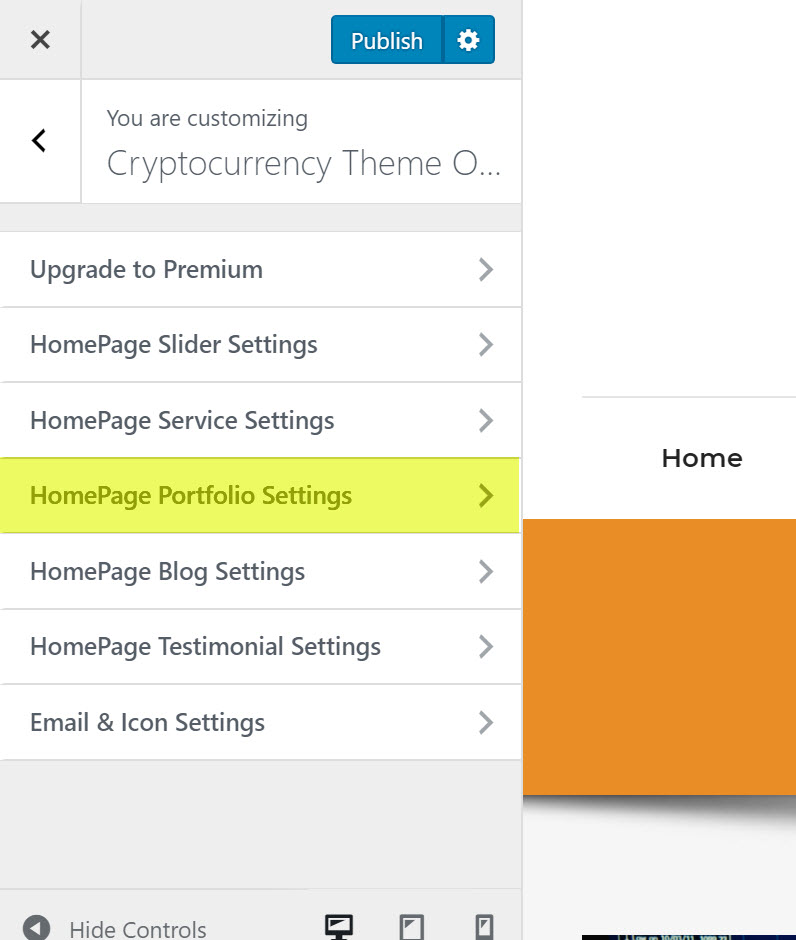
In HomePage Portfolio Setting Select Portfolio Section – Active to enable the portfolio on the homepage. Now, you can change the section title, Section Description Upload Portfolio Image, Project Title, Description. You can add up to Three portfolios in that section. In premium version can add multiple portfolios without any limit.
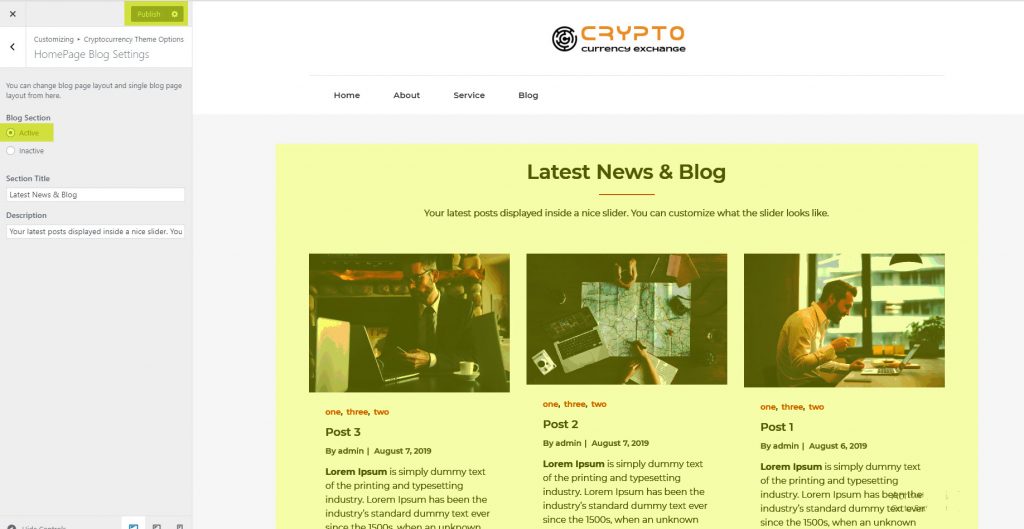
7. Enable Blog Section On Homepage
Step back into customizer settings and select the HomePage Blog Settings setting tab.
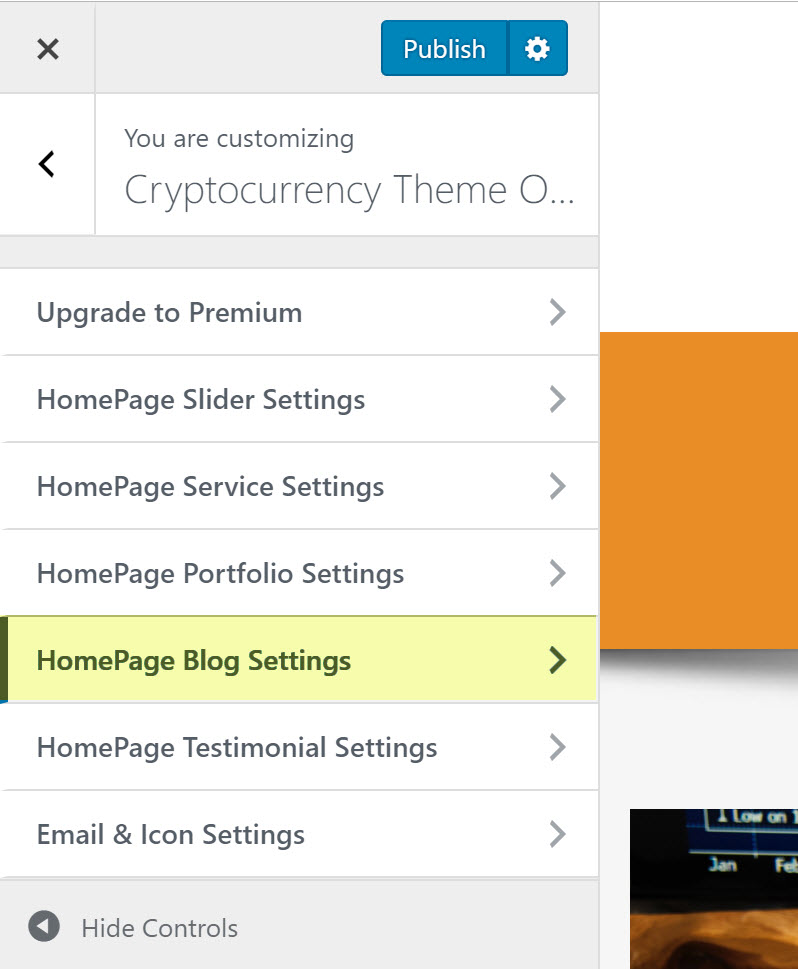
In HomePage Blog Setting, select Blog Section, and make it Active to enable the blog on the homepage. Now, you can simply change the blog title, blog description. In premium version can add configure blog section features settings like column layout and blog page layout.
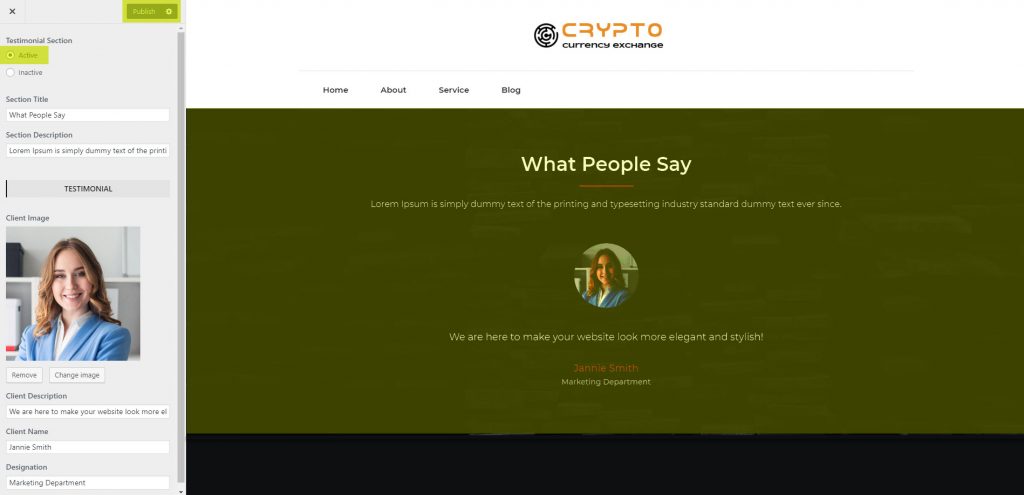
8. Enable Testimonial Section On Homepage
Step back in customizer settings and select the HomePage Testimonial Settings setting tab.
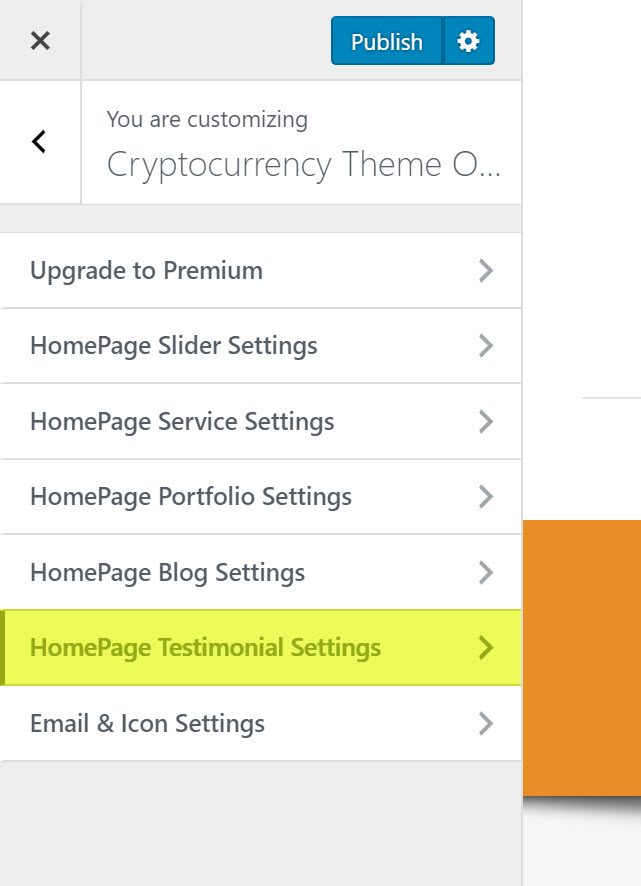
In Home Page Testimonial Setting select Testimonial Section – Active to enable the Testimonial on the homepage. Now, you can change the Section Title, Section Description, client Image, Client Description, Client Name, Designation. In premium version can add multiple testimonials without any limit.
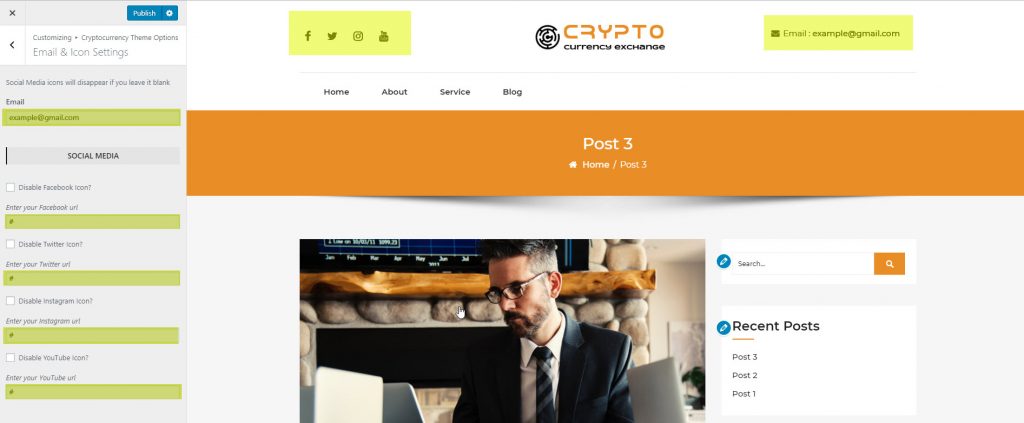
9. Email & Icon Settings Section On Homepage
Step back in customizer settings and select the Email & Icon Settings tab.
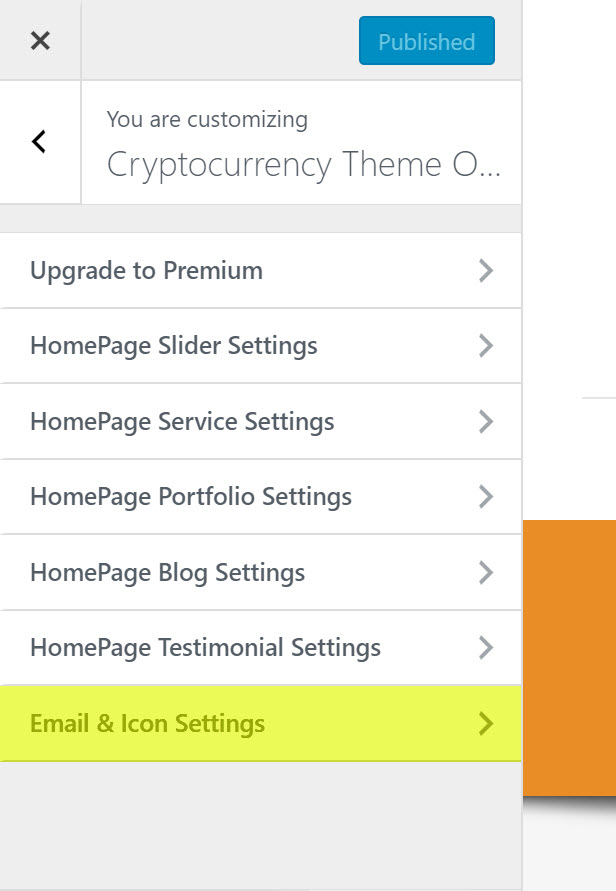
In Email & Icon Setting enables the homepage. Now, you can type your email, and enable social media icons on the top menu.
The Final Preview Of Cryptocurrency-Exchange Theme

10. Import Demo Data Using XML File
Go admin menu Tools > Import and brose the XML file downloaded using the below link.
Finally, we have completed the tutorial about cryptocurrency-exchange free WordPress theme setup on a website. Hopefully, you will find this theme setup tutorial easy-going and useful. Your feedback and support questions about the cryptocurrency exchange theme are really appreciated in the comment section.
