

With a WordPress plugin, would you like to add a map to your contact form (like Google Maps)? Your users will get more clarity about their location by viewing a map next to your contact form.
Here, we’ll demonstrate how to display a WordPress contact form with a map.
How to add a map to a contact form
Using a WordPress plugin, you can add a contact form map to your website. Here’s how:
# Step 1. First, you need to download and install the WPForms plugin
Installing and activating the WPForms plugin should be your first step. The following guide will explain how to do it.
To access the Geolocation addon, you’ll need WPForms Pro.
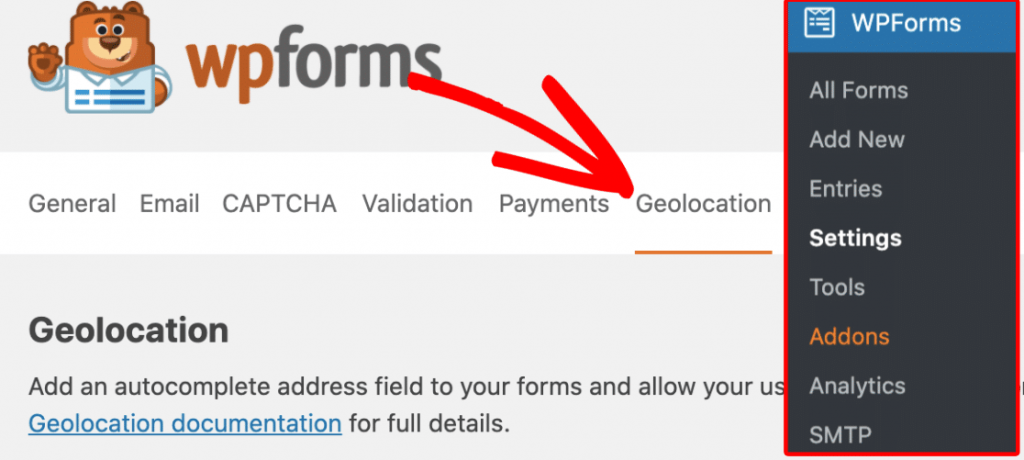
# Step 2. Enable the Geolocation Addon
The Geolocation Addon can be found in WPForms » Addons once the plugin has been activated. Activate it by clicking the Activate button.

Two awesome features are included with geolocation addons:
1. Form Entry Geolocation: Using this information, you can better segment your email list based on where your form users are coming from.
2. Address Autocomplete: The address field of your website can automatically display the user’s address as they type.
# Step 3. Add custom geolocations to the Geolocation Addon
After your Geolocation add-on has been activated, you need to configure it and customize it.
Go to WPForms » Settings and click on Geolocation.
In the Places Provider section, you’ll need to select the provider from which you want your geolocation information to be retrieved.
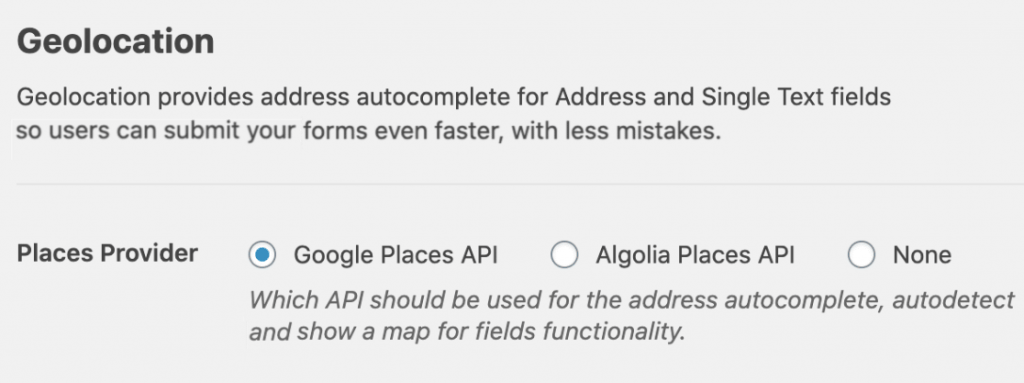
You are now ready to create your contact form map once you’ve filled in your location provider settings in the Geolocation add-on settings.
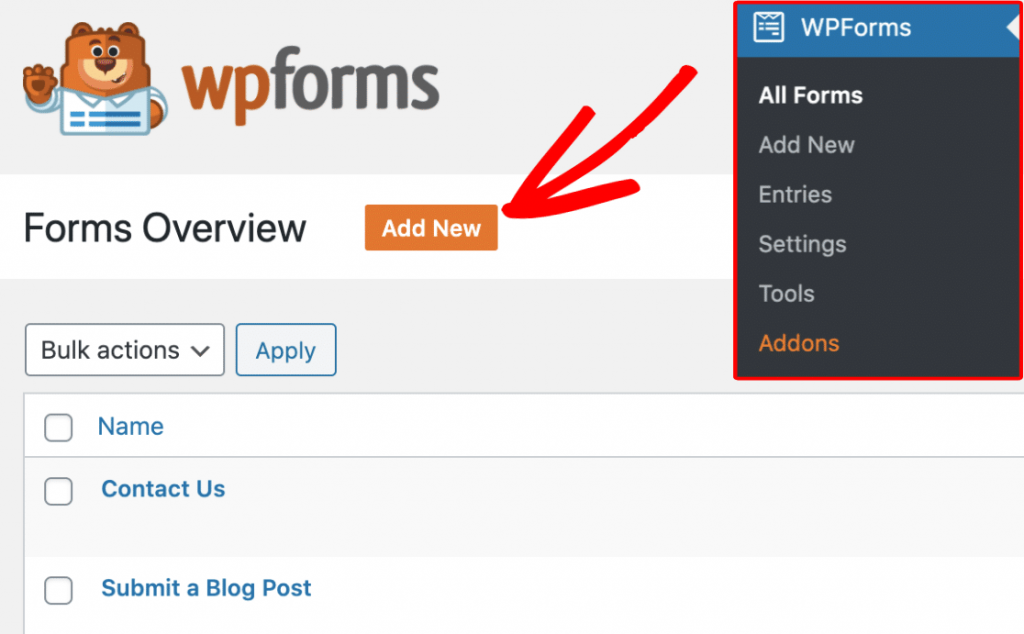
# Step 4. Create the Contact Form
Let’s create your contact form now with a map. It will only take a few minutes to complete.
Using the WPForms form builder, you can start creating your new form by clicking the Add New button.
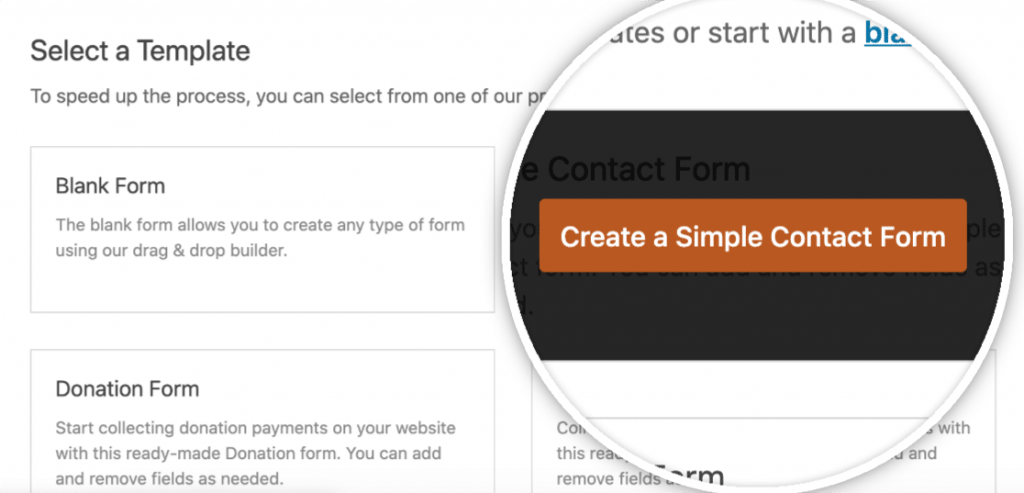
Form Name now allows you to enter the name of your form. Let’s use the “Contact Us” option.
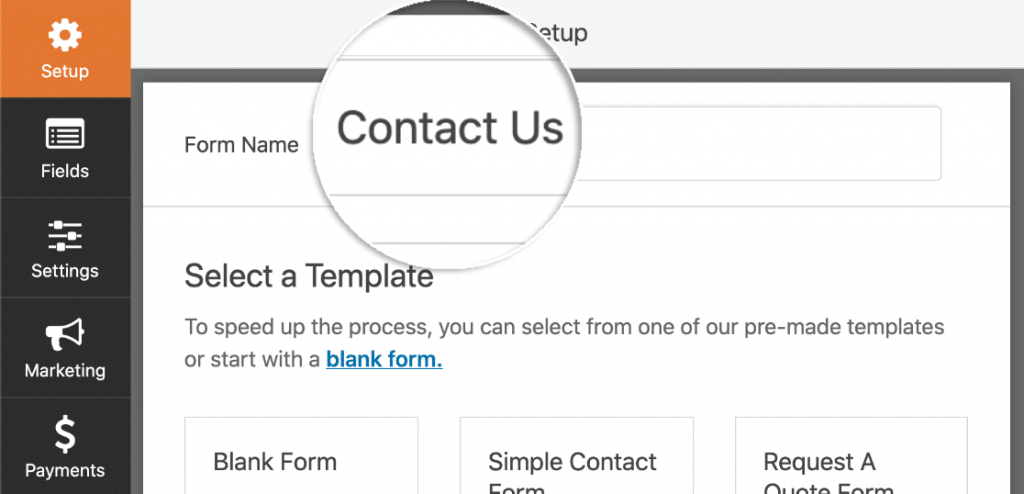
Choose the template you want to use by clicking the link next to the Form Name. We’ll create a simple form with the map attached shortly.
You will now see the following standard fields populate on your Simple Contact Form template:
>> (First name, Last name)
>> Contact us via email
>> Send us a message or comment
It’s probable you will need to configure notifications and confirmations in addition to the form settings.
You can enable the Display Map option on your form by adding a new field.
# Step 5. Enable Map Display
When your form loads, you’ll see all the fields you can add to it.
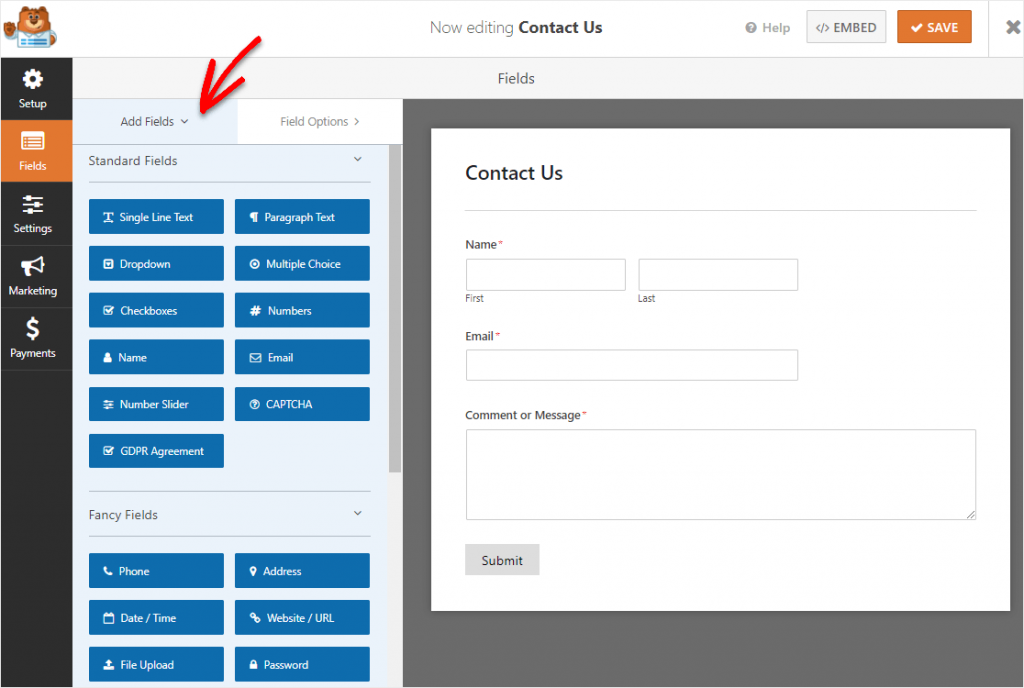
For your form to display the map option, you need to add the Address or Single Line fields.
Let’s use the Single Line Text field to display the address on one line.
By clicking the name of this field, you can add it to your form, or you can drag and drop it from the lefthand panel onto the righthand form.
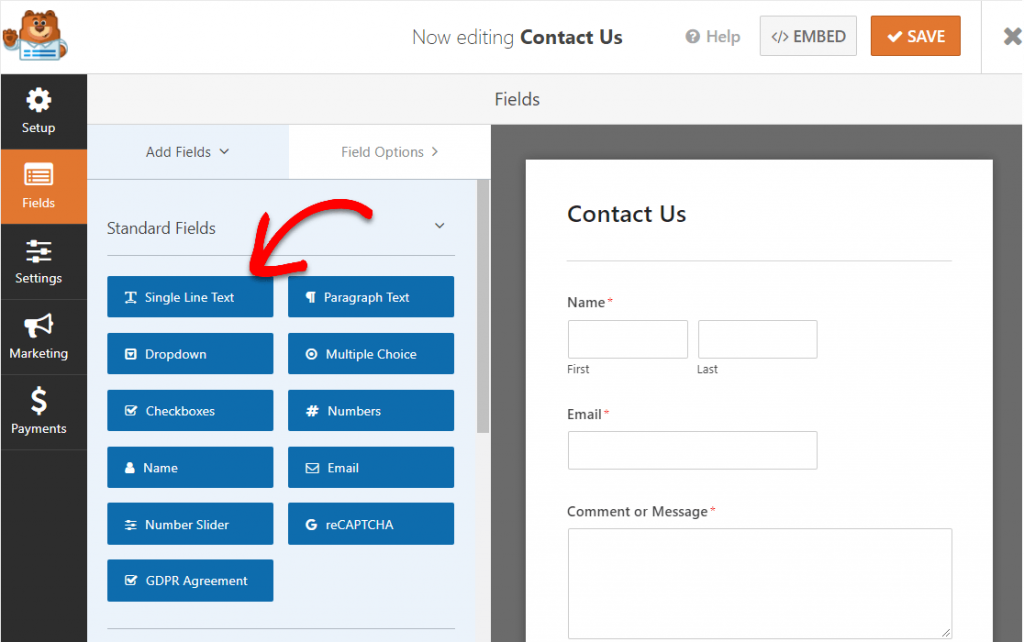
Click on Advanced Options for your Single Line Text field on the Field Options tab.

There are a few options now, so scroll down to find Enable Address Autocomplete and then select Display Map.
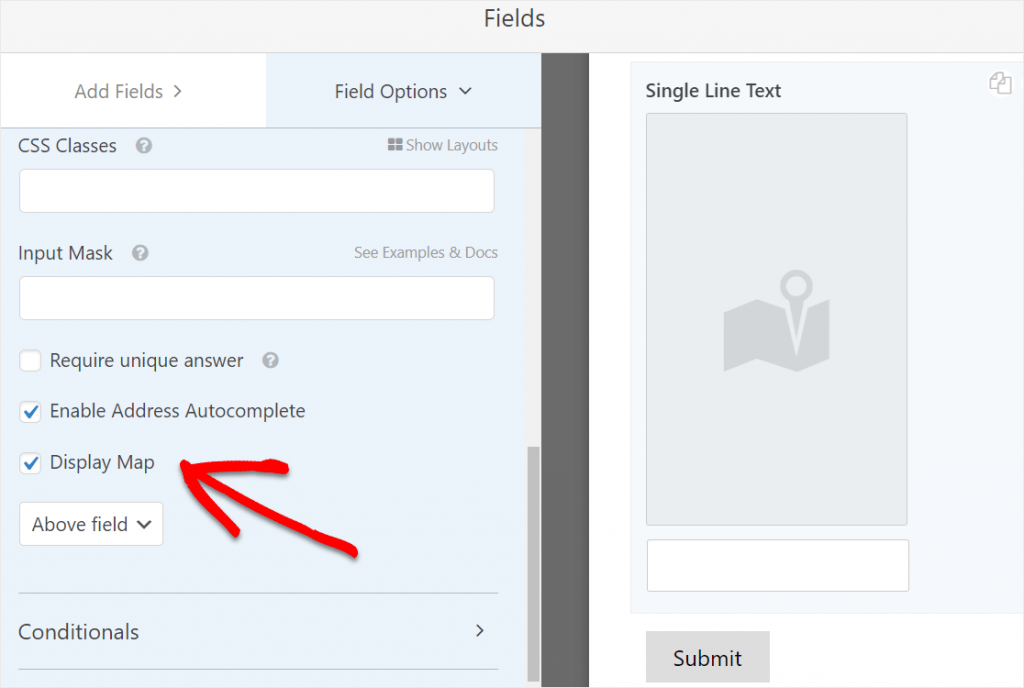
Maps by default appear above fields, but you can choose to place them below if you like. Switch the dropdown to the Below field by clicking on it.
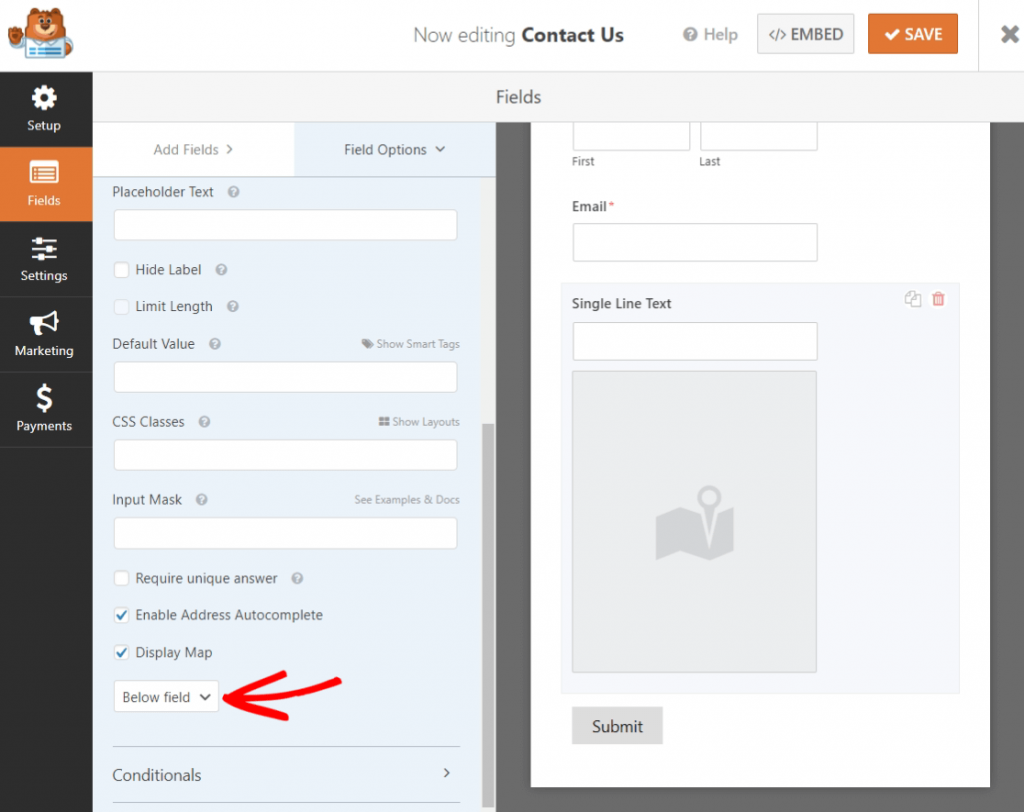
As the last step, let’s rename this field to ‘Address’ so that your users don’t see ‘Single Line Text’ when they fill out the form.
Then edit the Label in the Form Options panel to say ‘Address’.

Once you’re satisfied with your form, click Save in the top right corner.

The form is all set to go live.
# Step 6. Publish your form map
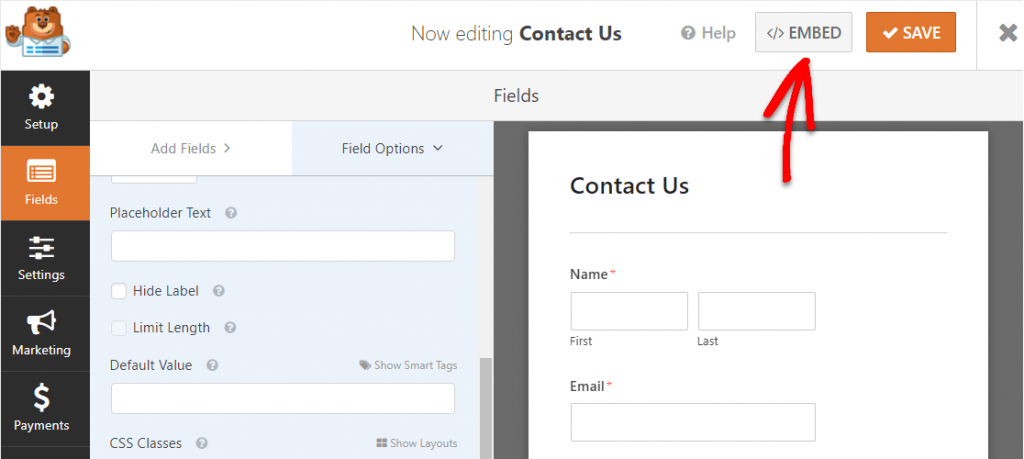
Are you ready to publish your contact form with a map? Embedding your form on your site is super easy with your WPForms Pro plugin.
You can now embed your form once it is configured the way you want it and it is saved. Just look for the Embed button on the top right corner of the form.
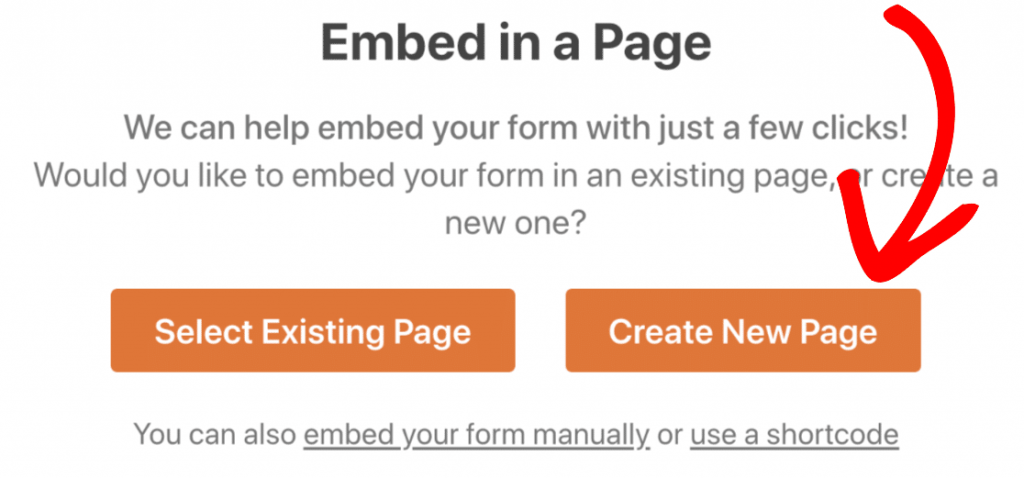
Any existing page or a new page can be selected here.
To begin, click on Create New Page.
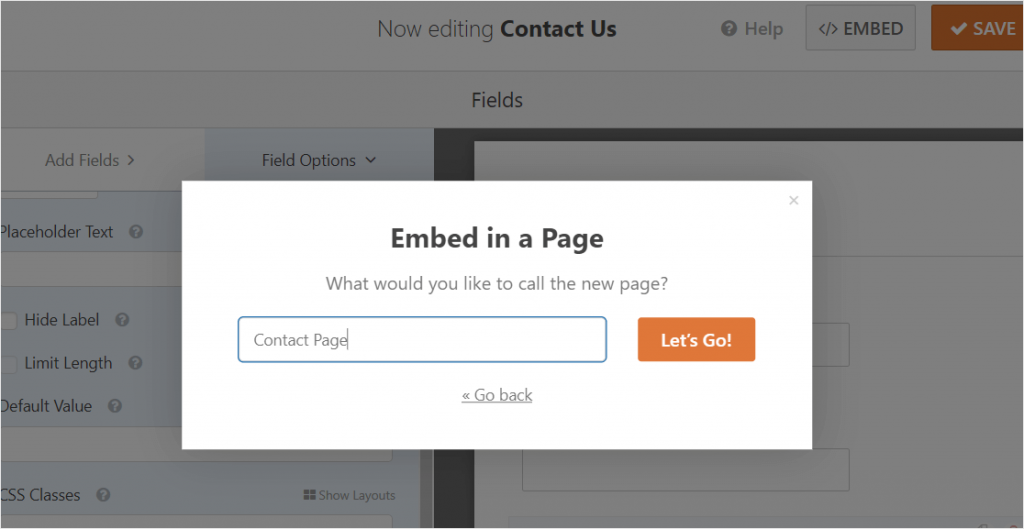
Click on Let’s Go! to start naming your page!
That’s it. WordPress will automatically add a map to your contact form.
You can now finally unleash your form online by clicking on Publish (or updating if you are using an existing page).

Great! A map is now available on your contact form.
Below is a visual representation of how it will look:

Now you’re done!
With a WordPress plugin, you can create a contact form map quickly and easily.
Conclusion
Hopefully, this article has informed you of how easy (and beneficial) it is to add a contact form map to your WordPress site using a plugin.
Start using the most powerful WordPress forms plugin today.
